This time I would like to describe the configuration of a local MSM captive portal on the MSM controller with a remote authentication, using iMC UAM. For a better understanding of the principles, you should read this post:
How To: MSM Local Captive Portal With Local Authentication
I will reuse a lot from this post, as most of the configuration steps are the same. Since my last MSM related post, I upgraded to the new MSM version 6.4.1.0-17746.
Prepare the Controller for Captive Portal
As described in my article How To: MSM Local Captive Portal With Local Authentication you need to prepare the controller for captive portal. I will not repeat everything, already configured in the mentioned post, so it would be beneficial to read this one.
Additional to the points mentioned in the post above, I add a radius server for the captive portal authentication. To do so, go to “Authentication–>Radius profiles” and click “Add New Profile…”:
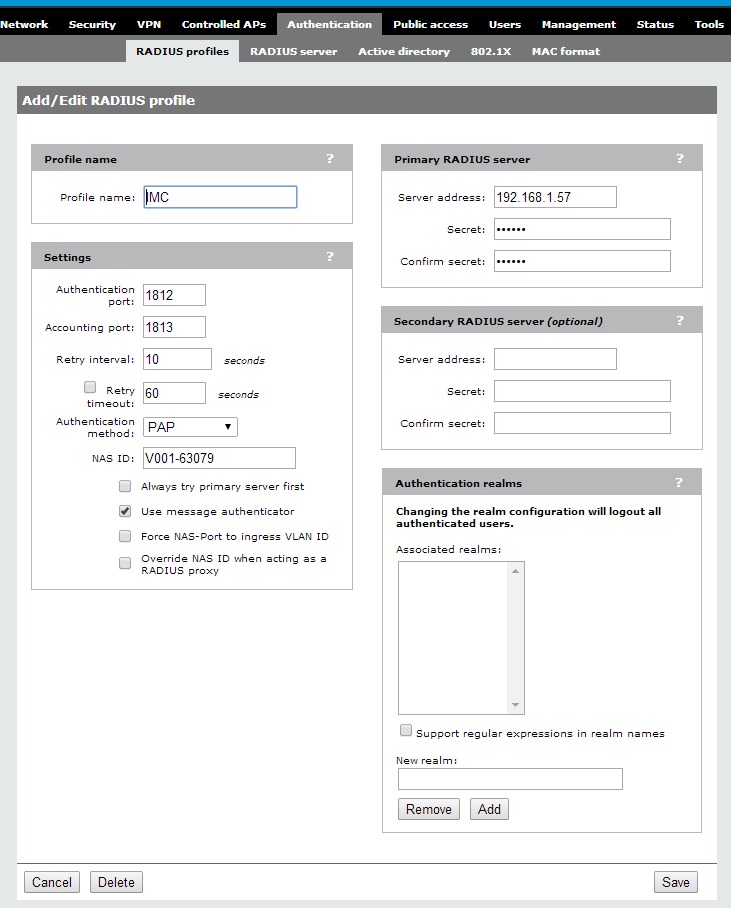
I will use “IMC” as the profile name to easily find the correct one, if I have more than one radius profile. You have to align the “Settings” to the settings of the radius server for captive portal authentication. The “Authentication method” has to be “PAP”. You also need to fill in the IP and the shared secret for the radius server. Click “Save” to finish this configuration step.
Configure a VSC for Captive Portal
For the VSC, used with this post, I will reuse the configuration from the post mentioned above. There will be only one difference, within the “HTML-based user logins”:
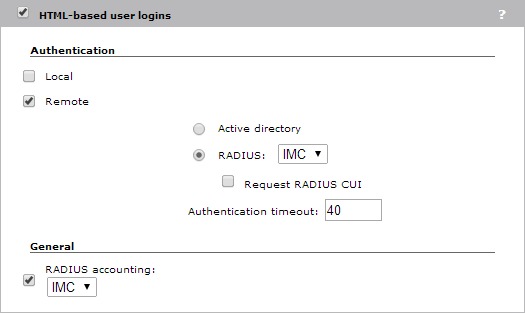
I will select “Remote” instead of “Local” and will select the created radius profile. I will also enable “RADIUS accounting” for this profile. This will make sure that iMC is aware of all online clients.
I will bind this created VSC to my test group and after the SSID is visible, I can connect and see the captive portal.
If the captive portal is presented, the MSM part of the configuration is done.
Prepare and Configure iMC UAM
In this part, I will describe the iMC UAM part of the configuration. The first step is to add the MSM controller as a radius client which is “Access Device” in iMC UAM. Go to “User–>User Access Policy–>Access Device Management–>Access Device” and click “Add” if the device is not already in the list.

I will select “HP(MSM)” as “Access Device Type” as this will enable the SOAP configuration part. Next is to insert the “Shared Key” which should be the same as the one used in the “Radius Profile” on the MSM controller. In the SOAP settings insert the username and password of the admin user, used to login in the WEB GUI on the controller. To add the controller click the “Select” button and navigate to the controller, or add the controller manually via the “Add Manually” button. To save, click the “OK” button.
Next step is to create an “Access Policy” which will be used for the authentication. Go to “User–>User Access Policy–>Access Policy” and click add:
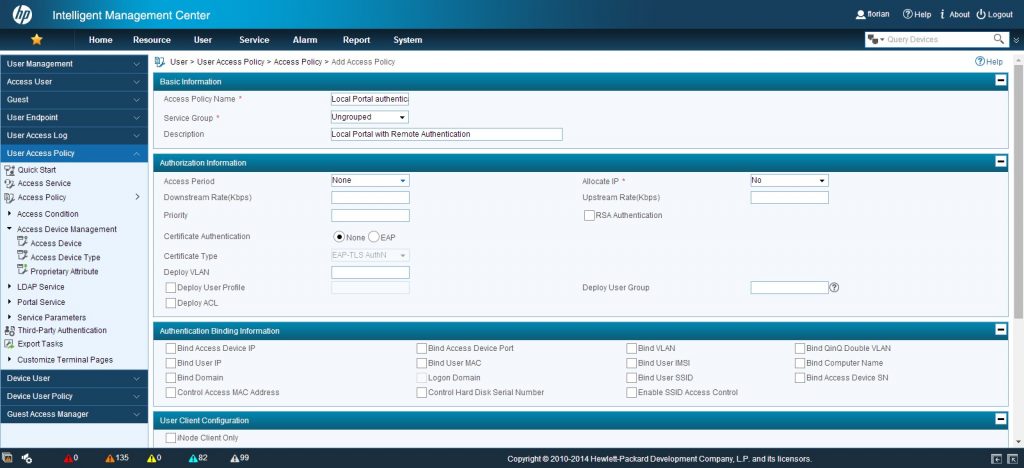
I only add the “Access Policy Name” and a “Description”. I will also make sure, that “None” is selected for “Certificate Authentication”.
Afterwards, you need to create an “Access Service”. Go to “User–>User Access Policy–>Access Service” and click “Add”:
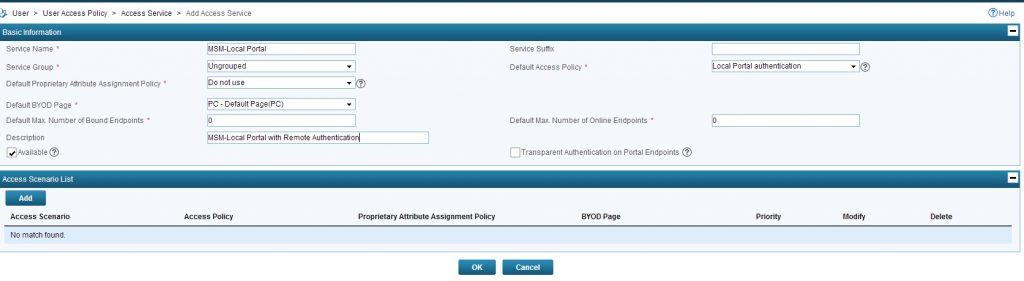
You have to insert a “Service Name” and for simplicity I would also insert a “Description”. Do not use a “Service Suffix”. If you do, all clients need to use this name format for authentication: “name@service-suffix”
Select you created “Access Policy” as the “Default Access Policy” and you are done with this step.
Now, you need to configure the selfservice portal to create guests. I already described this in my post about the Unified controller:
How To: Local Captive Portal with Remote Authentication
In the section “Adding Guests with the Selfservice Portal” this is described. so, I will keep it short here.
you have to create a “guest manager” which is able to create and manage guest accounts and enable the create “Access Service” to be used for guest accounts. Afterwards you can login into the selfservice portal and create a guest account, using the create “Access Service”. Details about the individual steps are in the post mentioned above.
Now, you should be able to authenticate at the captive portal with the credentials created for the guest account.
Any questions or feedback is very appreciated. Just use the comment function below.
Hi Florian,
I need help please, and I was hoping this document “How To: MSM Local Captive Portal With Local Authentication” would help me. However the link is broken or the document is no longer available.
Any way you can forward me that document please?
What I have is a MSM 720 and a number of 3rd party AP’s. What I need is primarily to redirect wifi users to an external landing page, authentication/login would be nice too.
Regards,
Erik
Hi Erik,
thanks for your comment.
Unfortunately, my provider had an outage some month ago and I lost most of my stuff. I fear, the post you mentioned is lost as well. Tried to recover this one during the last days but without luck.
What I understand from your comment is, that you have a MSM720 controller and 3rd party AP’s which are not managed by the MSM720 as they are 3rd party. what you need to do, is to send the guest users from those 3rd party AP’s in a VLAN, which is terminated on the MSM720 controller.
what I do not understand, are you using a captive portal on the MSM720 or do you need an external captive portal, not hosted on the MSM720?
BR
Florian