In this post, I will describe the captive portal capabilities on the HP unified controller, using iMC and UAM for remote authentication. Please read my earlier post about
[Unified_Controller_Master]dis version
HP Comware Platform Software
Comware Software, Version 5.20.109, Release 2507P22
Copyright (c) 2010-2014 Hewlett-Packard Development Company, L.P.
LSU3WCMD0 uptime is 7 weeks, 0 day, 18 hours, 9 minutes
Prepare the Controller for Captive Portal
As we use the same captive portal functionality as in the earlier post the same rules apply. As described in that post, prepare the controller for the captive portal. The same rules also apply in this scenario. For my setup, there is one difference, I use VLAN 51 instead of VLAN 50.
Below is the new configuration. First, VLAN 51:
#
vlan 51
 description local_WLAN_Portal_remote_auth
 name local_WLAN_Portal_remote_auth
#
Afterwards I created the DHCP pool for that VLAN:
#
dhcp server ip-pool local_portal_remote_auth extended
 network ip range 10.1.51.10 10.1.51.200
 network mask 255.255.255.0
 gateway-list 10.1.51.1
 dns-list 192.168.1.57
 domain-name hpn.local
#
Now, I create the VLAN interface and apply the DHCP IP pool:
#
interface Vlan-interface51
 description local_WLAN_Portal_remote_auth
 ip address 10.1.51.1 255.255.255.0
 dhcp server apply ip-pool local_portal_remote_auth
#
Last step, is to extend the NAT ACL to recognise the created IP pool:
#
acl number 2000 name NAT_Portal_Local
 rule 0 permit source 10.1.50.0 0.0.0.255
 rule 5 permit source 10.1.51.0 0.0.0.255
 rule 10 deny
#
As I already applied this ACL to the outgoing interface, I don’t need to change anything here.
I will now create the WLAN interface for the SSID. It is completely the same as with the local authentication except for the VLAN:
#
interface WLAN-ESS2
 description portal_local_remote_auth
 port access vlan 51
#
The last step would be to create the actual SSID and bind that SSID to the WLAN interface. For those who really read the post about captive portal with local authentication, the configuration is exactly the same:
#
wlan service-template 2 clear
 description local portal with remote auth
 ssid local_portal_remote_auth
 bind WLAN-ESS 2
 service-template enable
#
Just enable the service-template on the AP or AP group and you are done with the preparation and we can start with portal configuration:
#
wlan ap ap01 model MSM430-WW id 1
 serial-id CN31DWZ53K
 radio 1
  service-template 1
  service-template 2
  radio enable
 radio 2
  service-template 1
  service-template 2
  radio enable
#
After some seconds, the SSID should be visible and you should be able to get access without any restrictions, as we did not configured the portal yet.
Next step would be the portal configuration. We will reuse the portal from the earlier post. Therefore we just need to add the free-rules to reflect the new IP pool:
#
 portal server LOCAL ip 10.1.50.1
 portal free-rule 1 source ip 10.1.50.0 mask 255.255.255.0 destination ip 192.168.1.57 mask 255.255.255.255 udp 53
 portal free-rule 2 source ip 192.168.1.57 mask 255.255.255.255 udp 53 destination ip 10.1.50.0 mask 255.255.255.0
 portal free-rule 3 source ip 10.1.51.0 mask 255.255.255.0 destination ip 192.168.1.57 mask 255.255.255.255 udp 53
 portal free-rule 4 source ip 192.168.1.57 mask 255.255.255.255 udp 53 destination ip 10.1.51.0 mask 255.255.255.0
 portal local-server http
#
On top, there is the portal configuration and free-rule one and two, from the previous post. I just added free-rule three and four to allow DNS queries from VLAN 51. The last line will enable HTTP for the portal. The last step for the portal configuration is to bind the portal to the VLAN interface:
#
interface Vlan-interface51
description local_WLAN_Portal_remote_auth
ip address 10.1.51.1 255.255.255.0
dhcp server apply ip-pool local_portal_remote_auth
portal server LOCAL method direct
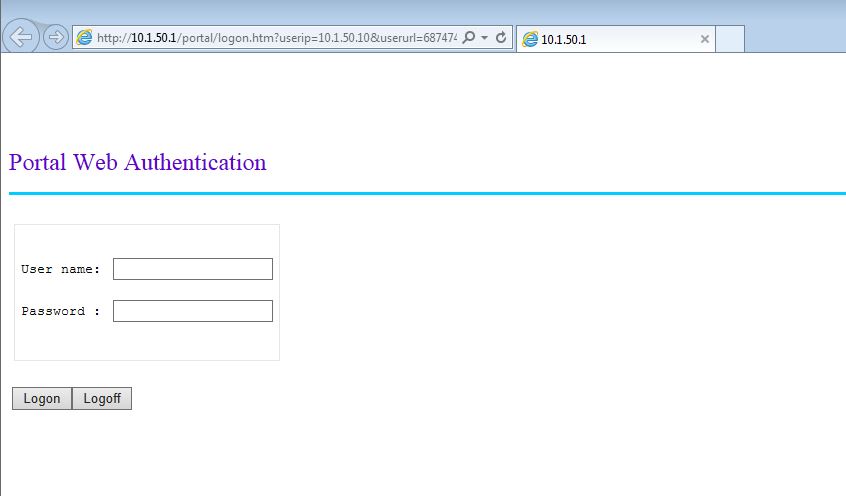
#The last line will enable the portal server on the VLAN interface and will redirect all HTTP requests to the local captive portal. When connecting, you should see this page, which is the standard captive portal page and can be modified:

We are now at the stage, where the interesting stuff is coming. I will now start with the configuration part for the remote authentication, which will be a radius server. I will use IMC in combination with UAM as the radius server.
Configure the Radius Server and Domain on the Unified Controller
To use an external radius server for authentication, you need to configure a radius scheme. This scheme consists of the radius server IP and the shared secret. Below is the configuration for my iMC server, but should also work with other radius servers:
#
radius scheme imc
 primary authentication 192.168.1.57 key cipher $c$3$3fDjUdwNv88XbybrugfFDrRV+P+LZKSPLyB7PA==
 primary accounting 192.168.1.57 key cipher $c$3$YodRPYG9AZJBb6UROl6+X17DaDMdAOjrxiOj9g==
#
This will create the radius server “imc”, where “imc” is just the internal naming, used for the domain configuration, which will be described below. There is an entry for primary authentication and accounting. Please enable accounting to let iMC or whatever radius server you are using know, if the client is still connected. You can also configure a secondary server for redundancy, but in my environment, I only have one server.
As mentioned above, this is just the radius server, but we need to create a domain also. The concept of domains is used in every Comware based switch. This will bring a lot of flexibility, as you can use a
#
domain local_portal
 authentication portal radius-scheme imc
 authorization portal radius-scheme imc
 accounting portal radius-scheme imc
 access-limit disable
 state active
 idle-cut disable
 self-service-url disable
#
I inserted just the 3 first lines, as the rest is the default. Make sure, that you use “portal” as the authentication method. This will make sure, that only clients, using the portal are authenticated with this domain. I will now tell the portal to use this domain for authentication:
#
interface Vlan-interface51
 description local_WLAN_Portal_remote_auth
 ip address 10.1.51.1 255.255.255.0
 dhcp server apply ip-pool local_portal_remote_auth
 portal server LOCAL method direct
 portal domain local_portal
#
I added the last line to tell the portal to use the created domain for authentication instead of local accounts or other domains which are maybe configured on the controller.
Configure iMC and UAM to Authenticate Captive Portal User
From an iMC perspective, it doesn’t matter if the authentication occurs via the

At least, you have to set a “Shared Key” and select an access device. If the controller is already discovered in iMC you can press “Select” and select the controller or you can add the controller with a click on “Add Manually” manually. Click “OK” to save.
Next step is to create an access policy which will be used for the users. Go to “User–>User Access Policy–>Access Policy” and click “Add”:
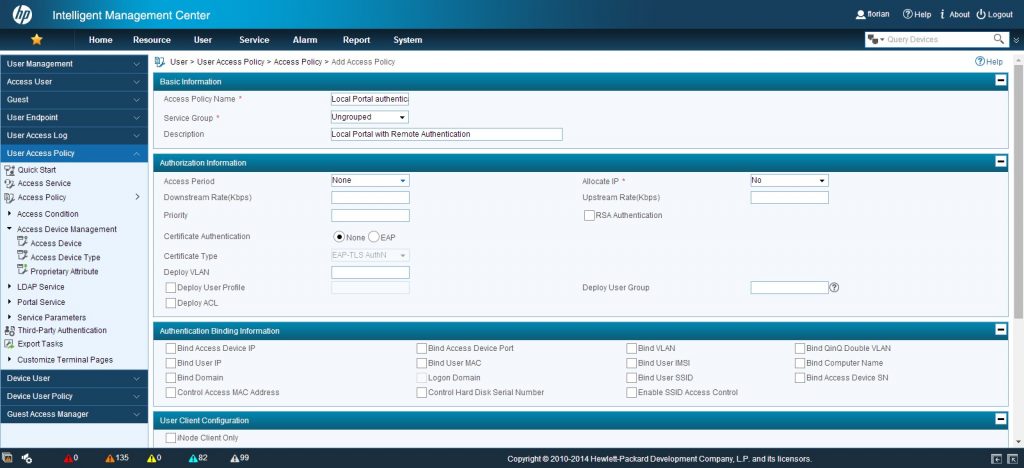
I only entered the information in the screenshot above. There are plenty of other configuration possibilities, but at the moment I will keep it simple. Click “OK” to save everything.
To create a service, which can be bound to users go to “User–>User Access Policy–>Access Service” and click again “Add”:
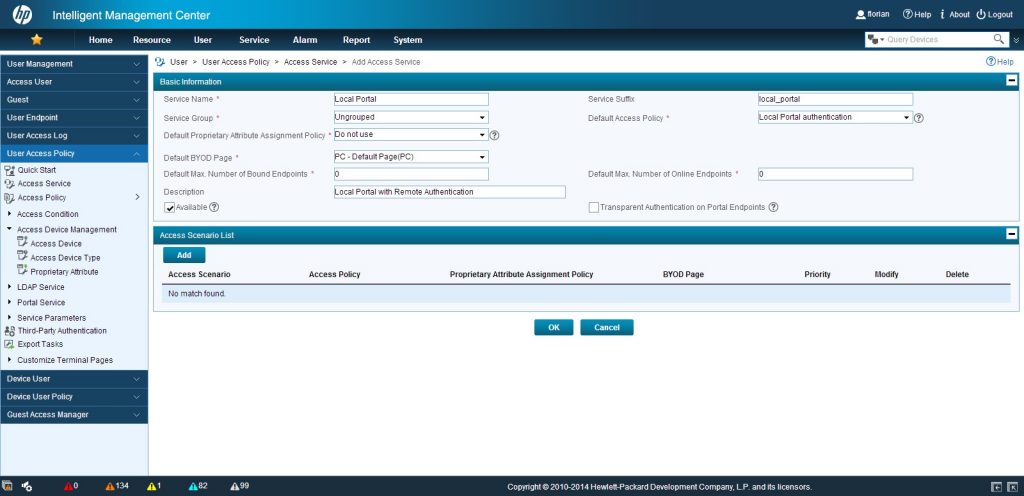
There are some things to consider at this configuration step. You can use the “Service Suffix” as I did, which is the name of the domain, used at the controller for authentication. This gives you the flexibility to attach more than one access service to a user. UAM will use the “Service Suffix” to consider which one to use. As we just have one access policy I selected this one as the “Default Access Policy”, but you can also select the access policy by creating different “Access Scenarios”, but this is beyond the scope of this post. When you are finish, click “OK”.
You can now use UAM to create access users, which are bound to this access service or use the selfservice portal to create guest users with this access service. As this authentication method is normally used for guest authentication, so I will show the selfservice portal, as this was made for this kind of user accounts.
Adding Guests with the Selfservice Portal
The selfservice portal is part of UAM and can be reached by this URL:
https://imc-ip-address:imc-port/selfservice/

Before I can login to the selfservice portal, I need to do some configuration. Therefore login into iMC. We need to create a guest manager who can login in the selfservice portal and create users. To do so, go to “User–>Guest–>Guest Manager” and click “Add”:
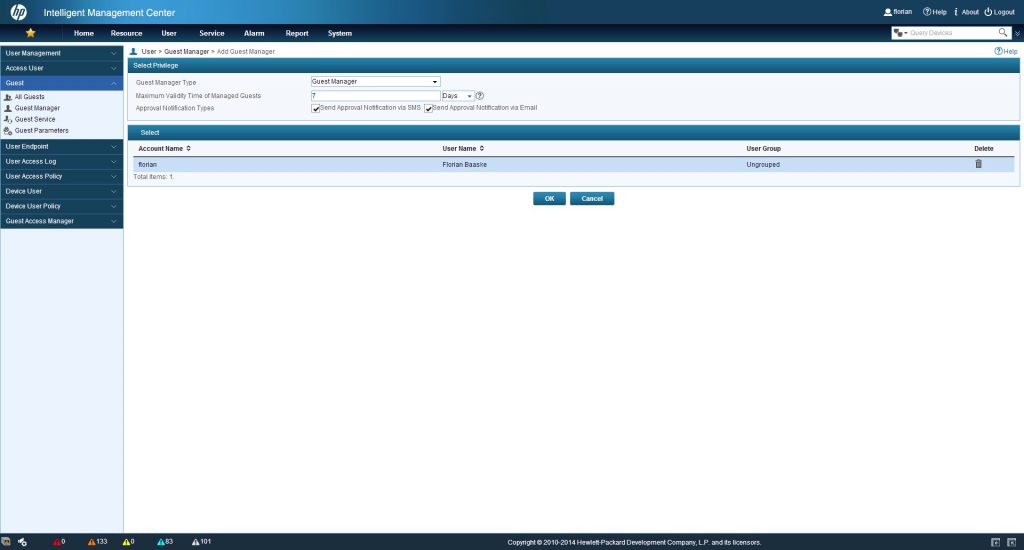
Press the “Select” button and query the account, which should
To let the guest manager use our created access service, we need to configure this access service as a guest service. Go to “User–>Guest–>Guest Service” and click “Add”:
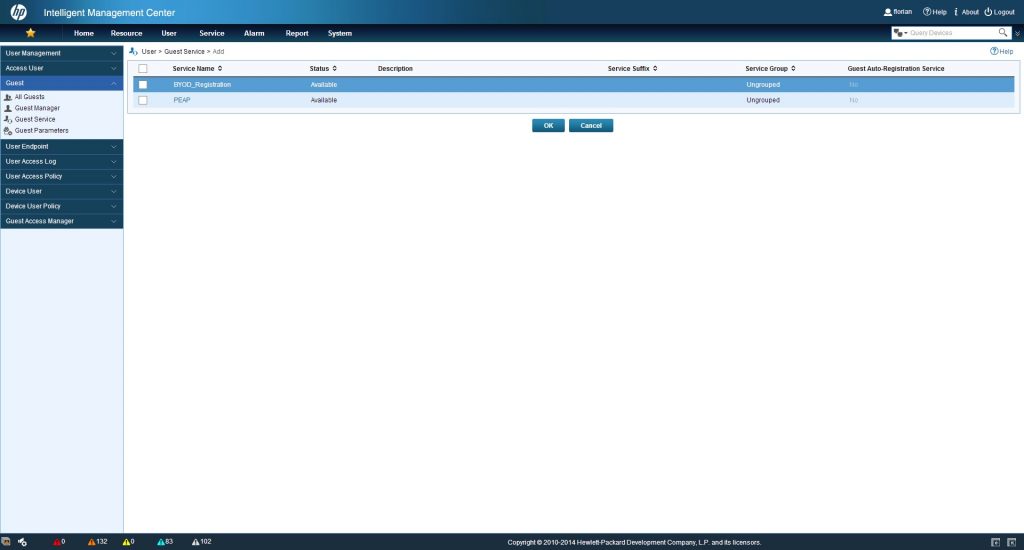
Select the required access service and click “OK”. You can select more than one, if needed.
Now, I can head over to the selfservice portal. After you successful authenticate on the selfservice portal you will get this screen:
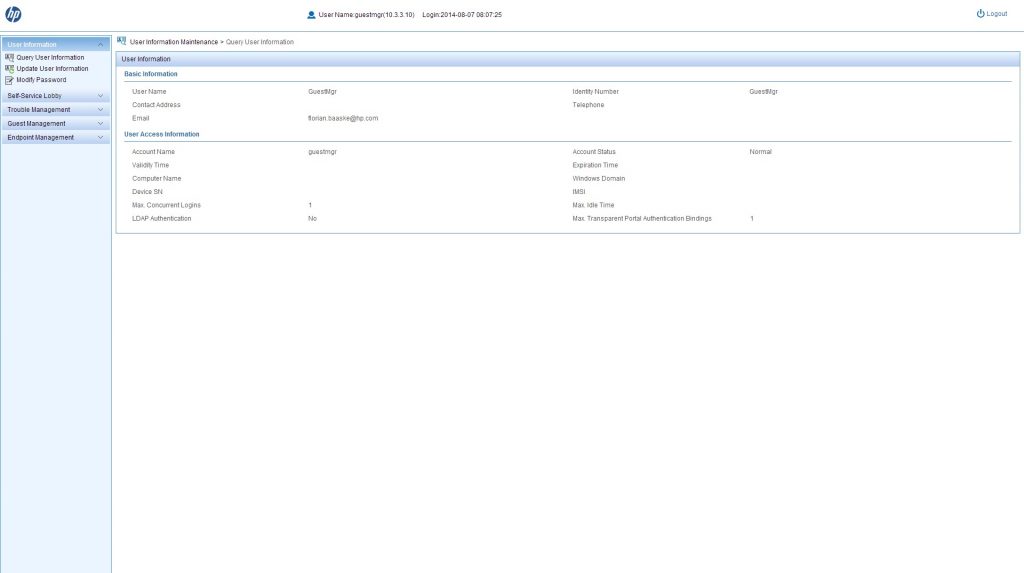
This is a summery of the user, who is logged into the selfservice portal. So it is your summery. To create users, you have to go to “Guest Management–>All Guest” and click “Add”:
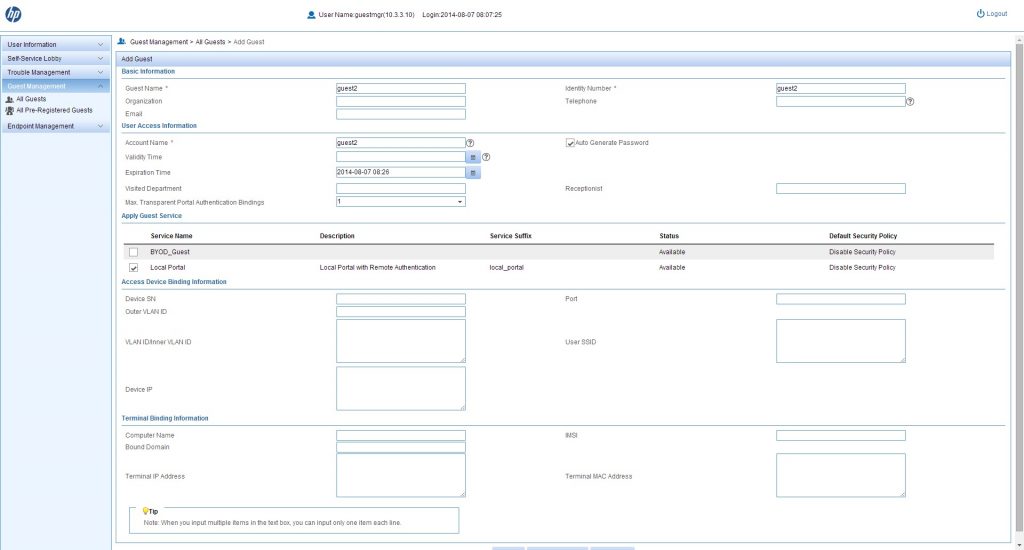
I filled just the required fields. But you can also use the other ones. After clicking “OK” or “Ok And Print” the user is created and an email or SMS is sent to the user, if mail address or phone number was provided, with the credentials.
Connecting to the SSID will bring up the portal, as before, but now, you can use the created user to login and start using the connection.
Please use the comment function for feedback or questions.