How to connect a Client Bridge in a secure manner to the network not only means to secure the WLAN connection, but also the ethernet port of the bridge. This is the topic of the following post.
The scenario for this post is to have the client bridge securely connected to the WLAN. But what benefit will this have, if I could connect every device to the ethernet port of the bridge without any authentication? In a public space, this does not make any sense so we need to secure the ethernet port as well. The following post will guide you through this setup, connect the bridge securely first, and afterward enable dot1x authentication on the ethernet port. The bridge will authenticate a device against a radius server. For this setup, I use the Aruba Client Bridge 501 with the latest software version, which is as of this day V2.0.1.2-Aruba501-B0027.
Connect the Client Bridge Securely to the WLAN
I’m pretty sure, the first step is the easy one, as most people would do it like this. If I speak of a secure connection in the context of WLAN I always think of a WPA2/3 EAP-TLS secured connection. This type of connection brings the most security. So let’s do this with the bridge.
First, you need a certificate for the bridge to do EAP-TLS. This certificate should include the whole certificate chain, the public and private key (protected by a passphrase) in base-64 format within one *.pem file. According to the manual you can also use PKCS12 based files with *.pfx or *.p12. I haven’t checked with those files.
If you have the certificate ready head over to the bridge and create a new station profile. I assume, that you have an EAP-TLS based SSID already running and you know some basics about the Aruba 501 Client Bridge.
To create the new station profile login to the bridge and go to “Wireless–>Station Profiles” and use the “Add” button on the bottom to create a new profile. Enter the name and press “OK”. This adds the new profile to the list on the same page. Now select the new entry to begin the configuration:
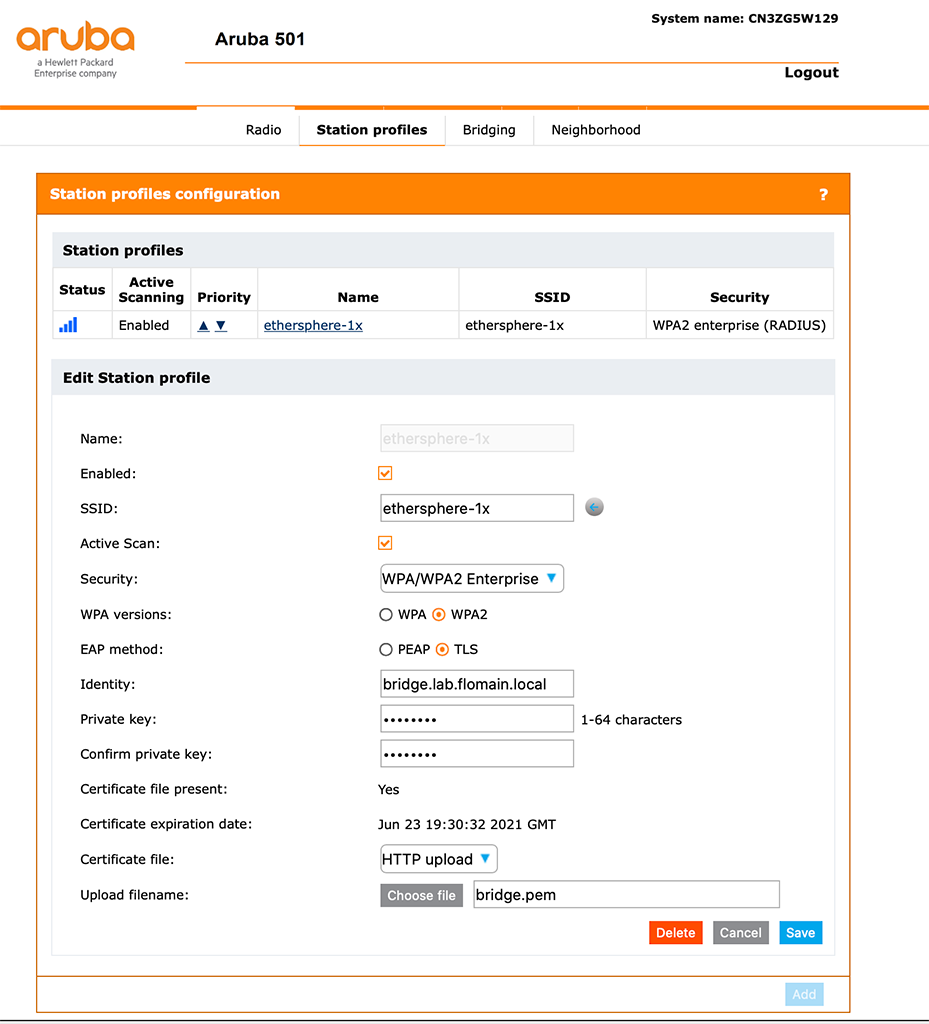
First, you should “Enable” the profile. Without this checkmark set, the bridge will not try to connect. You can either fill the “SSID” field manually, or you can use the button next to the field to get a list of available SSID’s. You can also configure the bridge for an “Active Scan”. Active scanning might help in situations where the AP did not broadcast the SSID name.
For the Security, select “WPA/WPA2 Enterprise” (the bridge did not support WPA3) and use “WPA2” with “TLS”. Enter the “Identity” of the bridge. In most cases, this is the CN from the certificate. Now it’s getting a little bit confusing. The field, asking for the “Private key” actually means the passphrase of the certificate file. So don’t get tricked. Select the file using the “Choose file ” button and click save afterward. You should get a message for a successful upload of the certificate.
If you already know the IP of the bridge on the SSID you should now change the management IP of the bridge to a static one. Go to “Network–>IP” and set a static IP for the bridge:
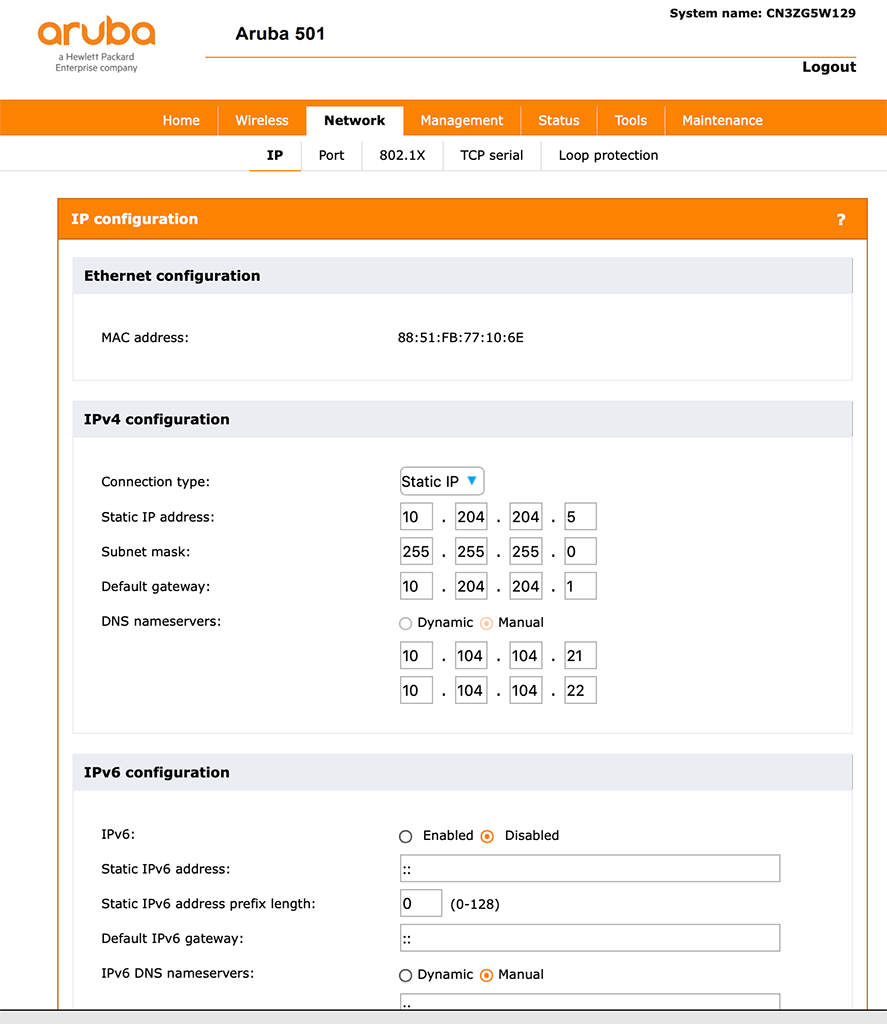
The static IP is useful for the radius configuration, as you need to configure the bridge there as well with the IP of the Bridge. Only some radius servers support IP subnet ranges instead of static IP’s. And the other reason is, you would like to manage the bridge. And from my point of view, the bridge is an active network component and you would never come to the idea to run your switches with dynamic IPs.
Now, you should just wait until the bridge connects to the SSID. If the bridge is connected, you should reach the bridge using the static IP configured above.
Secure the Ethernet Port of the Bridge
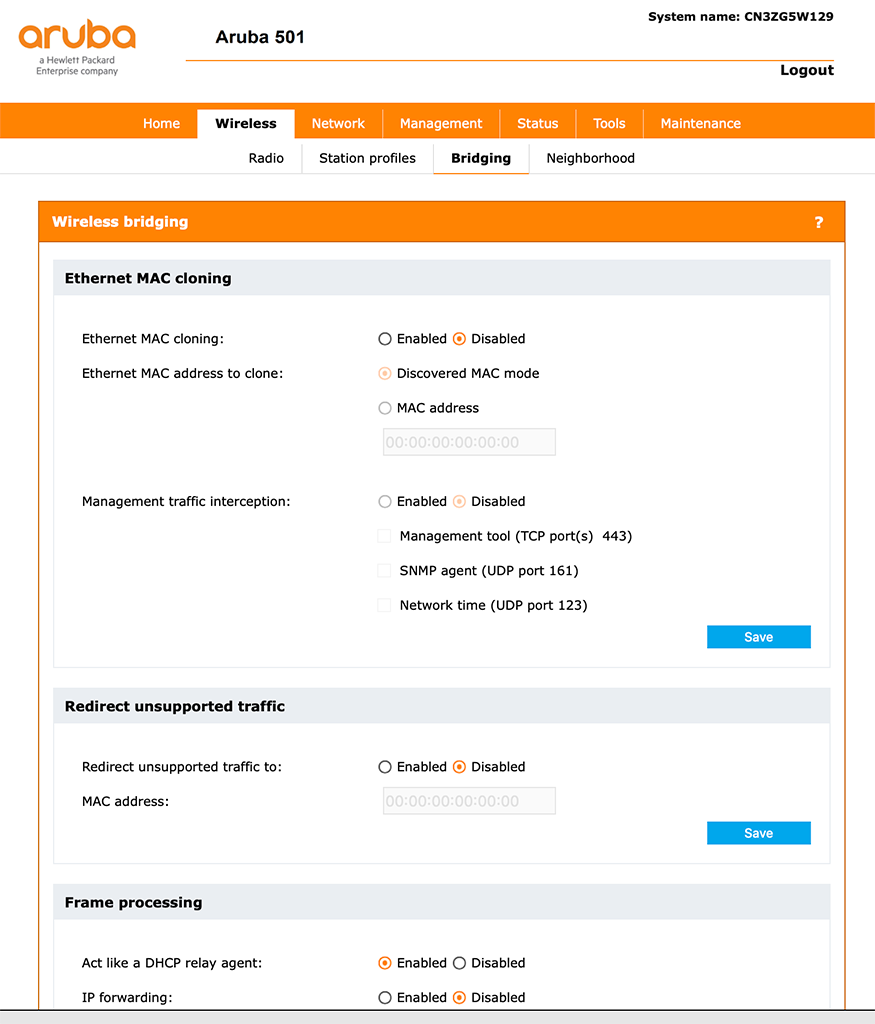
The next step is to secure the ethernet port of the bridge. But before that, we make sure, that our client will work properly after the connection. I assume, that the client on the ethernet port will use DHCP. Go to “Wireless–>Bridging” and disable “Ethernet MAC cloning”. If your device is using DHCP enable “Act like a DHCP relay Agent”:
Now, we can start to secure the ethernet port. Go to “Network–>802.1X” and enable “Wired LAN 802.1X authenticator”:
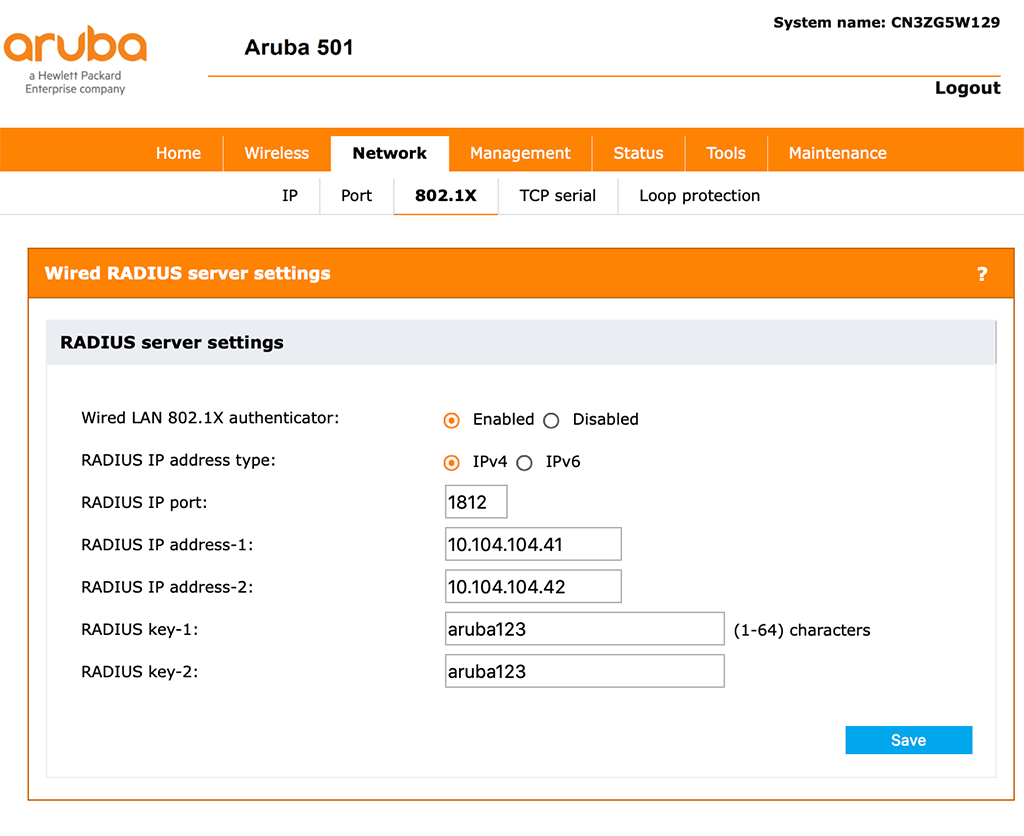
You also need to enter the “Radius IP address-1” and also the second one, if you have a second radius server. Also, enter the “RADIUS key-1” and “RADIUS key-2” accordingly. I assume, that your radius server knows the client bridge and will answer radius request from the bridge.
Also make sure, that the time on the bridge is correct. You can configure an NTP server, which would be my recommendation. Go to “Manamgement–>System time” and select “Using network time protocol (NTP)”:
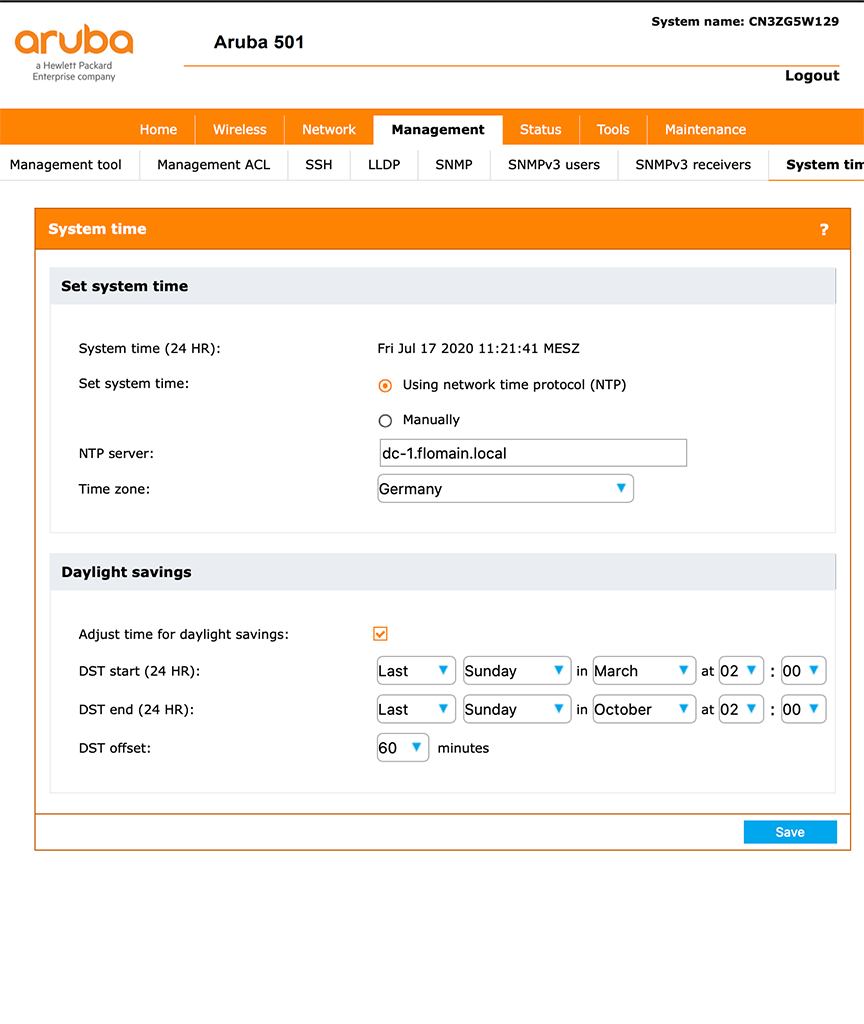
Also, set the “NTP Server” name and select the “Time zone”. If applicable, set the “Daylight savings” for your time zone as well.
Now, you can connect a dot1x enabled device to your ethernet port of the client bridge. The device should authenticate against your radius server and should get online. Also make sure, that your Wireless AP supports multiple MAC and IP addresses on the same WLAN link. All Aruba products did.
If you find this post useful, leave me a comment and share your feedback with me. You can also buy me Pizza, using the “Buy me a Pizza” button on the right, to support this blog and keep the IT gremlin happy.
If you would like to do me a favor, share this post with your friends and social media contacts. This would really help to make this blog more popular and help others to find the information above more easily using search engines.
Share on: