*******UPDATE September 19th 2022*******
This guide does not work anymore as the script to install EVE-NG in azure is not available anymore.
*******UPDATE END*******
During the last months, I was regularly asked to build up a quick demo for partners and/or customers. As I cannot do this at home with limited hardware available I came across EVE-NG. EVE-NG can simulate network devices like the ArubaOS CX switches or the VSR with Comware 7. You can even run Netedit, ClearPass and virtual Controllers (VMC’s).
But as this needs a lot of resources which I do not have at home I came to the idea to do this in Azure. To help others doing this kind of setup as well, the following post describes the installation of EVE-NG in Azure.
The installation itself follows more or less the manual for installing EVE-NG on a bare server. But there are some things to consider.
Create the VM for EVE-NG in Azure
As EVE-NG will virtualize different network devices the first thing to consider is nested virtualization. Before starting the setup, make sure, to check which VM in Azure is capable of nested virtualization. I used the following page to get this information:
https://docs.microsoft.com/en-us/azure/virtual-machines/acu
The page contains a list of available Azure VM sizes but not all are capable of nested virtualization. Look for the following comment and VM sizes with “***”:
***Hyper-threaded and capable of running nested virtualizationNow you can log in to Azure and create a new VM for EVE-NG. I assume you know how to work with Azure. Below is the summary of the VM I created for this test:
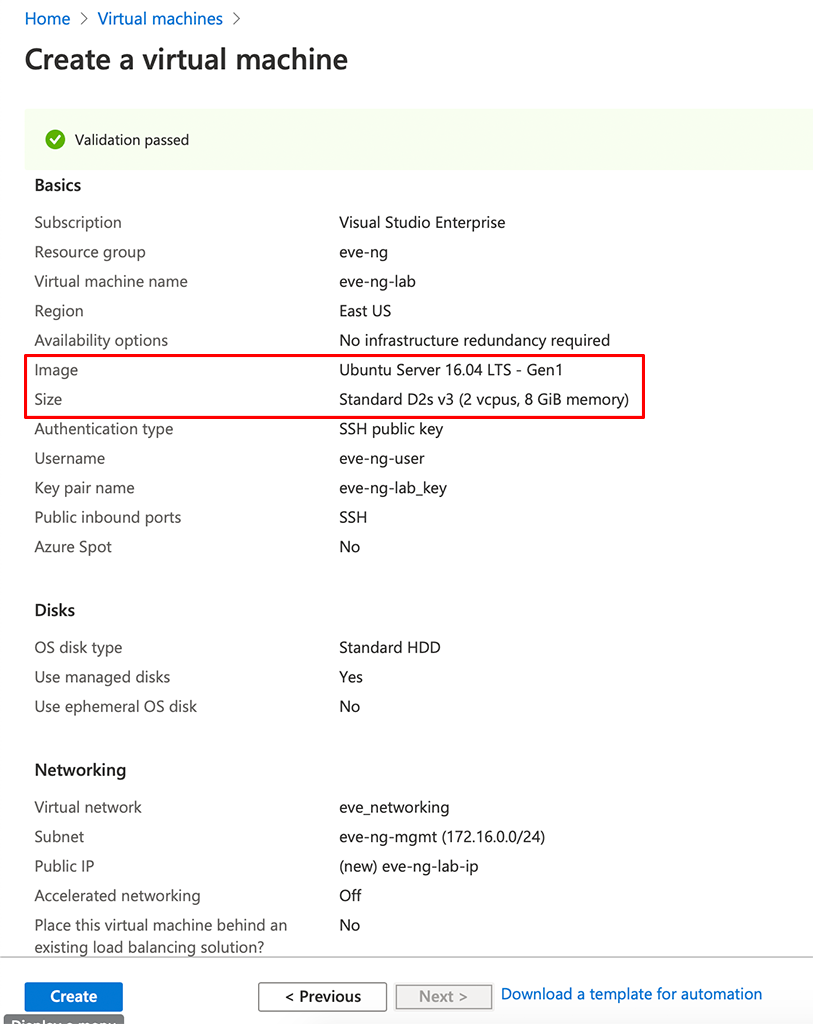
The most important part is the “Image”, which should be “Ubuntu Server 16.04 LTS – Gen1” and the “Size”. Remember to use a size, which is enabled for nested virtualization. Click “Create” to create the VM. If you have selected “SSH public key” for “Authentication type” which is my recommendation, download the public key from Azure right after you clicked “Create”. Now you need to wait until Azure has deployed the VM.
After the VM is deployed connect to the VM using its public IP. If you do not know this IP look for the “Connect” link on the VM object:
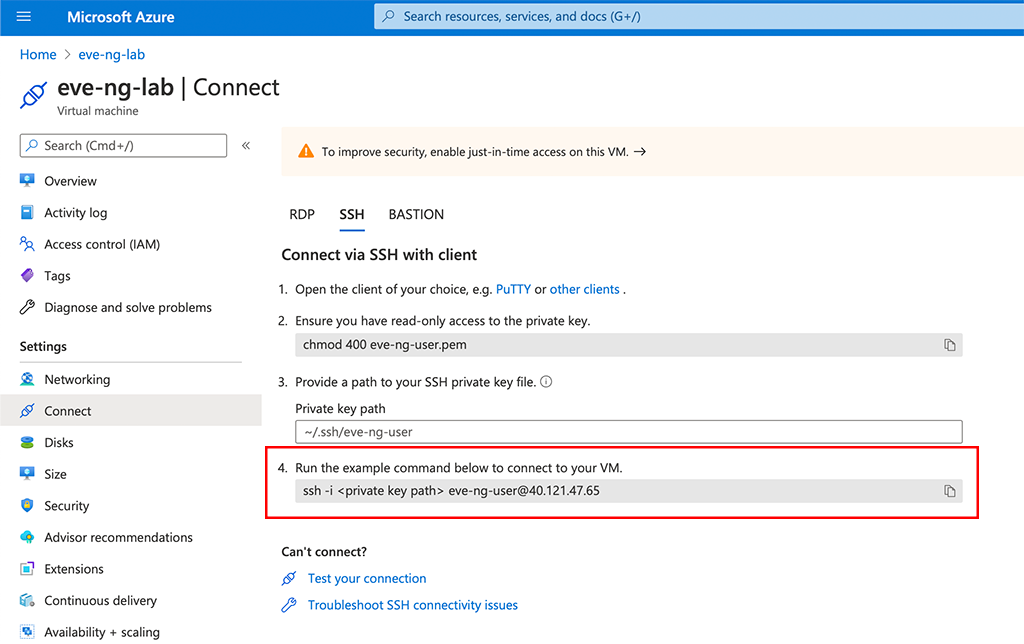
Actually, you just need to replace the “<private key path>” with the actual path to the private key, downloaded during VM creation above and you can connect. At least for Linux (OSX) users. If you use Windows or a different SSH client check there for using a key file.
First I would install the latest patches for the system:
sudo apt update && sudo apt upgradeAfter all packages are up to date let’s start preparing the VM.
Prepare the VM to run EVE-NG in Azure
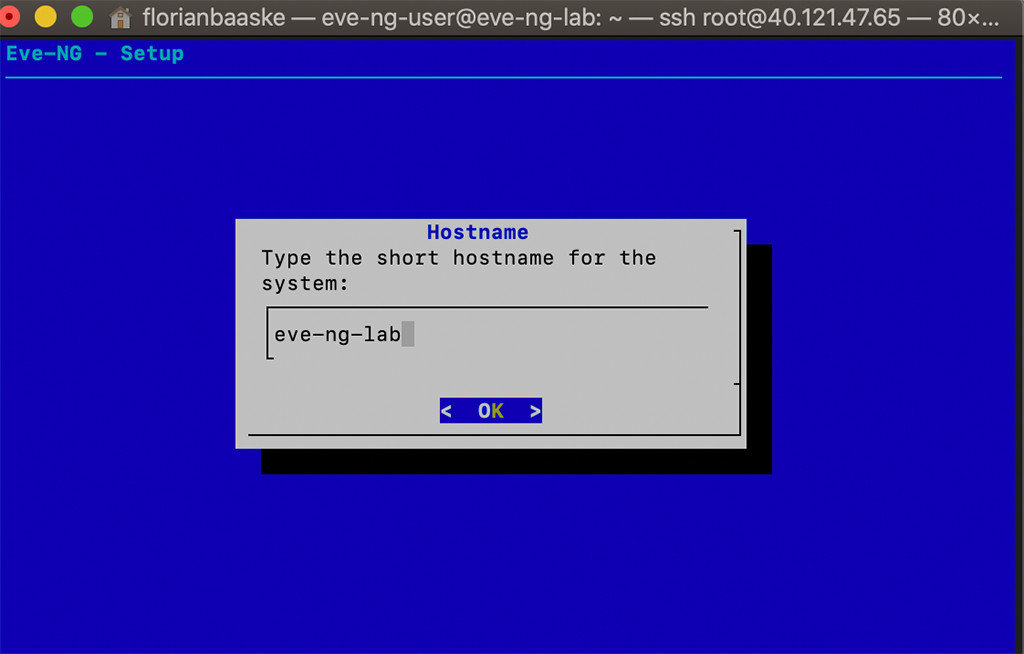
First, you need to set the hostname for the VM. Open the “/etc/hostname” file and set the hostname of your choice:
vi /etc/hostnameIn my case it is “eve-ng-lab”.
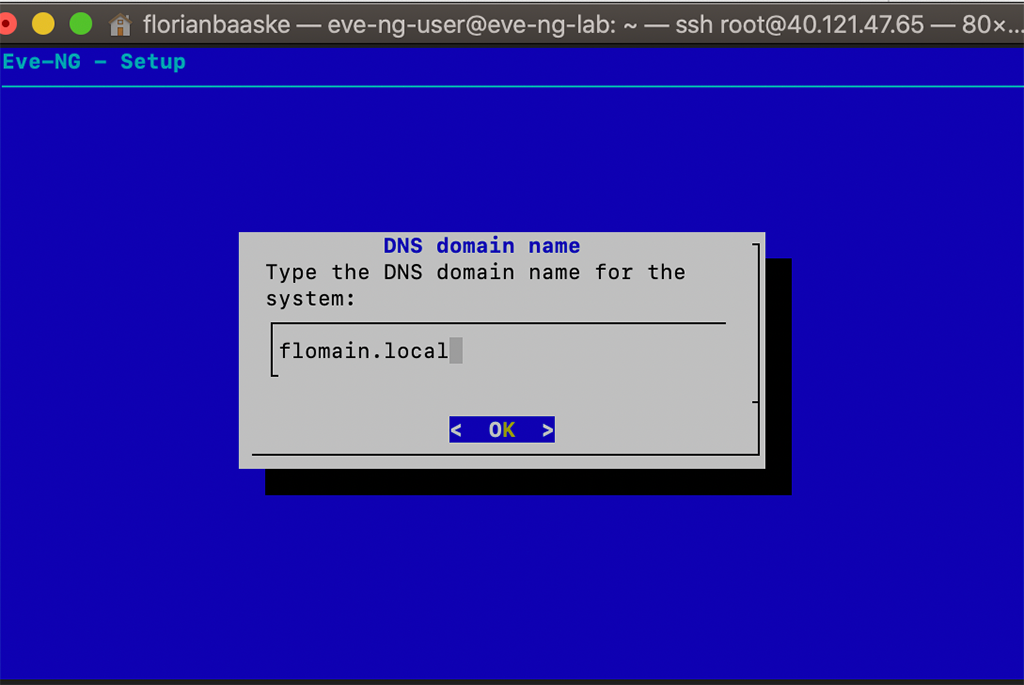
Next, you need to adjust the “hosts” file to reflect the hostname and the domain. Open the “/etc/hosts” file and add the entry for your host (the second line in the output):
127.0.0.1 localhost
127.0.0.1 eve-ng-lab.flomain.local      eve-ng-lab

# The following lines are desirable for IPv6 capable hosts
::1 ip6-localhost ip6-loopback
fe00::0 ip6-localnet
ff00::0 ip6-mcastprefix
ff02::1 ip6-allnodes
ff02::2 ip6-allrouters
ff02::3 ip6-allhosts
The next step is to modify Grub, the boot loader, like this:
eve-ng-user@eve-ng-lab:~$ sudo sed -i -e 's/GRUB_CMDLINE_LINUX_DEFAULT=.*/GRUB_CMDLINE_LINUX_DEFAULT="net.ifnames=0 noquiet"/' /etc/default/grub
eve-ng-user@eve-ng-lab:~$ sudo update-grub
Generating grub configuration file ...
Found linux image: /boot/vmlinuz-4.15.0-1098-azure
Found initrd image: /boot/initrd.img-4.15.0-1098-azure
done
Afterwards reboot the VM.
After the VM is up and running again connect again to the VM. This time you need to change to the root user and change the password for the root user:
eve-ng-user@eve-ng-lab:~$ sudo su
root@eve-ng-lab:/home/eve-ng-user# passwd
Enter new UNIX password:
Retype new UNIX password:
passwd: password updated successfully
Now you allow to login via SSH using the root user. You will revert this setting in the end. Open the file “/etc/ssh/sshd_config” and change the line “PermitRootLogin” to “yes”. Also set “PasswordAuthentication” to “yes”.
Restart the ssh daemon afterwards:
root@eve-ng-lab:/home/eve-ng-user# /etc/init.d/ssh restart
[ ok ] Restarting ssh (via systemctl): ssh.service.
root@eve-ng-lab:/home/eve-ng-user#
Now you can check if the login using the root user with password authentication works. If yes, go ahead to the next step.
Install EVE-NG in Azure
Now we can start to install EVE-NG. Login to the VM using the root user (or use the session from the step above) and issue this command:
root@eve-ng-lab:/home/eve-ng-user# wget -O - http://www.eve-ng.net/repo/install-eve.sh | bash -iIt will take some time to install all the needed packages. Simply wait for the process to finish.
Afterwards we need to install some Azure specific packages:
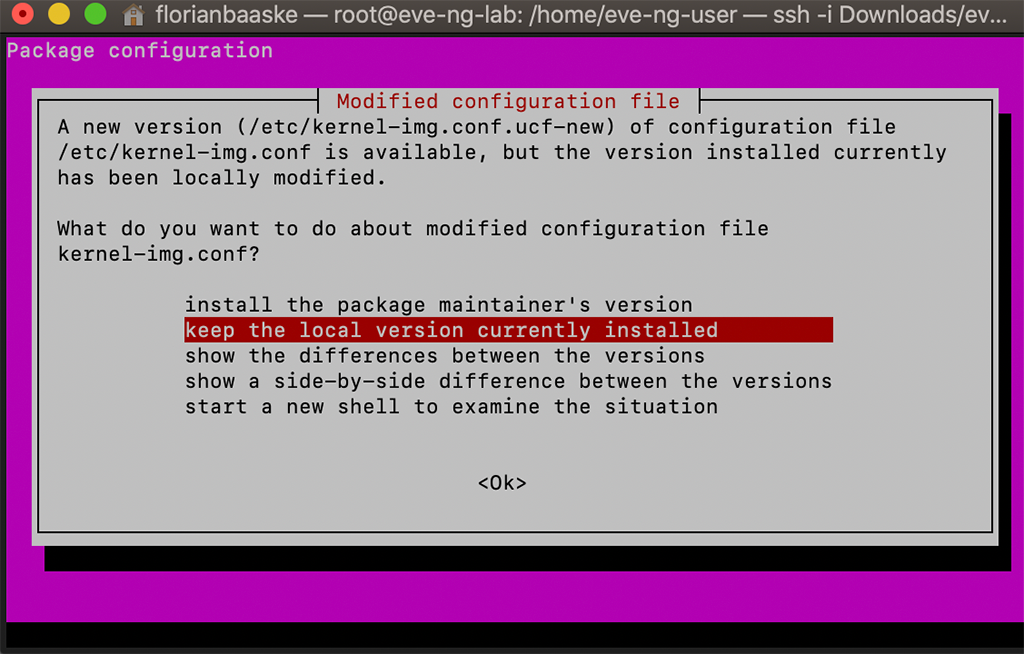
root@eve-ng-lab:/home/eve-ng-user# apt install kernel-common linux-image-4.20.17-eve-ng-azure+If you where asked about the “kernel-img.conf” select “keep the local version currently installed”:
Next, you need to remove the unused packages:
root@eve-ng-lab:/home/eve-ng-user# sudo apt autoremoveAfterwards, re-run the installer to make sure everything is installed:
root@eve-ng-lab:/home/eve-ng-user# wget -O - http://www.eve-ng.net/repo/install-eve.sh | bash -iNow, you can reboot the VM.
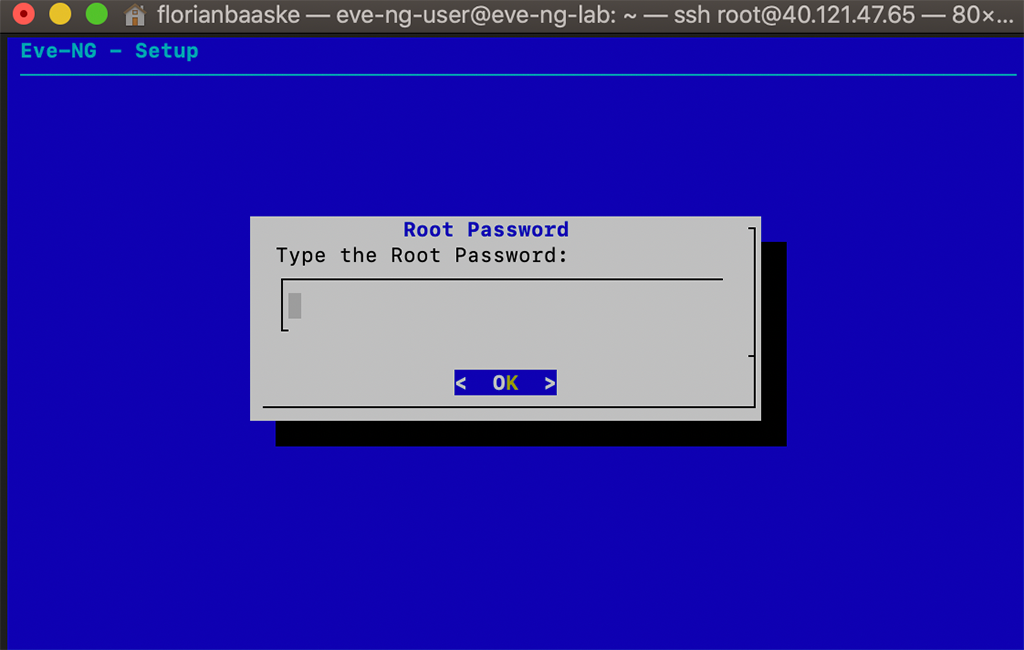
Configure EVE-NG in Azure
You should now connect to the VM using the root user. This will start the initial wizard. First, you need to set the root password (again). I use the same as before:
The next screen is asking for the hostname:
and also for the domain:
Leave the IP address setting as “DHCP”:

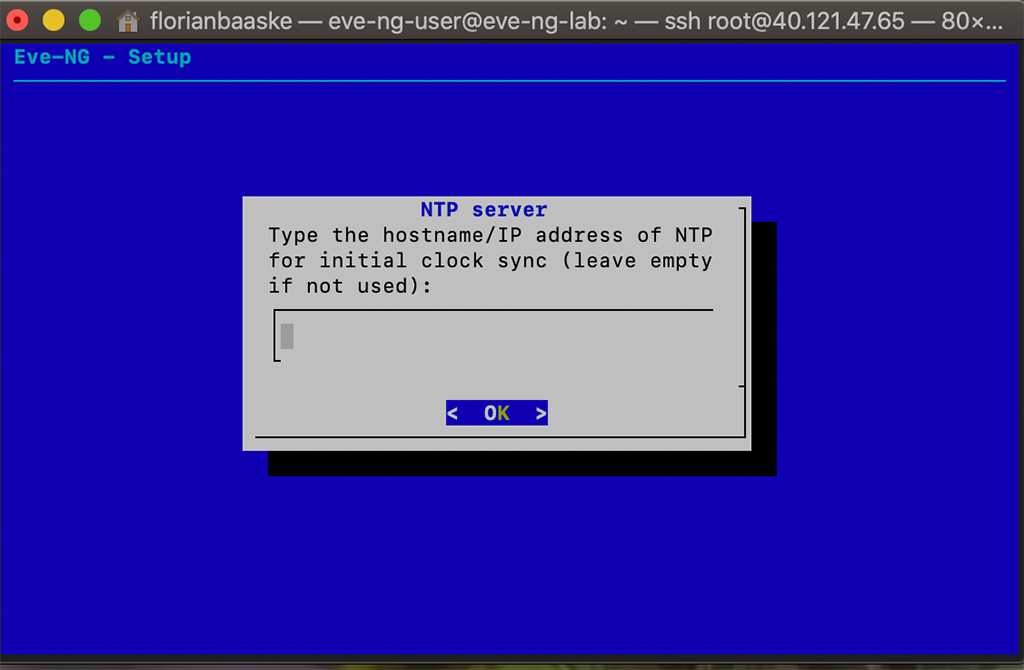
You do not need a NTP server:
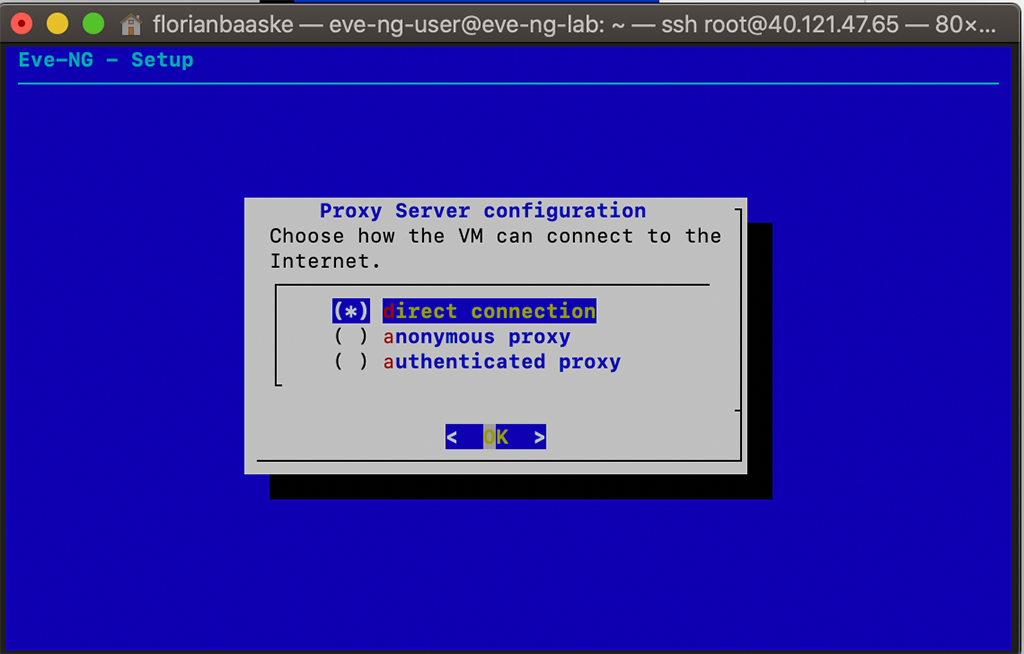
The VM has also a direct connection to the internet:
Afterward, reconfigure the SSH daemon to deny root login and login with a password. Open the “/etc/ssh/sshd_config” and change the “PermitRootLogin” from “yes” to “prohibit-password” and “PasswordAuthentication” from “yes” to “no”. Afterward, reboot the server.
When the server is back online, you can check if everything has worked. Login to the server using the public key user from above:
ssh -L 8080:eve-ng-lab.flomain.local:80 -i Downloads/eve-ng-lab_key.pem [email protected]I also added the “-L 8080:eve-ng-lab.flomain.local:80” option to tunnel port 8080 to port 80 in the VM in order to access the WEB UI. In this case, I use the URL “http://localhost:8080” and could access the EVE UI.
EVE-NG in Azure last Steps
One thing to consider. In order to save some money. I stop the VM every time I do not need the VM. In order to really save money, you not just need to shut down the VM but “Stop” the VM from the Azure GUI. First, shut down the VM from the CLI:
shutdown -hP nowAfterwards, stop the VM from the Azure GUI:
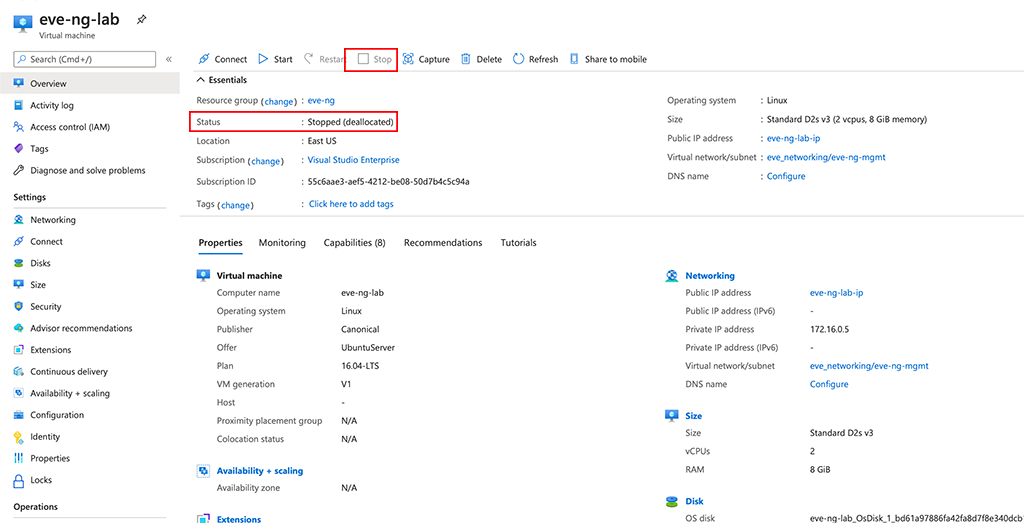
Wait until the VM is in the “Status” “Stopped (deallocated)”.
Another thing to consider, if the defined OS disk is too small. The VM I have chosen has only 30G. If the VM is in the “Status” above you can easily expand the size to your needs. Simply go to “Disks” and select the “OS disk”. Here you can change the size in the “Size + performance” settings.
The VM will automatically use the additional space.
You should now be ready to start creating virtual networks.
If you find this post useful, leave me a comment and share your feedback with me. You can also buy me Pizza, using the “Buy me a Pizza” button on the right, to support this blog and keep the IT gremlin happy.
If you would like to do me a favor, share this post with your friends and social media contacts. This would really help to make this blog more popular and help others to find the information above more easily using search engines.
Share on:
Thanks for the blog, I really appreciated your effort. I have managed to built my eve-ng lab. I have issue with accessing the nodes like windows or windows server that I have no access to view these nodes. how can I rdp or just view the windows to make further configuration into the server. could you please help to solve this issue. Thanks
Hi Muhammad,
On the login window, you can select “Html5 console” instead of “Native console”. This should allow you to get access to the GUI of your Windows or Windows Server VM. There you can configure everything.
BR
Florian
Hi Florian,
I need to test some SD-Branch stuff, but I have no resources in my homelab. One of the alternatives would be to build this lab on Azure. Do you have any idea of monthly costs on Azure to keep these machines running?
Hi Felipe,
I’m not an Azure Pricing expert. If I need to answer this question to myself, I use the Azure pricing calculator here:
https://azure.microsoft.com/en-gb/pricing/calculator/
Simply use the calculation for the VM Size you need. If the machine did not run the whole month it is cheaper (the option I chose).
BR
Florian
Nice Florian, I will check this and compare with AWS. By the way, thanks for the post! I’m working in Aruba Brazil and always share your post with the SE team!
Great Article. This helped me setup from start to finish. I encountered an issue that whenever connecting to a device, i would only get a blank screen. Turned out that the NSG that applied to the VM had to be amended, as it was only allowing ports 80 and 22, and not the various ports required for the Telnet connection.
Hi Kris,
this is correct. But if you use the HTML5 version of EVE it will not open telnet from your computer but a Guacamole Websession. I use this all the time and it works great.
BR
Florian
Awesome. Learnt another thing 🙂 thanks
Hi Kris,
great to get this feedback. Really appreciated.
BR
Florian
Has anyone had luck running QEMU nodes in an Azure setup ? Seems like it might not be supported according to eve-ng release notes…
Hi Hagop,
I know, it is not officially supported but for me, it is working, BUT, you need to select the correct virtual machine. The VM has to support nested virtualization and I had no luck with AMD-based VMs. Intel-based VMs do work for me. Currently, I’m using a Standard_D16s_v4 VM.
BR
Florian
Hi Florian,
Thanks for the tip. After several attempts to run QEMU image on VM on Azure, after viewing your post with VM size suggestion, I was successful.
Hi Salvino,
Nice to see that my post has helped you out.
BR
Florian
Hi,
Does anyone have any tips on eve-ng in Azure AND using the eve-ng Cloud0 network to access external servers from within the eve-ng lab?
Suspect there is an Azure network config setting that we have missed.
Peter
Hi,
We have worked this out. The standard approach to use the Cloud0 network and bridge does not work with Azure.
What does work for our use-case is to setup the eve-ng host machine with a 2nd IP address on the pnet0 interface and setup routing through the eve-ng host.
Once that is setup, the eve-ng nic (in Azure) needs to be set to routing and Azure a route resource setup and applied to our vnet.
But the trick – route via the eve-ng host not bridge.
Hope this save someone some time.
PDJ
Hi Peter,
This is my setup as well. I will do a post for that during the next weeks, as the setup in Azure was a little bit tricky. At least for me.
BR
Florian
Hello,
I’m getting errors when I’m using the installation commands:
wget -O – http://www.eve-ng.net/repo/install-eve.sh | bash -i
and
apt install kernel-common linux-image-4.20.17-eve-ng-azure+
the wget command gives me reads an html file and then prints:
> bash: unexpected EOF while looking for matching `”
bash: syntax error: unexpected end of file
and the kernel gives me:
E: Unable to locate package linux-image-4.20.17-eve-ng-azure
E: Couldn’t find any package by glob ‘linux-image-4.20.17-eve-ng-azure’
E: Couldn’t find any package by regex ‘linux-image-4.20.17-eve-ng-azure’
I’m using root and did apt-get update and upgrade, I’m also using a VM that supports virtualization, the OS version is Ubuntu Server 16.04 by Cognosys(The official azure version is gone).
Thanks
Hi L,
I haven’t checked recently, but EVE-NG has released a new version that is no longer compatible with 16.04. And it also looks like they have removed the script to install it in Azure. So far I haven’t found an alternative.
BR
Florian
Hi Florian, Thanks for such nice explanation. i tried your method today & looks like package is not at repo so my this command is failing — http://www.eve-ng.net/repo/install-eve.sh | bash -i
Can you double check if something has changed.. Pls help me out
Hi Ravi,
I couldn’t find the script either. So I fear, that it is currently not possible to run EVE-NG in Azure. You might be able to run Hyper-V and create an EVE-NG VM within Hyper-V. But I could not tell if this will have the performance you might need.
BR
Florian
Hi Florian, Did you find the way to install EVE-NG in Azure?
Hi Vishal,
Not really but looks like you have found a new script. Thanks for posting this.
BR
Florian
https://willgrana.com/posts/eve-ng-azure-ps/
Tried this one, very easy and simple!!