My lab environment is more and more important for some of my daily tasks. But I do not care about the system itself. The only requirement is that it has to run. but as it get’s more and more important I started thinking about a backup. ESXi has no built-in function for this and external tools are mostly expensive, for a lab system. But I found a small tool to backup ESXi server, which is free of charge and works like a charm. But let’s start with the beginning.
Backup ESXi: Starting Position
Currently, I have two ESXi servers in my lab. They run stuff like AirWave, ClearPass, Active Directory, my Mobility Master and a DNS/DHCP server. All my clients need this infrastructure to get access to the lab and the internet. If the ESXi server fails or one of the VM’s get corrupted, the manual recovery will consume a lot of time. So I start looking for a simple backup solution. I have a Synology Disk Station in the lab. My intention is to use the Disk Station for the backups.
The first search offers many tools, but most of them are either expensive and for real production environments or nasty scripts. But some blog posts recommend ghettoVCB from William Lam. He is with VMWare and his tool looks quite promising. There is already the option to use an external NFS store for the backup. And the backup is an online backup. Just what I was looking for, for my lab.
Backup ESXi: Install ghettoVCB
The first step is to install ghettoVCB on the ESXi host. You can download the latest version from GitHub:
https://github.com/lamw/ghettoVCB
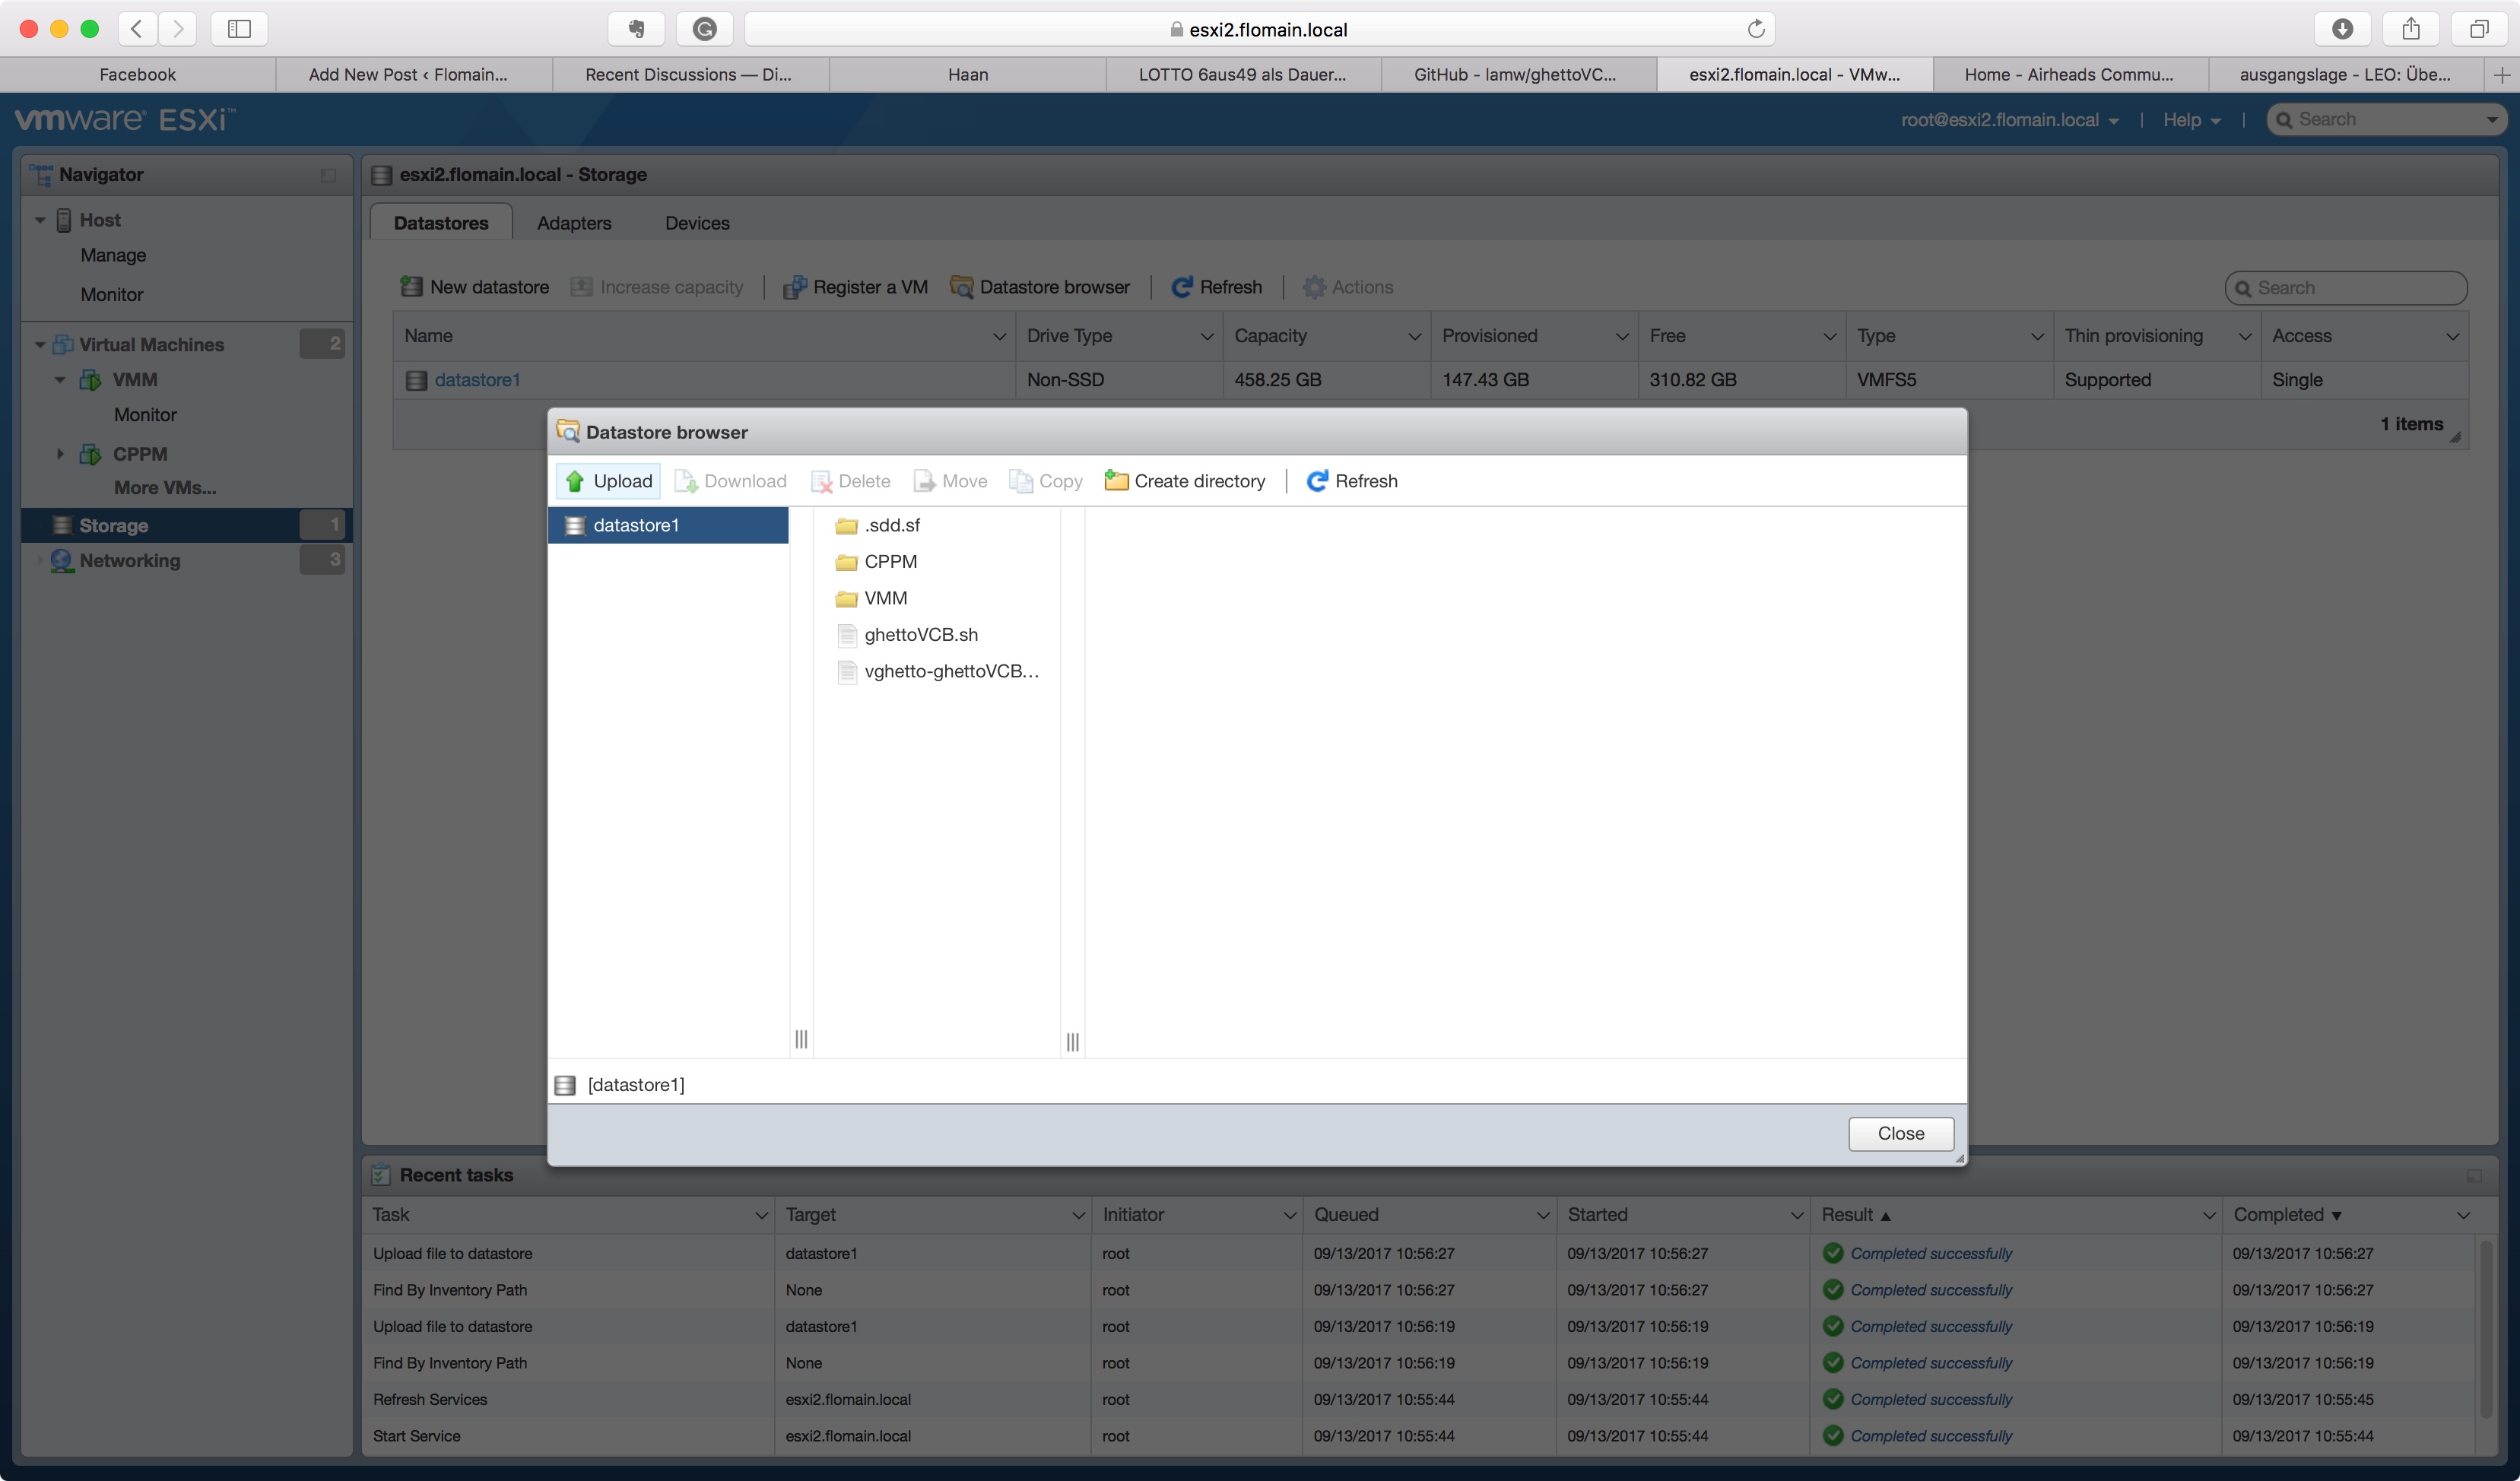
I use the vghetto-ghettoVCB.vib file. I also download the latest version of the ghettoVCB.sh file. This file contains some extra fixes for NFS and ESXi 6.5.
Now, permanently enable SSH on the ESXi host. I use the web GUI to do so. you can also use the VMWare vSphere Client for this task:
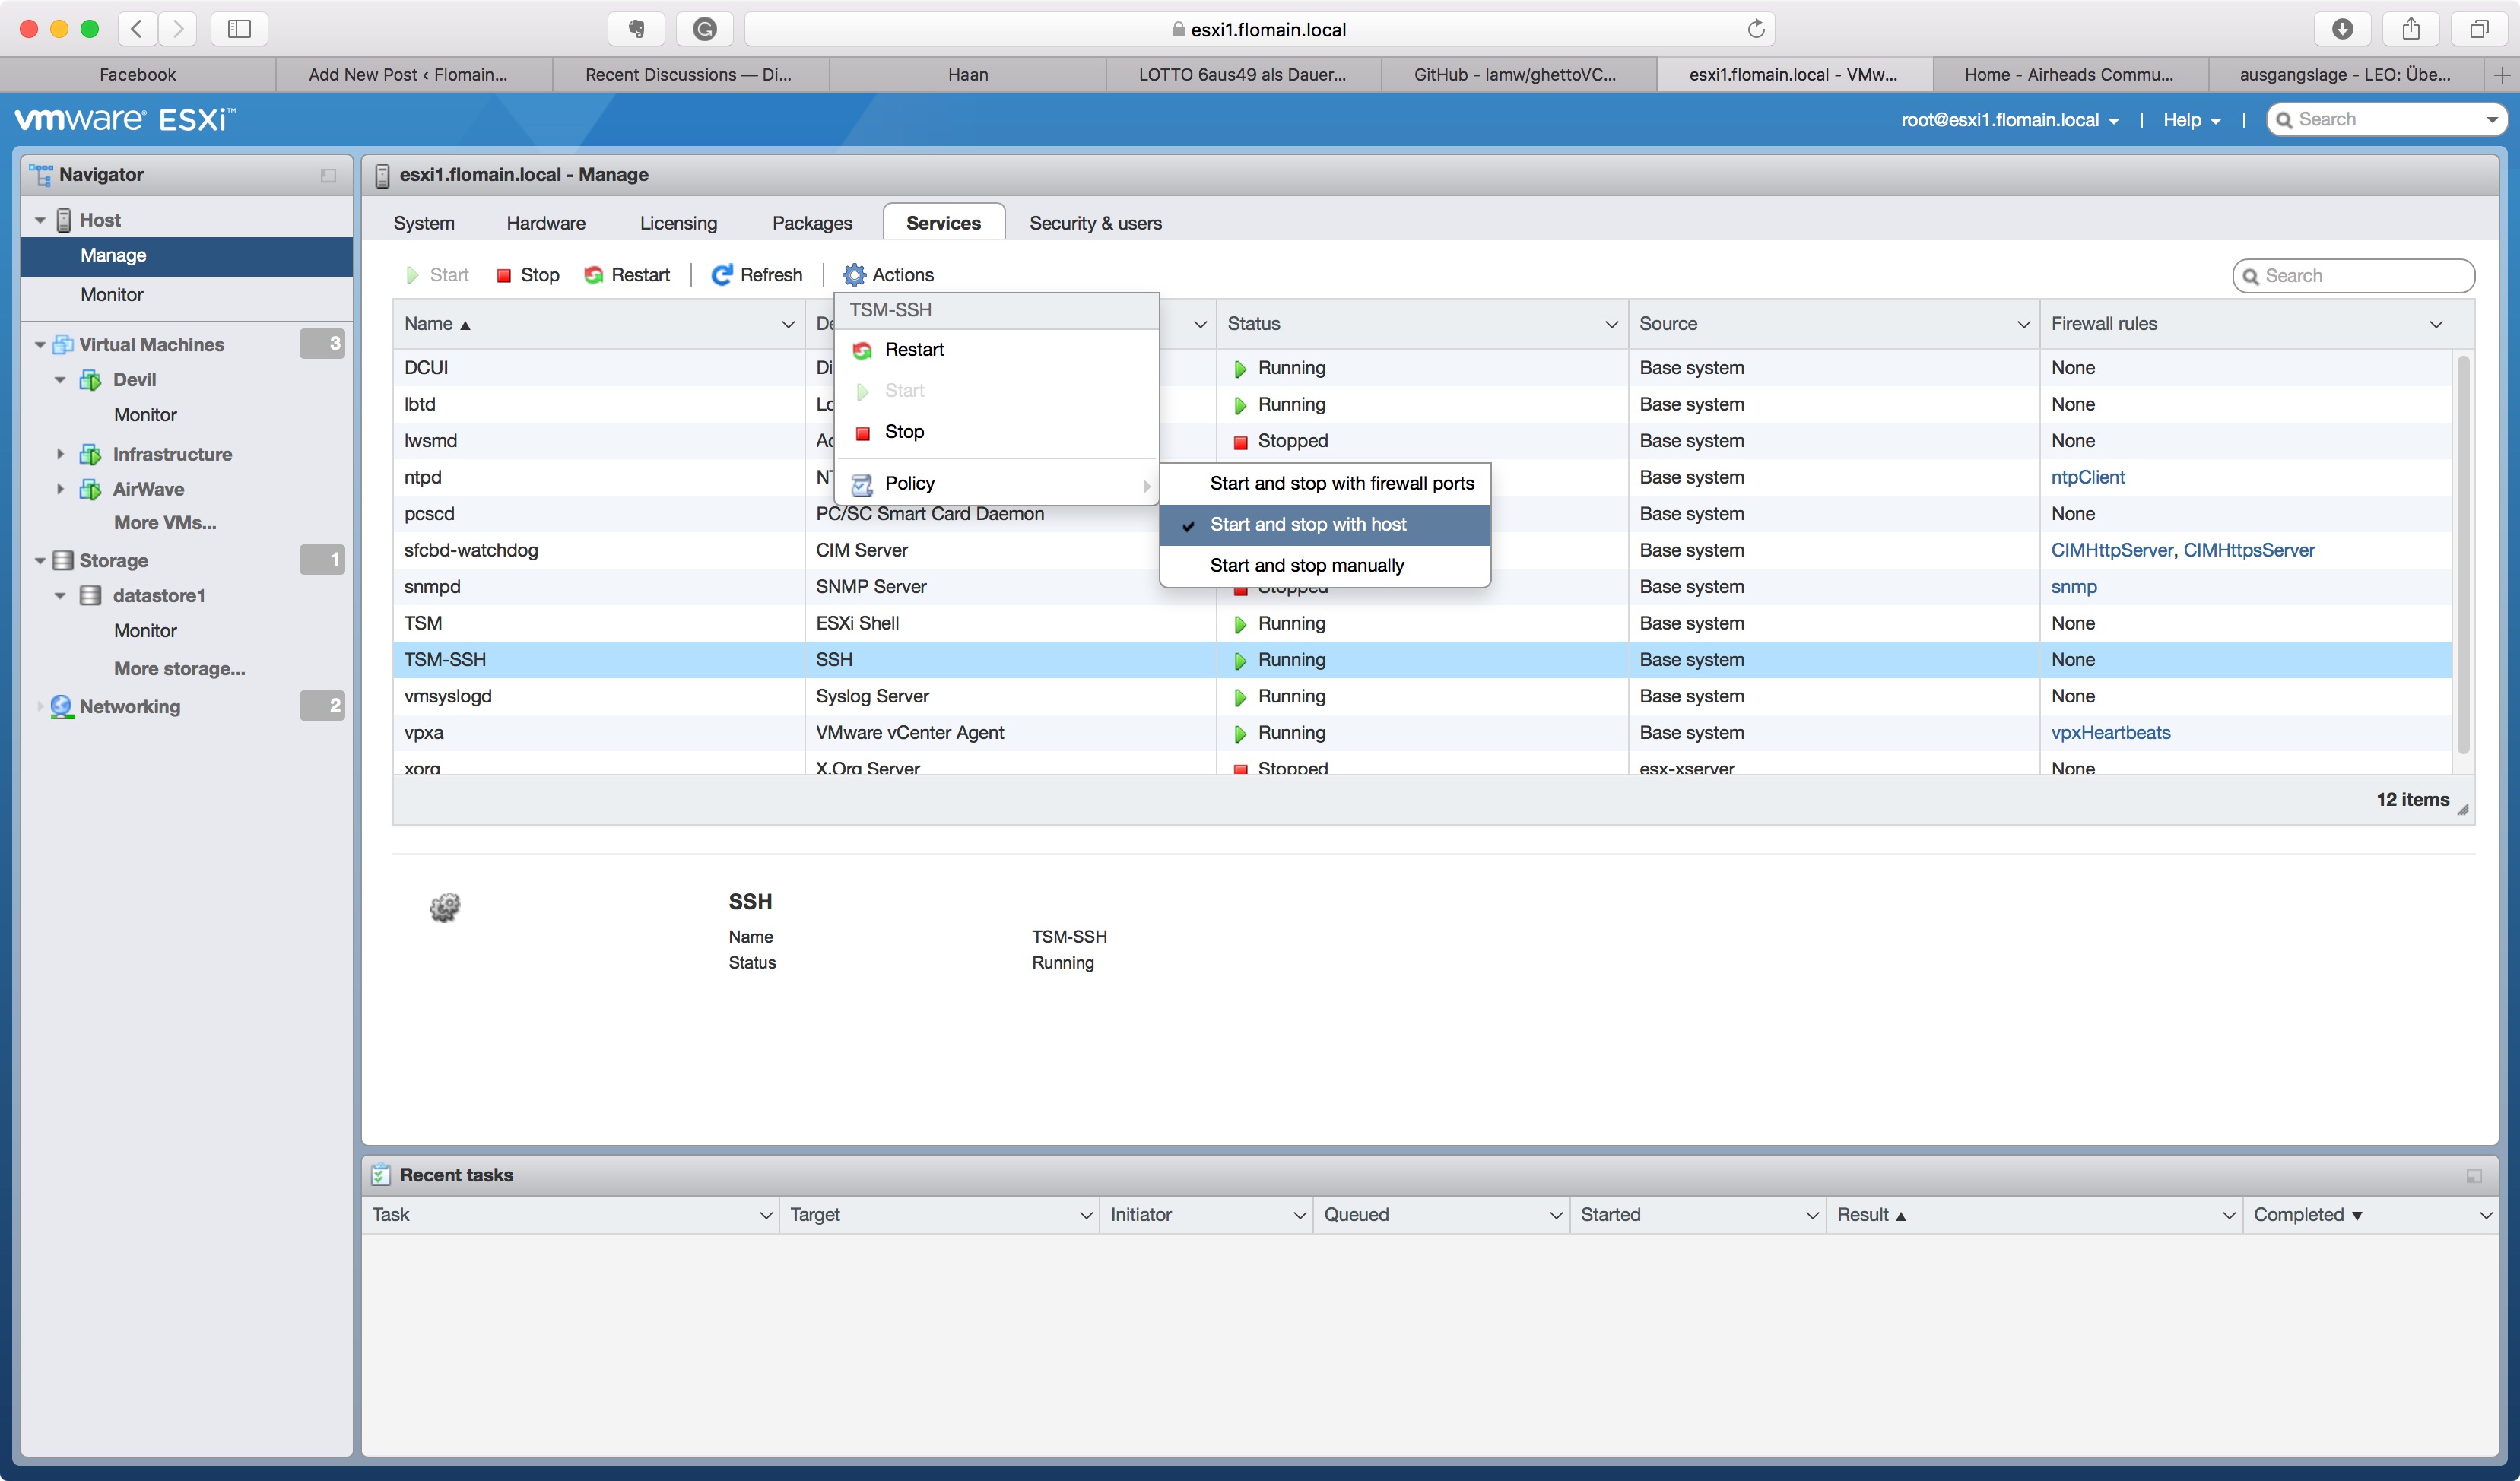
The “TSM-SSH” service is the ESXi SSH server. The SSH server should start with the host. Afterward, you can start the service. In my case, it is already running.
Now, I upload the two files to the ESXi datastore. I use the web GUI for this task as well:
Connect to the ESXi server with SSH and install the vghetto-ghettoVCB.vib file:
[root@esxi2:~] esxcli software vib install -v /vmfs/volumes/datastore1/vghetto-ghettoVCB.vib -f
Installation Result
   Message: Operation finished successfully.
   Reboot Required: false
   VIBs Installed: virtuallyGhetto_bootbank_ghettoVCB_1.0.0-0.0.0
   VIBs Removed:
   VIBs Skipped:
[root@esxi2:~]
The “Message” “Operation finished successfully” show that the *.vib file is installed. Now, I replace the ghettoVCB.sh file the latest one:
[root@esxi2:~] mv /vmfs/volumes/datastore1/ghettoVCB.sh /opt/ghettovcb/bin/ghettoVCB.shAfterward, make the script executable:
[root@esxi2:~] chmod +x-w /opt/ghettovcb/bin/ghettoVCB.shTo finally run the script, create a config file. Here is mine:
[root@esxi2:~] vi /vmfs/volumes/datastore1/backup.conf
VM_BACKUP_VOLUME=/vmfs/volumes/backup/ESXi1
DISK_BACKUP_FORMAT=thin
VM_BACKUP_ROTATION_COUNT=2
ENABLE_COMPRESSION=1
ENABLE_NON_PERSISTENT_NFS=1
UNMOUNT_NFS=1
NFS_SERVER=192.168.2.20
NFS_MOUNT=/volume1/Data/ESXi-Backup
NFS_LOCAL_NAME=backup
NFS_VM_BACKUP_DIR=ESXi1
For a full list of options, please refer to the ghettoVCB documentation page:
https://communities.vmware.com/docs/DOC-8760
My configuration is very simple. The important part is the NFS section. This configures the NFS store. The “NFS_LOCAL_NAME” and the NFS_VM_BACKUP_DIR” are two parts of the “VM_BACKUP_VOLUME” option.
Backup ESXi: Run ghettoVCB the First Time
Before getting serious, you can test the script with the “-d dryrun” switch:
[root@esxi2:~] /opt/ghettovcb/bin/ghettoVCB.sh -a -g /vmfs/volumes/datastore1/backup.conf -d dryrun
Logging output to "/tmp/ghettoVCB-2017-09-13_10-02-27-890532.log" ...
2017-09-13 10:02:27 -- info: ============================== ghettoVCB LOG START ==============================

2017-09-13 10:02:27 -- info: CONFIG - USING GLOBAL GHETTOVCB CONFIGURATION FILE = /vmfs/volumes/datastore1/backup.conf
2017-09-13 10:02:27 -- info: CONFIG - VERSION = 2016_11_20_1
2017-09-13 10:02:27 -- info: CONFIG - GHETTOVCB_PID = 890532
2017-09-13 10:02:27 -- info: CONFIG - VM_BACKUP_VOLUME = /vmfs/volumes/backup/ESXi2
2017-09-13 10:02:27 -- info: CONFIG - ENABLE_NON_PERSISTENT_NFS = 1
2017-09-13 10:02:27 -- info: CONFIG - UNMOUNT_NFS = 1
2017-09-13 10:02:27 -- info: CONFIG - NFS_SERVER = 192.168.2.20
2017-09-13 10:02:27 -- info: CONFIG - NFS_VERSION = nfs
2017-09-13 10:02:27 -- info: CONFIG - NFS_MOUNT = /volume1/Data/ESXi-Backup
2017-09-13 10:02:27 -- info: CONFIG - VM_BACKUP_ROTATION_COUNT = 2
2017-09-13 10:02:27 -- info: CONFIG - VM_BACKUP_DIR_NAMING_CONVENTION = 2017-09-13_10-02-27
2017-09-13 10:02:27 -- info: CONFIG - DISK_BACKUP_FORMAT = thin
2017-09-13 10:02:27 -- info: CONFIG - POWER_VM_DOWN_BEFORE_BACKUP = 0
2017-09-13 10:02:27 -- info: CONFIG - ENABLE_HARD_POWER_OFF = 0
2017-09-13 10:02:27 -- info: CONFIG - ITER_TO_WAIT_SHUTDOWN = 3
2017-09-13 10:02:27 -- info: CONFIG - POWER_DOWN_TIMEOUT = 5
2017-09-13 10:02:27 -- info: CONFIG - SNAPSHOT_TIMEOUT = 15
2017-09-13 10:02:27 -- info: CONFIG - LOG_LEVEL = dryrun
2017-09-13 10:02:27 -- info: CONFIG - BACKUP_LOG_OUTPUT = /tmp/ghettoVCB-2017-09-13_10-02-27-890532.log
2017-09-13 10:02:27 -- info: CONFIG - ENABLE_COMPRESSION = 1
2017-09-13 10:02:27 -- info: CONFIG - VM_SNAPSHOT_MEMORY = 0
2017-09-13 10:02:27 -- info: CONFIG - VM_SNAPSHOT_QUIESCE = 0
2017-09-13 10:02:27 -- info: CONFIG - ALLOW_VMS_WITH_SNAPSHOTS_TO_BE_BACKEDUP = 0
2017-09-13 10:02:27 -- info: CONFIG - VMDK_FILES_TO_BACKUP = all
2017-09-13 10:02:27 -- info: CONFIG - VM_SHUTDOWN_ORDER =
2017-09-13 10:02:27 -- info: CONFIG - VM_STARTUP_ORDER =
2017-09-13 10:02:27 -- info: CONFIG - RSYNC_LINK = 0
2017-09-13 10:02:27 -- info: CONFIG - BACKUP_FILES_CHMOD =
2017-09-13 10:02:27 -- info: CONFIG - EMAIL_LOG = 0
2017-09-13 10:02:28 -- info:
2017-09-13 10:02:28 -- dryrun: ###############################################
2017-09-13 10:02:28 -- dryrun: Virtual Machine: CPPM
2017-09-13 10:02:28 -- dryrun: VM_ID: 2
2017-09-13 10:02:28 -- dryrun: VMX_PATH: /vmfs/volumes/datastore1/CPPM/CPPM.vmx
2017-09-13 10:02:28 -- dryrun: VMX_DIR: /vmfs/volumes/datastore1/CPPM
2017-09-13 10:02:28 -- dryrun: VMX_CONF: CPPM/CPPM.vmx
2017-09-13 10:02:28 -- dryrun: VMFS_VOLUME: datastore1
2017-09-13 10:02:28 -- dryrun: VMDK(s):
2017-09-13 10:02:28 -- dryrun: 	CPPM_1.vmdk	100 GB
2017-09-13 10:02:28 -- dryrun: 	CPPM.vmdk	20 GB
2017-09-13 10:02:28 -- dryrun: INDEPENDENT VMDK(s):
2017-09-13 10:02:28 -- dryrun: TOTAL_VM_SIZE_TO_BACKUP: 120 GB
2017-09-13 10:02:28 -- dryrun: ###############################################

2017-09-13 10:02:28 -- dryrun: ###############################################
2017-09-13 10:02:28 -- dryrun: Virtual Machine: VMM
2017-09-13 10:02:28 -- dryrun: VM_ID: 3
2017-09-13 10:02:28 -- dryrun: VMX_PATH: /vmfs/volumes/datastore1/VMM/VMM.vmx
2017-09-13 10:02:28 -- dryrun: VMX_DIR: /vmfs/volumes/datastore1/VMM
2017-09-13 10:02:28 -- dryrun: VMX_CONF: VMM/VMM.vmx
2017-09-13 10:02:28 -- dryrun: VMFS_VOLUME: datastore1
2017-09-13 10:02:28 -- dryrun: VMDK(s):
2017-09-13 10:02:28 -- dryrun: 	VMM_1.vmdk	6 GB
2017-09-13 10:02:28 -- dryrun: 	VMM.vmdk	4 GB
2017-09-13 10:02:28 -- dryrun: INDEPENDENT VMDK(s):
2017-09-13 10:02:28 -- dryrun: TOTAL_VM_SIZE_TO_BACKUP: 10 GB
2017-09-13 10:02:28 -- dryrun: ###############################################

2017-09-13 10:02:28 -- info: ###### Final status: OK, only a dryrun. ######

2017-09-13 10:02:28 -- info: ============================== ghettoVCB LOG END ================================

[root@esxi2:~]
Check the upper part. You should find all your configurations here. If one is missing, check the configuration file again, and rerun the script.
Backup ESXi: Add Cronjob
Finally, the script should run automatically. In Linux, there is cron. In ESXi, you can use cron as well. It is just not that easy as with normal Linux distributions.
You could simply add the script to the crontab of root. But this modification is gone after rebooting the ESXi server. To make it more sustainable, I use a script during boot of ESXi. The script simply stops the cron daemon, insert the cronjob to the crontab file and restart the cron daemon again. This works for ESXi version 6.5. For older versions, you should check, how to permanently add a cronjob as the precedure might differ.
Open the local.sh file:
[root@esxi1:~] vi /etc/rc.local.d/local.shand insert the following lines before the “exit 0”:
/bin/kill $(cat /var/run/crond.pid)
/bin/echo "0    5    15  *   *   /opt/ghettovcb/bin/ghettoVCB.sh -a -g /vmfs/volumes/datastore1/backup.conf > /dev/null" >> /var/spool/cron/crontabs/root
/usr/lib/vmware/busybox/bin/busybox crond
Afterward, execute the local.sh file and check the crontab:
[root@esxi2:~] vi /var/spool/cron/crontabs/root

#min hour day mon dow command
1    1    *   *   *   /sbin/tmpwatch.py
1    *    *   *   *   /sbin/auto-backup.sh
0    *    *   *   *   /usr/lib/vmware/vmksummary/log-heartbeat.py
*/5  *    *   *   *   /bin/hostd-probe.sh ++group=host/vim/vmvisor/hostd-probe/stats/sh
00   1    *   *   *   localcli storage core device purge
0    5    15  *   *   /opt/ghettovcb/bin/ghettoVCB.sh -a -g /vmfs/volumes/datastore1/backup.conf > /dev/null
The script added the last line. My script runs every 15th at 5am in the morning. You can, of course, adjust the timing to your needs.
Backup ESXi: Restore VM
Let’s assume I never need this. But if something goes wrong the recovery is simple. The only pitfall, there are some more manual steps as during the backup.
The first step is to mount the backup store. I use the CLI to perform this task. But you can also do this with the web GUI or the VMWare vSphere Client:
[root@esxi2:~] esxcli storage nfs add -H 192.168.2.20 -s /volume1/Data/ESXi-Backup -v backup
[root@esxi2:~] esxcli storage nfs list
Volume Name  Host          Share                      Accessible  Mounted  Read-Only   isPE  Hardware Acceleration
-----------  ------------  -------------------------  ----------  -------  ---------  -----  ---------------------
backup       192.168.2.20  /volume1/Data/ESXi-Backup        true     true      false  false  Not Supported
The first command adds the NFS store to the ESXi server. The second one is just to confirm it is mounted.
The second step is to create a list of VM’s to restore. You can read the full documentation with all the available options here:
https://communities.vmware.com/docs/DOC-10595
For my test VM, the file looks like this:
[root@esxi2:~] vi restore.conf

"/vmfs/volumes/backup/ESXi2/Test/Test-2017-09-14_06-09-30.gz;/vmfs/volumes/datastore1;1;Test"
As before, I do a dryrun to test my file and the configuration:
[root@esxi2:~] /opt/ghettovcb/bin/ghettoVCB-restore.sh -c restore.conf -d 1
GZ found, extracting ...

################ DEBUG MODE ##############
Virtual Machine: "Test"
VM_ORIG_VMX: "Test.vmx"
VM_ORG_FOLDER: "Test-2017-09-14_06-09-30"
VM_RESTORE_VMX: "Test.vmx"
VM_RESTORE_FOLDER: "Test"
VMDK_LIST_TO_MODIFY:
scsi0:0.fileName = "Test.vmdk"
scsi0:0.fileName  = "Test-1.vmdk"
##########################################


Start time: Thu Sep 14 06:30:46 UTC 2017
End   time: Thu Sep 14 06:30:58 UTC 2017
Duration  : 12 Seconds

---------------------------------------------------------------------------------------------------------------
To actually do the restore remove the “-d” option:
[root@esxi2:~] /opt/ghettovcb/bin/ghettoVCB-restore.sh -c restore.conf
GZ found, extracting ...
################## Restoring VM: Test  #####################
Start time: Thu Sep 14 06:48:56 UTC 2017
Restoring VM from: "/vmfs/volumes/backup/ESXi2/Test/Test-2017-09-14_06-09-30"
Restoring VM to Datastore: "/vmfs/volumes/datastore1/" using Disk Format: "zeroedthick"
Creating VM directory: "/vmfs/volumes/datastore1//Test" ...
Copying "Test.vmx" file ...
Restoring VM's VMDK(s) ...
Updating VMDK entry in "Test.vmx" file ...
Option --adaptertype is deprecated and hence will be ignored
Destination disk format: VMFS zeroedthick
Cloning disk '/vmfs/volumes/backup/ESXi2/Test/Test-2017-09-14_06-09-30/Test.vmdk'...
Clone: 100% done.
Registering Test ...
5
End time: Thu Sep 14 06:49:10 UTC 2017
################## Completed restore for Test! #####################


Start time: Thu Sep 14 06:48:43 UTC 2017
End   time: Thu Sep 14 06:49:10 UTC 2017
Duration  : 27 Seconds

---------------------------------------------------------------------------------------------------------------
The VM is restored and registered to the ESXi server. You just need to start the VM again.
The last step is to unmount the NFS store again:
[root@esxi2:~] esxcli storage nfs list
Volume Name  Host          Share                      Accessible  Mounted  Read-Only   isPE  Hardware Acceleration
-----------  ------------  -------------------------  ----------  -------  ---------  -----  ---------------------
backup       192.168.2.20  /volume1/Data/ESXi-Backup        true     true      false  false  Not Supported
[root@esxi2:~] esxcli storage nfs remove -v backup
[root@esxi2:~] esxcli storage nfs list
[root@esxi2:~]
That’s the whole magic.
If you find this post interesting, leave me a comment and share it with your friends. If you don’t like the post, leave me a comment and share it with your enemy. But whatever you do, leave me a comment, now.