This is the first post, of a series of posts, explaining how I set up my BYOD environment at home, to get my guest onto the internet. The environment consists of IMC (Intelligent Management Center) with UAM (User Access Manager) Module and MSM (in the past) and Unified WLAN (which replaced the MSM controller some days ago) infrastructure. This first post will describe, all the steps, necessary to prepare the MSM controller to work with IMC. We will do the following:
- configure two VLAN’s
- configure one SSID
- configure the IMC UAM Server as the Radius Server
Now we start to do the cool stuff…
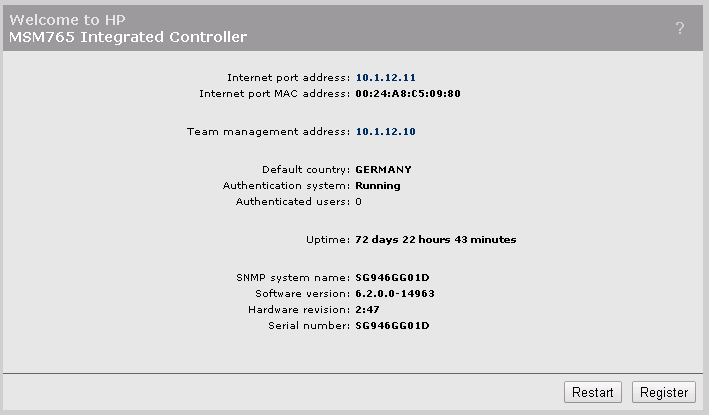
I will not describe how to configure the switching infrastructure and you need to be able to do the initial configuration of the controller on your own. You need to have a working controller or a team of controllers with AP’s connected. I use version 6.2.0 for my environment, but all other MSM versions down to 5.5 should work.

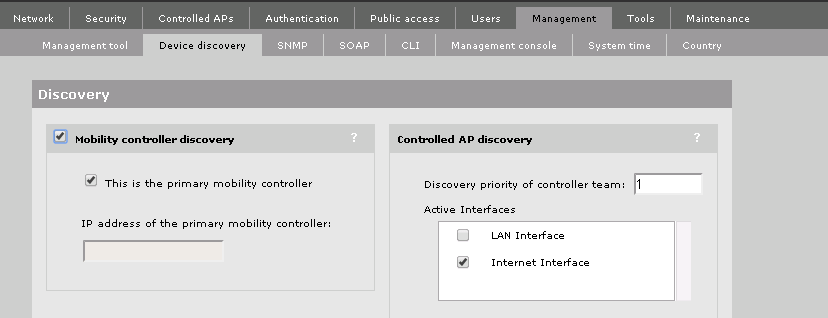
If you have the mobility premium license, you should enable Mobility Traffic Manager by going to Management –> Device Discovery and enable the Mobility controller discovery. If this is your only controller check the “This is the primary mobility controller” checkbox.
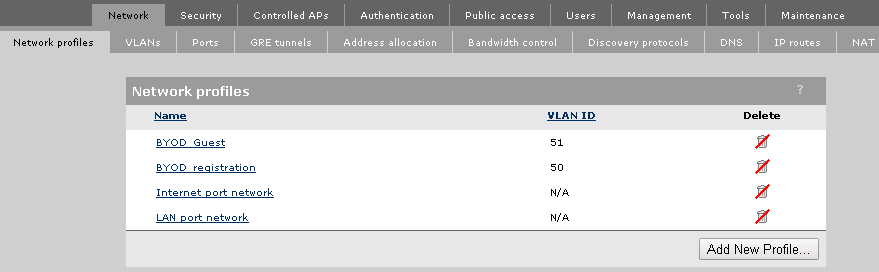
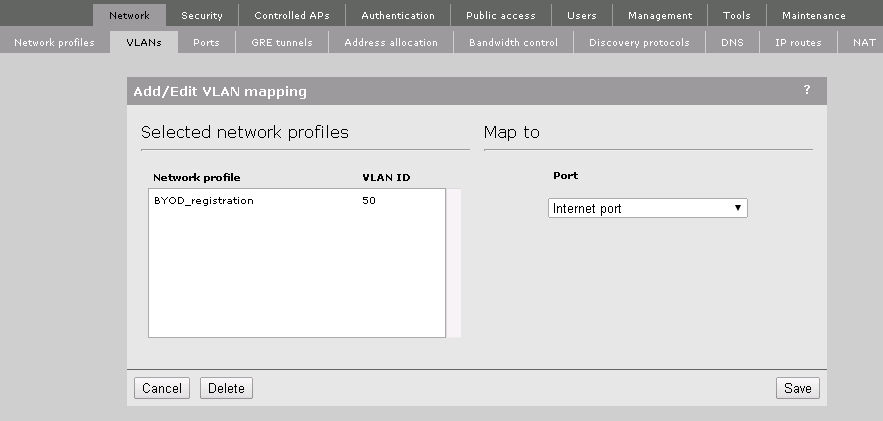
This step is optional, but this will enable you, to bridge traffic through the controller, which is my preferred way for redirecting the client to the BYOD Portal. Now we will create two VLAN’s which will help us to get the client online. I called them “BYOD_registration” and “BYOD_Guest”. The “BYOD_registration” VLAN will be used to transfer the clients to the IMC BYOD portal and restrict traffic to every other direction then the portal. The “BYOD_Guest” VLAN is actually the VLAN which will carry the client traffic after the client is fully connected and should have access to the internet. Just go to Network –> Network profiles and create both VLAN’s.
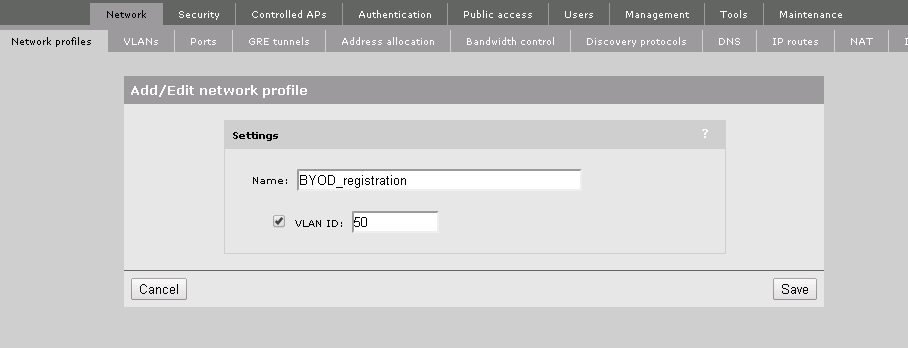
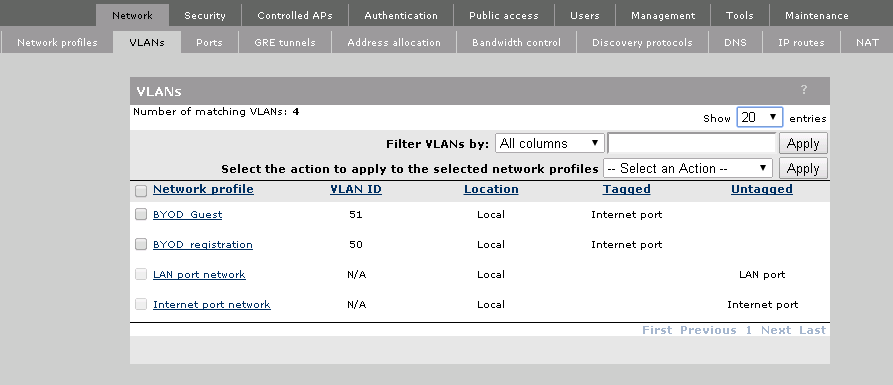
It should looking like this:
If you don’t have the premium license or won’t let the controller tunnel one of the VLAN’s you can skip the next step. For all the others: Go to Network –>VLANs and select the VLAN which should be forwarded to the controller and select a port. In this case I use the “BYOD_registration” VLAN and put it on the internet port. I always put egress VLAN’s on the internet port. This option will create a tagged VLAN on the internet port. So be sure, that the Infrastructure could handle this.
For my setup, I tagged both ports to the internet port, which means that all the data needs to go through the controller. It is also possible to have the “BYOD_Guest” VLAN handled locally by the AP, which is very useful when having branch offices with their own internet breakout.
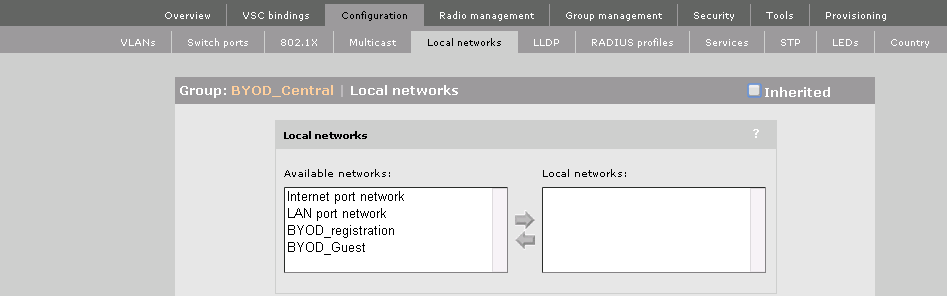
If you want to have one of the VLAN’s switched locally by the AP, there is one more step to do. You have to go to the AP or the AP group and select Configuration–>Local networks and put the VLAN, which should be switched locally on the Local networks side. This option is only considered for VSC’s which have MTM enabled.
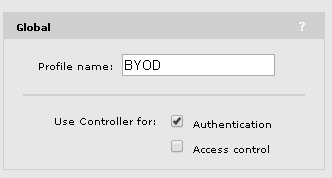
After setting up the scene, we need to create an SSID to provide the Service to our clients. So, create a new VSC and configured it as below: Setup a name for the VSC, this is not the name of the SSID, but it would make sense to keep them the same. The important stuff is the checkmarks for “Authentication” and “Access control”. Remove the check mark for “Access control”. Remove the checkmark for “Authentication” only, if every AP should send its own radius request to the IMC server! This could be useful if the controller fails and you still want to authenticate users, but you need to have all AP’s in the Access Device list of UAM.
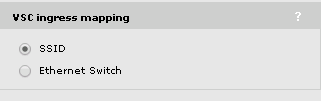
VSC ingress mapping is a simple one, leave it as it is.
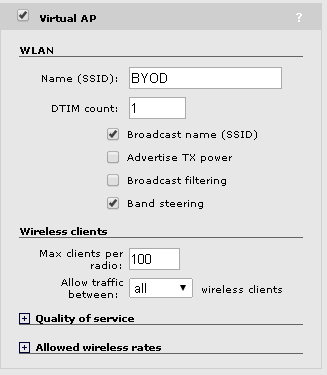
In the Virtual AP box, you can specify the SSID name. In all my configurations, it is the same as the VSC name. Below are my preferred settings for “Broadcast name” and “Band steering”. You can use your preferred settings here. It will not have any impact on the BYOD solution, but it will have
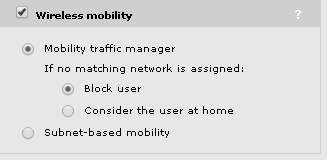
You have to enable Wireless mobility, if you need traffic, going through the controller. This will enable the local networks settings, we set earlier.
As the SSID is not protected by WPA 2, in my case, this option makes no sense and remain off. I also disabled the Wireless security filters, for my Home Network. For a production
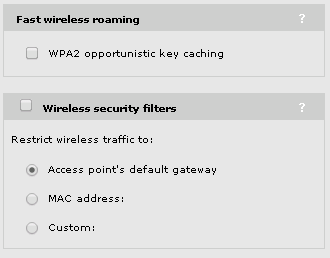
In my case, the SSID is not protected with WPA or any 802.1x authentication. If you need, you can enable the WPA 2 preshared key protection. Be aware, all
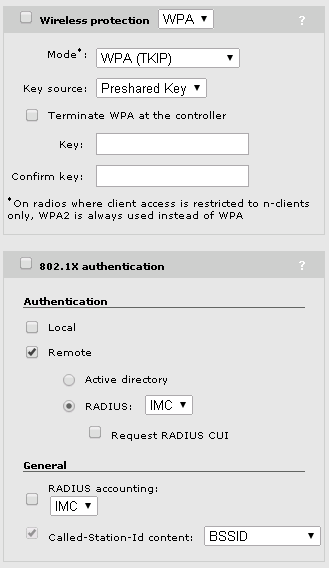
For BYOD to work, I have to enable MAC-based authentication. This has to be a remote authentication with IMC UAM as the radius server. There is no way to use a different radius server.
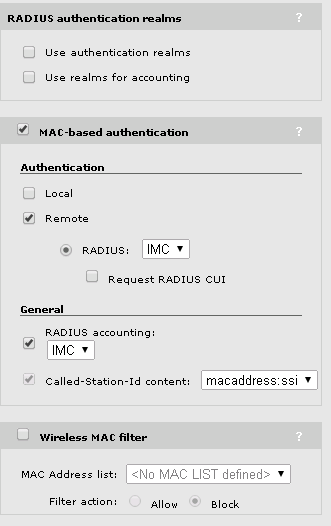
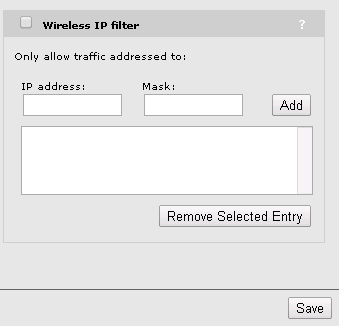
The wireless IP filter will not make any sense, as this will not allow traffic to the internet. Now save the new VSC.
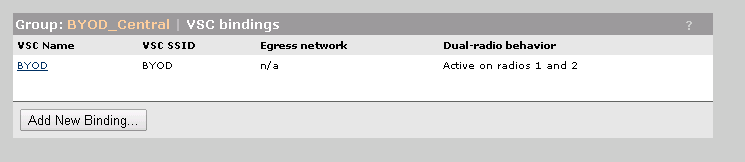
The last step is to bind the VSC to the desired AP group. Don’t use any Egress Network. The radius server will send a VLAN ID.
These were my BYOD settings for the MSM controller in my Home Lab. This should also work in bigger environments. In future posts, I will describe how to configure the IMC UAM part. If you find anything which is not working, contact me or leave me a comment. I will try to include this into my post.