iMC is able to display a list of devices and IP addresses in use. To get the hostname of those devices as well, the iMC DHCP agent can grab those from the DHCP server. During my test of this function, I found some obstacles. In this article, I will share my experience and describe the installation of the iMC DHCP agent.
iMC DHCP Agent: Prepare iMC
The first and most important step to make this work is to add the DHCP server as a device in iMC. In my case, I need to add the Windows Server to iMC. As iMC depends on SNMP, you need to install the SNMP service first. The SNMP service is a feature in Windows Server. No need for third party software.
To install the SNMP service start the “Add Roles and Features” wizard from the “Server Manager”. Click “Next” until you reach the “Features” section:
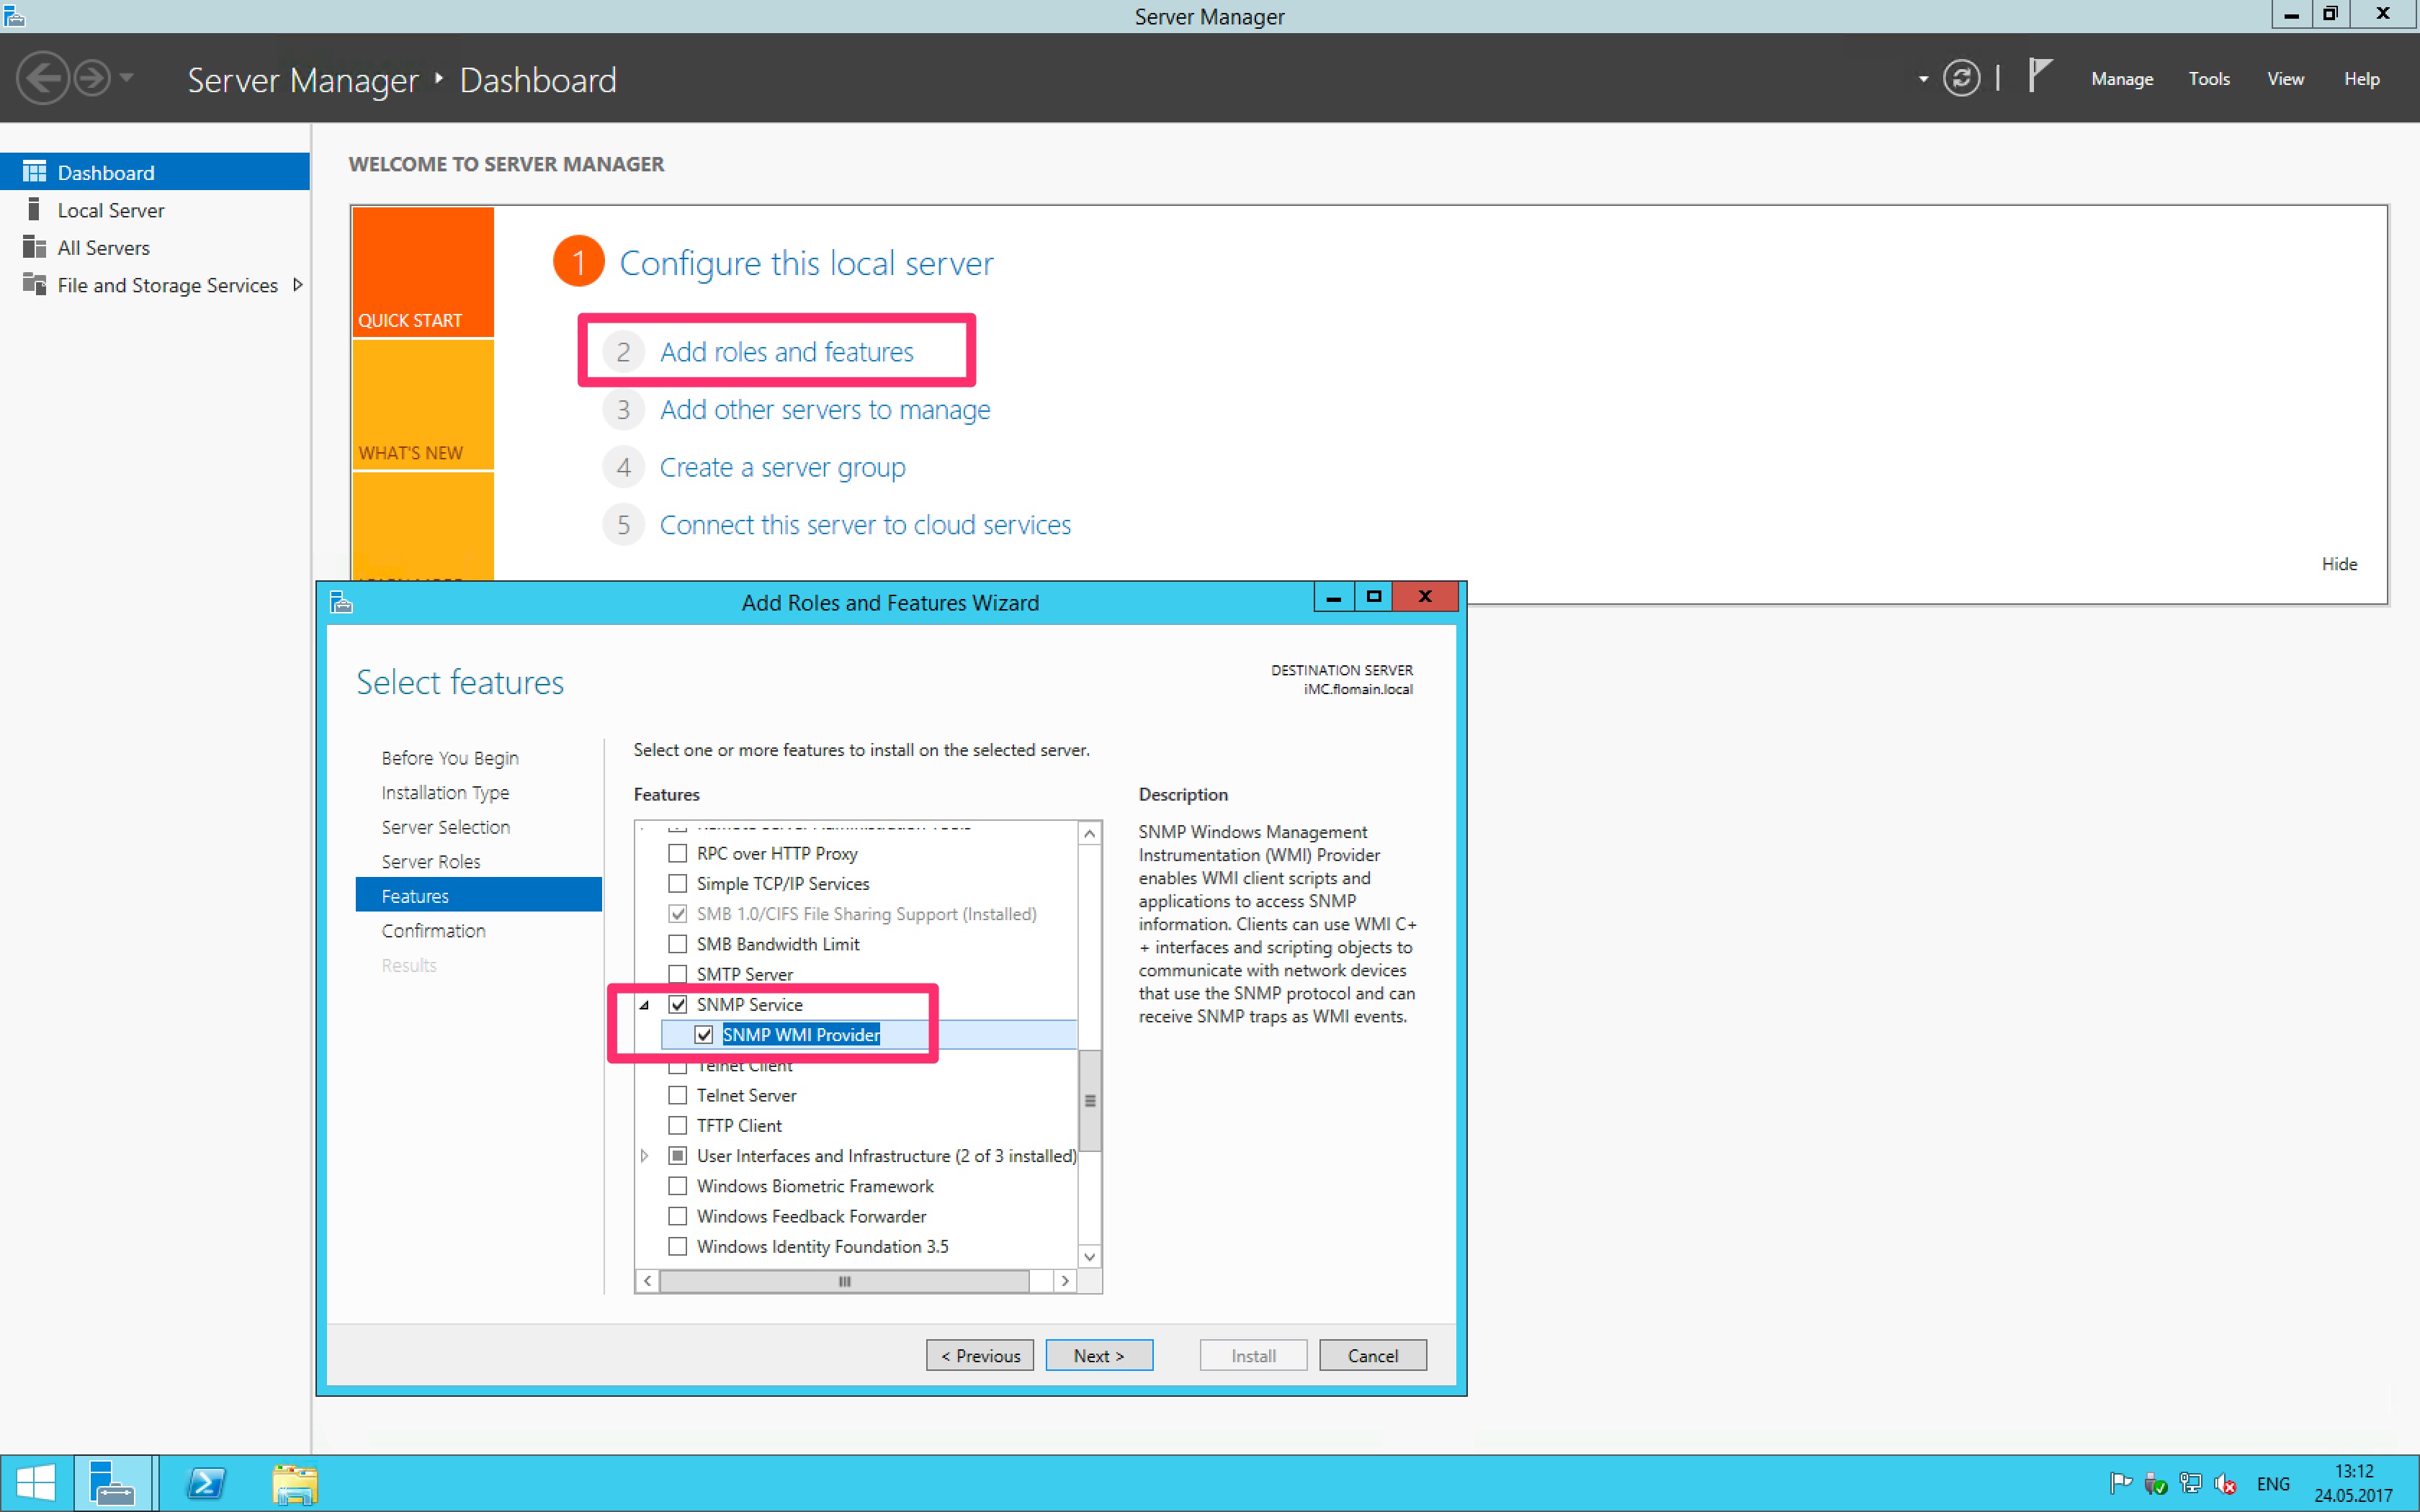
Select the “SNMP Service” and click “Next” for the “Confirmation” screen. The last step is to start the installation. Wait until the installation is finished.
Now, get into the “Services” list and search for SNMP. Open the properties for the “SNMP Service” and go to the “Security” tag:
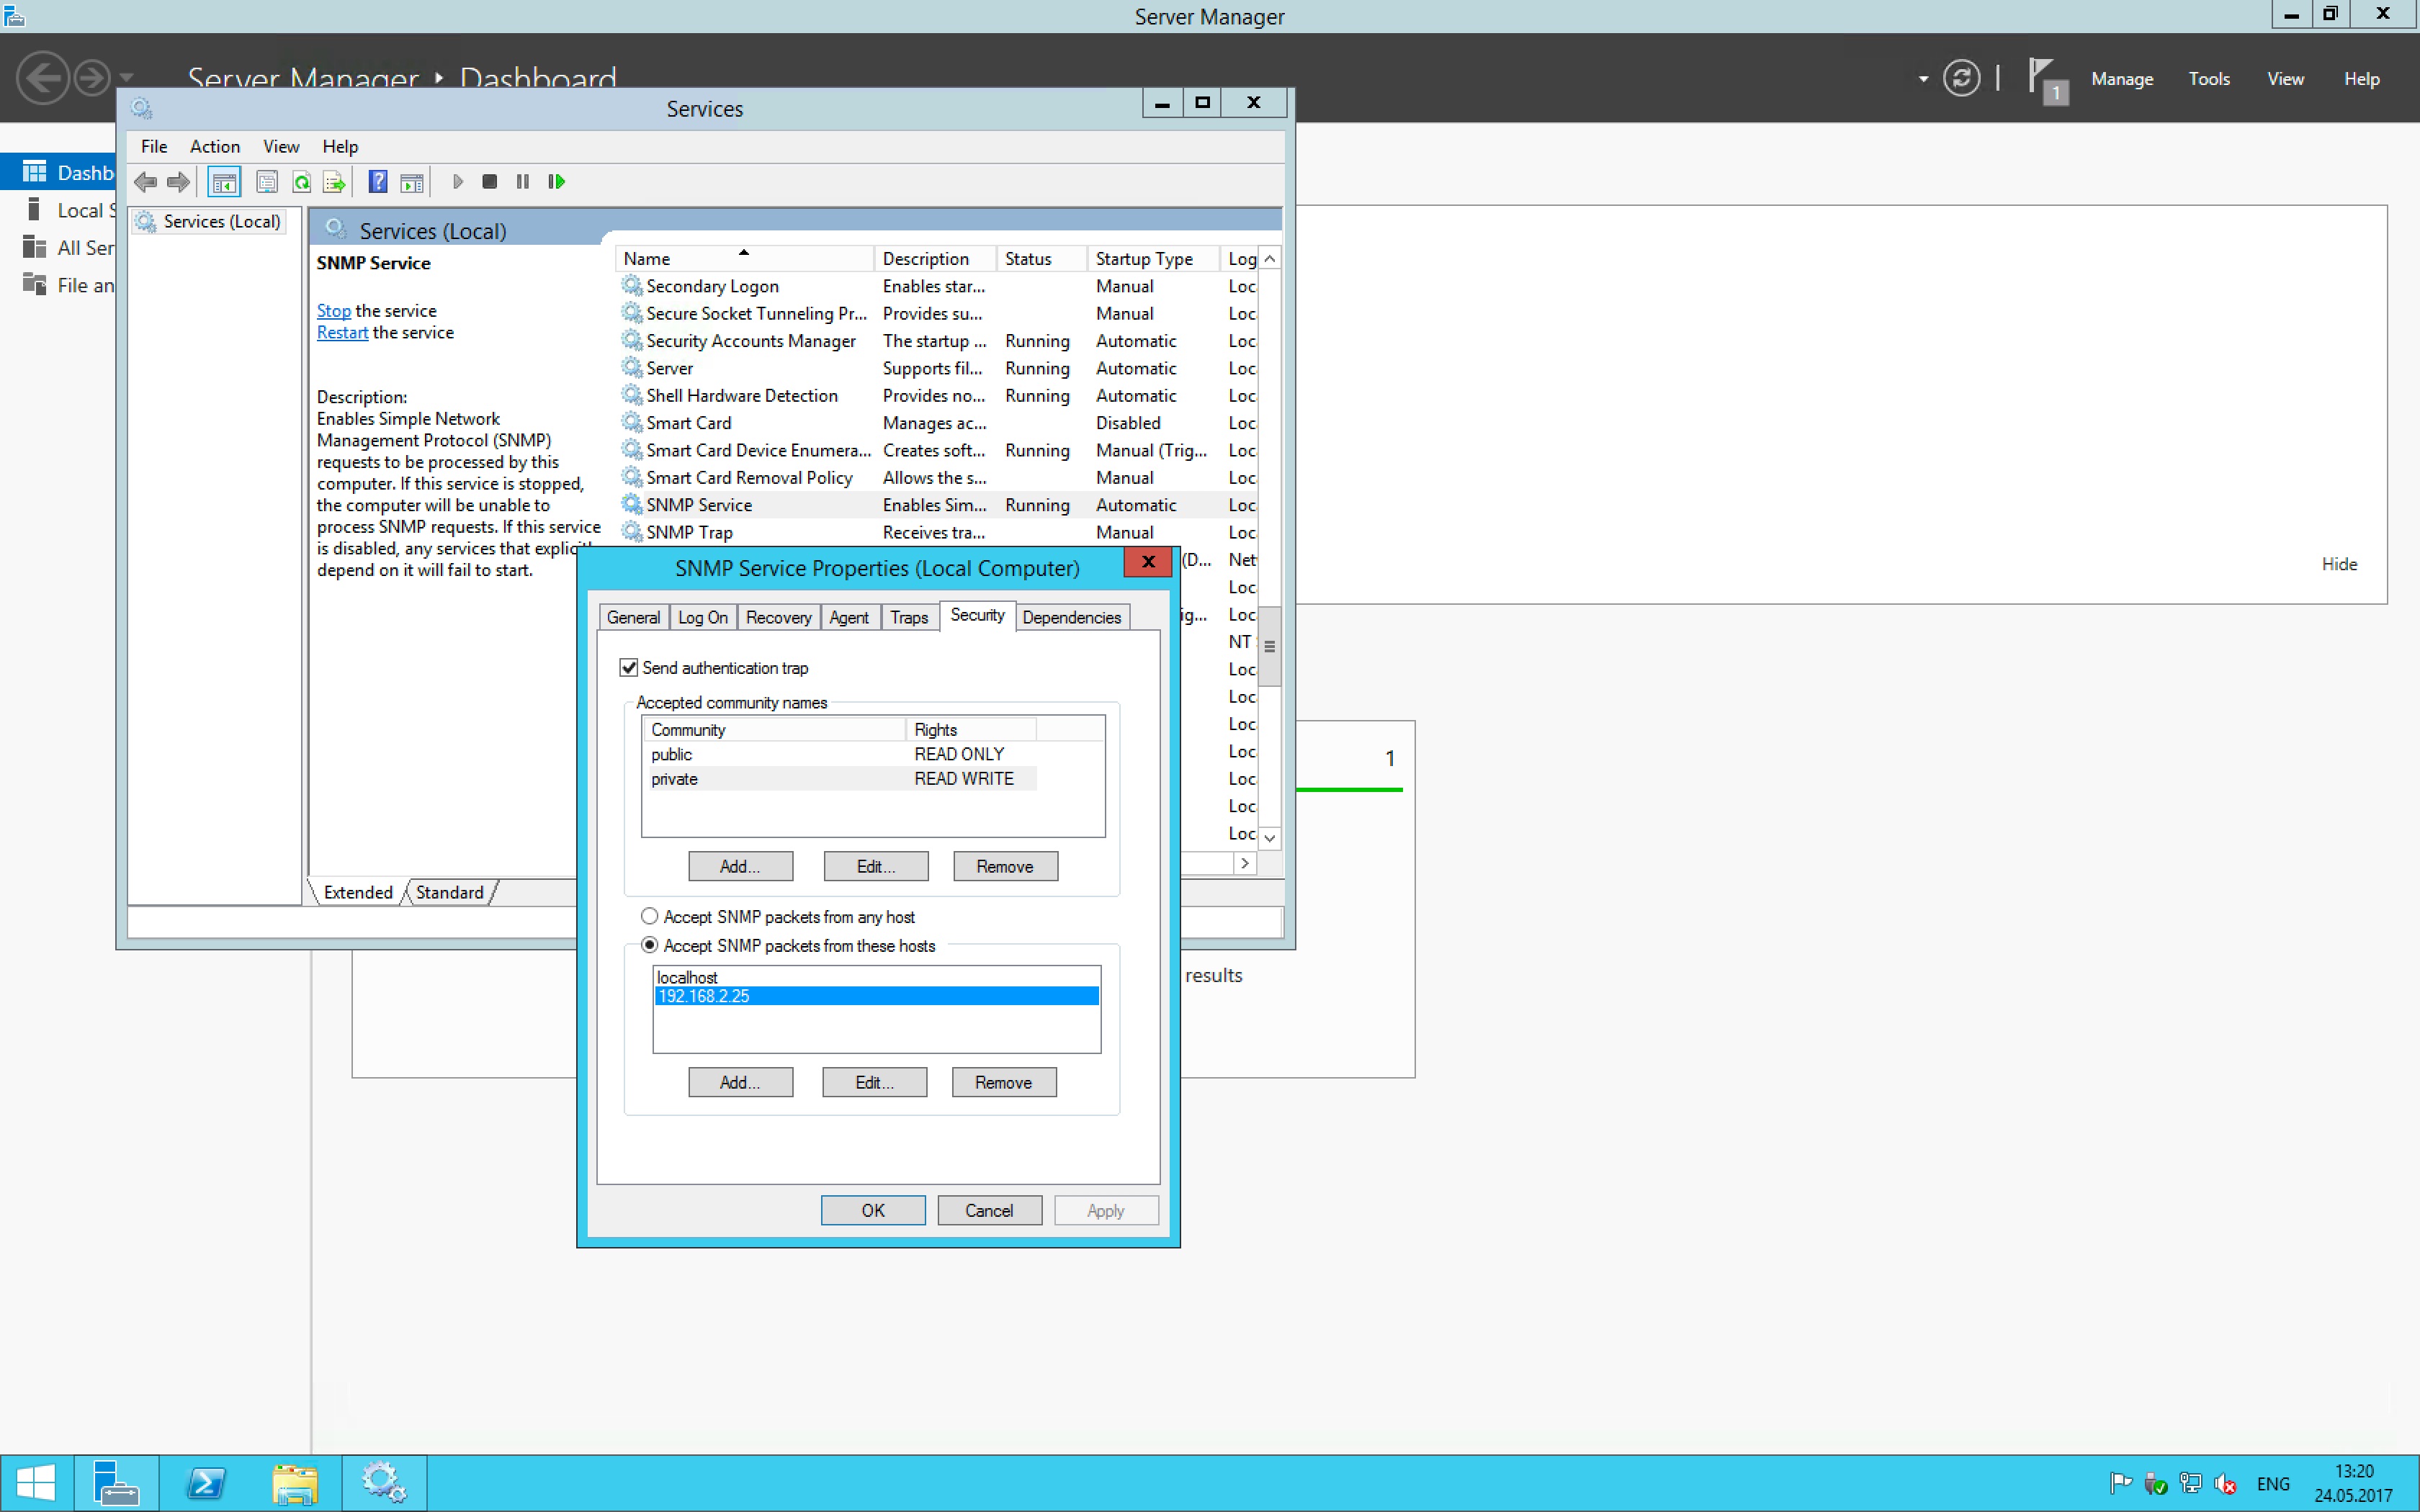
Add the community names you need, but at least one for “READ”. The second one, for “READ WRITE” is not explicitly needed. Make also sure, that the iMC server can talk to the SNMP service. Add iMC to the allow list. Apply changes and restart the “SNMP Service”.
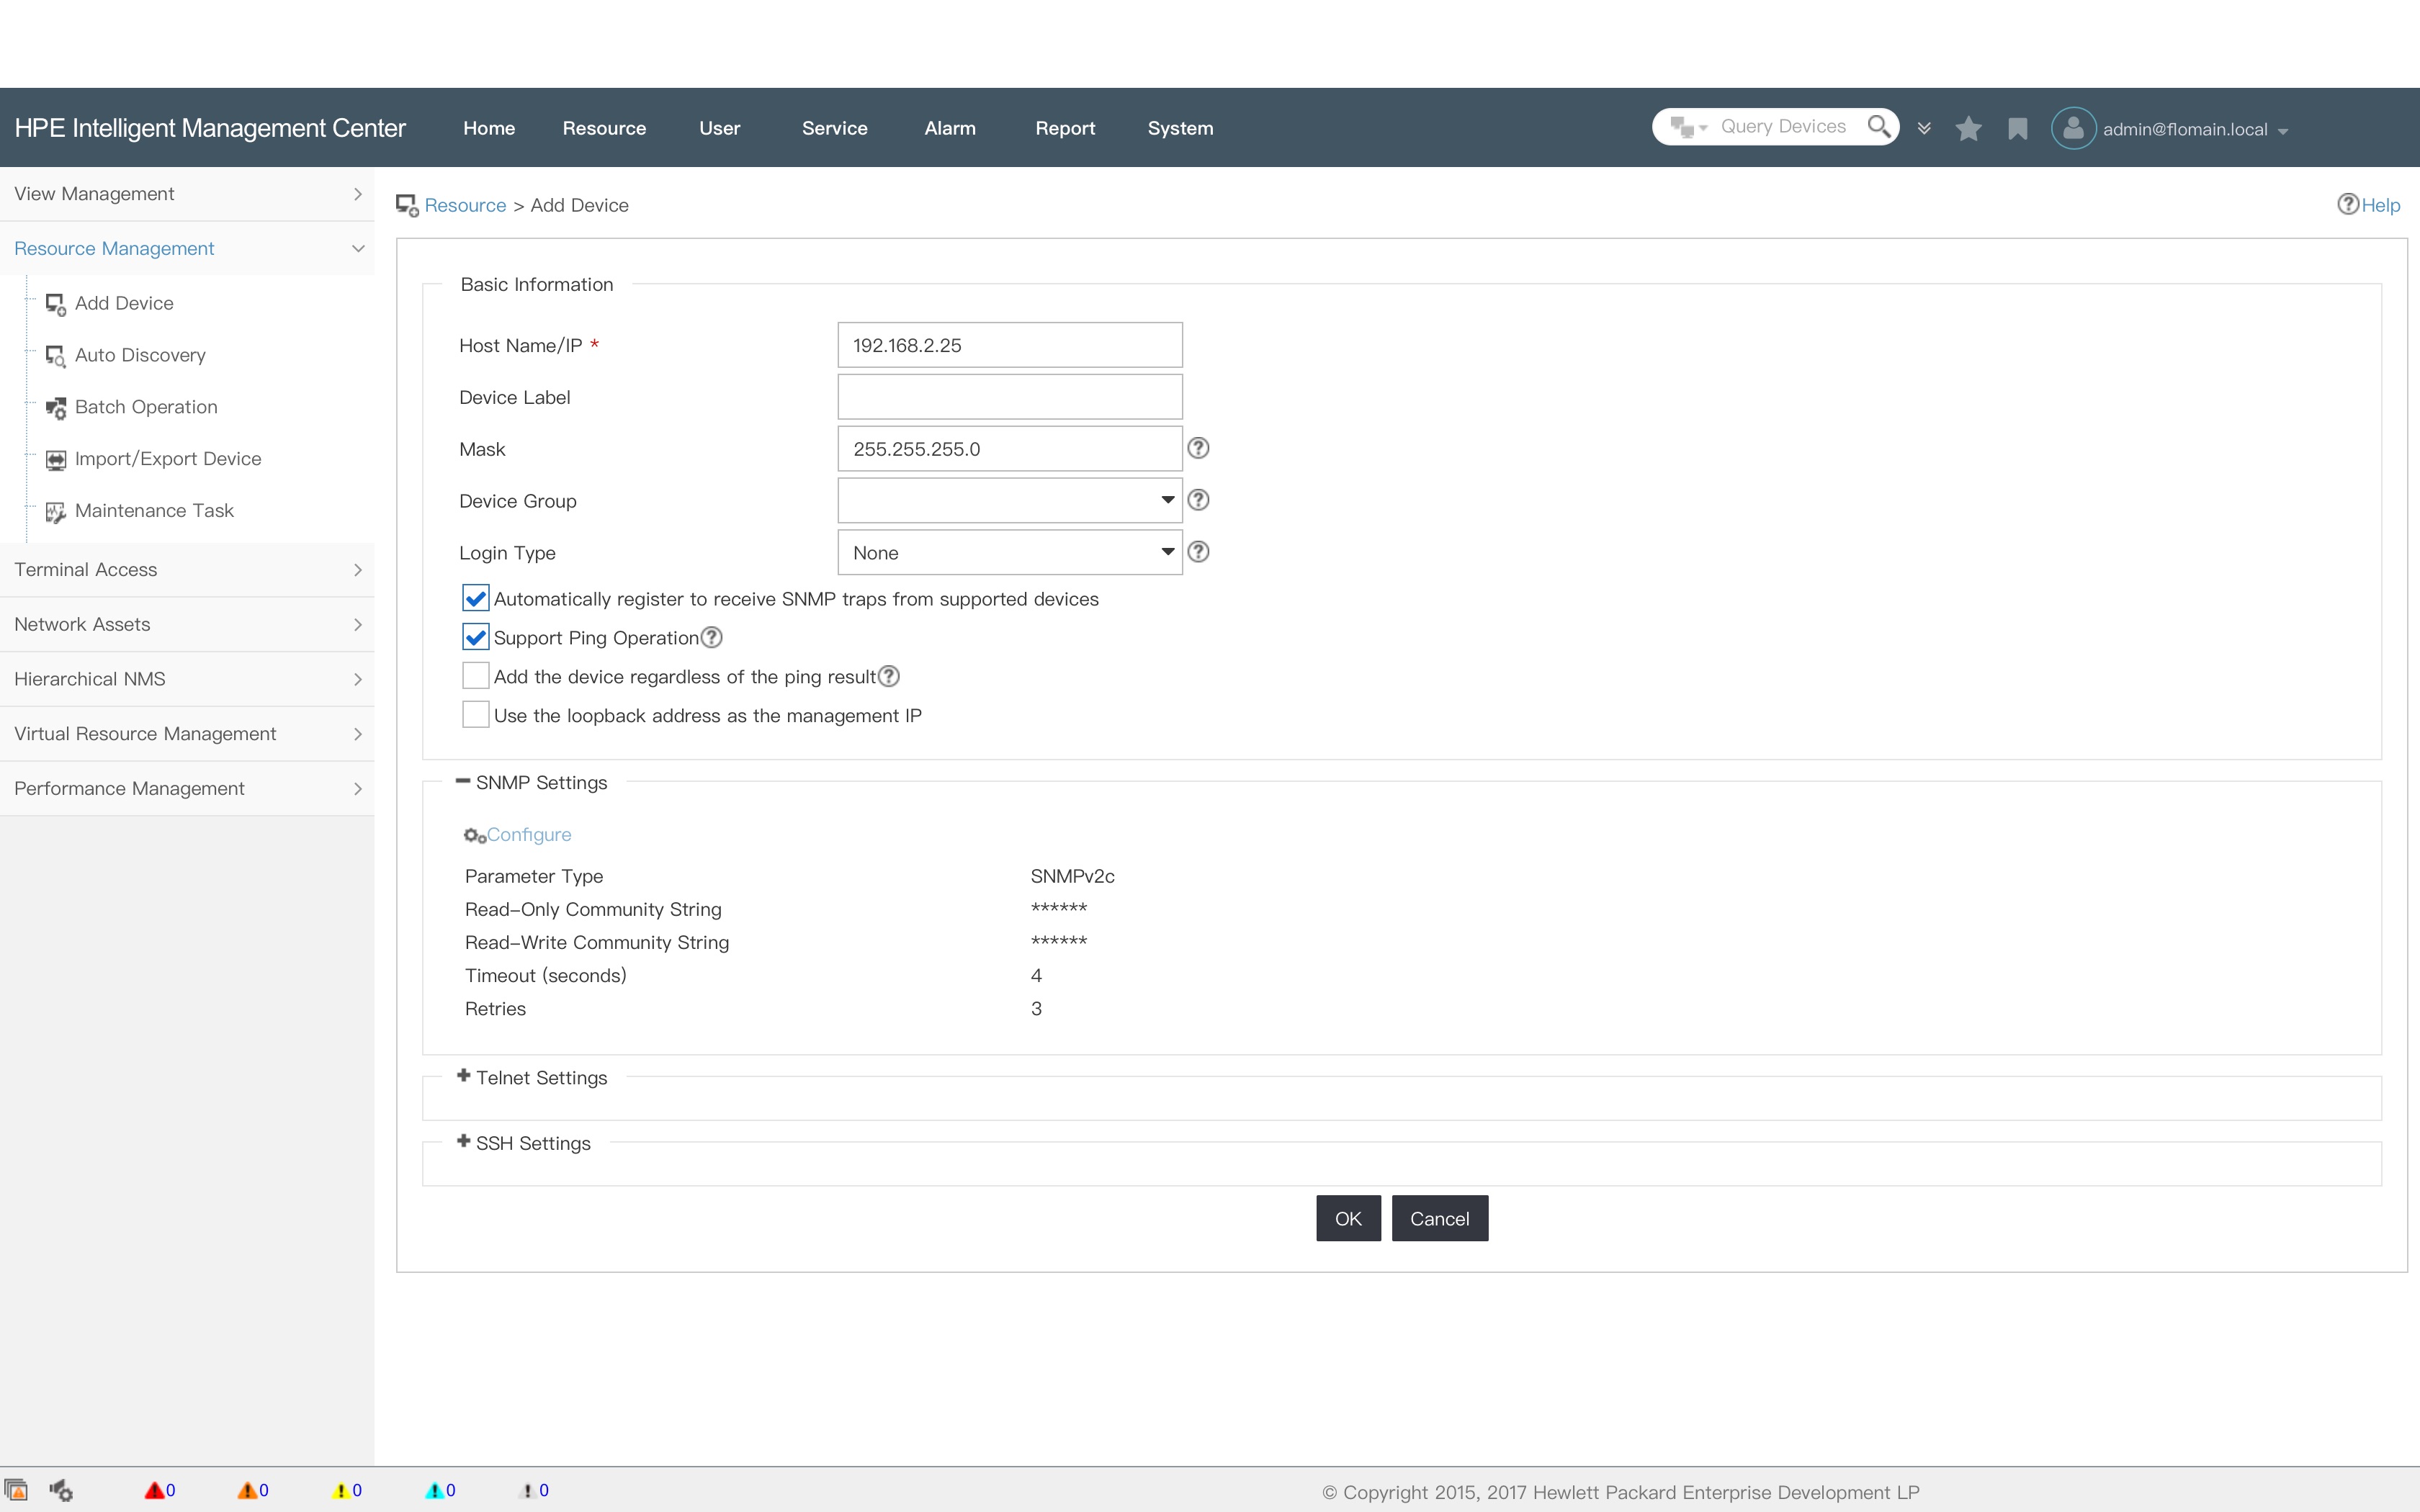
Afterward, add the server to iMC with the configured SNMP communities:
Click the “OK” button to let iMC discover the device. After the device is in iMC, you need to tell iMC to get hostnames via the DHCP agent. Get into this iMC directory:
C:\Program Files\iMC\server\confHere, you need to open this file:
qvdm.confAdd the following line to the end of the file:
l2topoPCNameDhcpSwitch = 1Now, you need to restart iMC.
iMC DHCP Agent: Install the Agent
The second part of this article is the installation of the iMC DHCP agent. In all installation packages for iMC and in most of the patch packages you find a folder called “Tools”. In this folder, you find the iMC DHCP agent. Both, for Windows and Linux.
Copy the zip file to the DHCP server and extract the content there. Copy the whole folder to a place where it is safe from incidental removal. Go to this folder:
dhcp-plug-windows\server\imf\server\confWithin this folder open this file:
imf.cfgChange the file to match your environment:
IMGAddress=192.168.2.25
IMGPort = 8800
Change the “IMGAddress” to the iMC address of your server. You do not have to change the “IMGPort” value. This is the default. On windows, both commands are in the same line. Keep it that way. I only changed it to make it more readable.
Make sure, that the port is not blocked by any firewall.
In the root folder, is the “installtion.bat” file. To install the service, run this file. It takes a moment to install everything.
Now, get into the “Services” list of the Windows Server and search for iMC. Get into the properties of the “iMC DHCP Plug” service and check if the “Startup type” is “Automatically”. Check also in the “Log On” tab, that the “Local System account” is selected.
Afterward. restart the DHCP server service.
iMC DHCP Agent: DHCP Server in the iMC GUI
If everything is working, you see the DHCP server in the iMC GUI as well. Login to iMC and go to “Resource–>Terminal Access–>DHCP Configuration”:
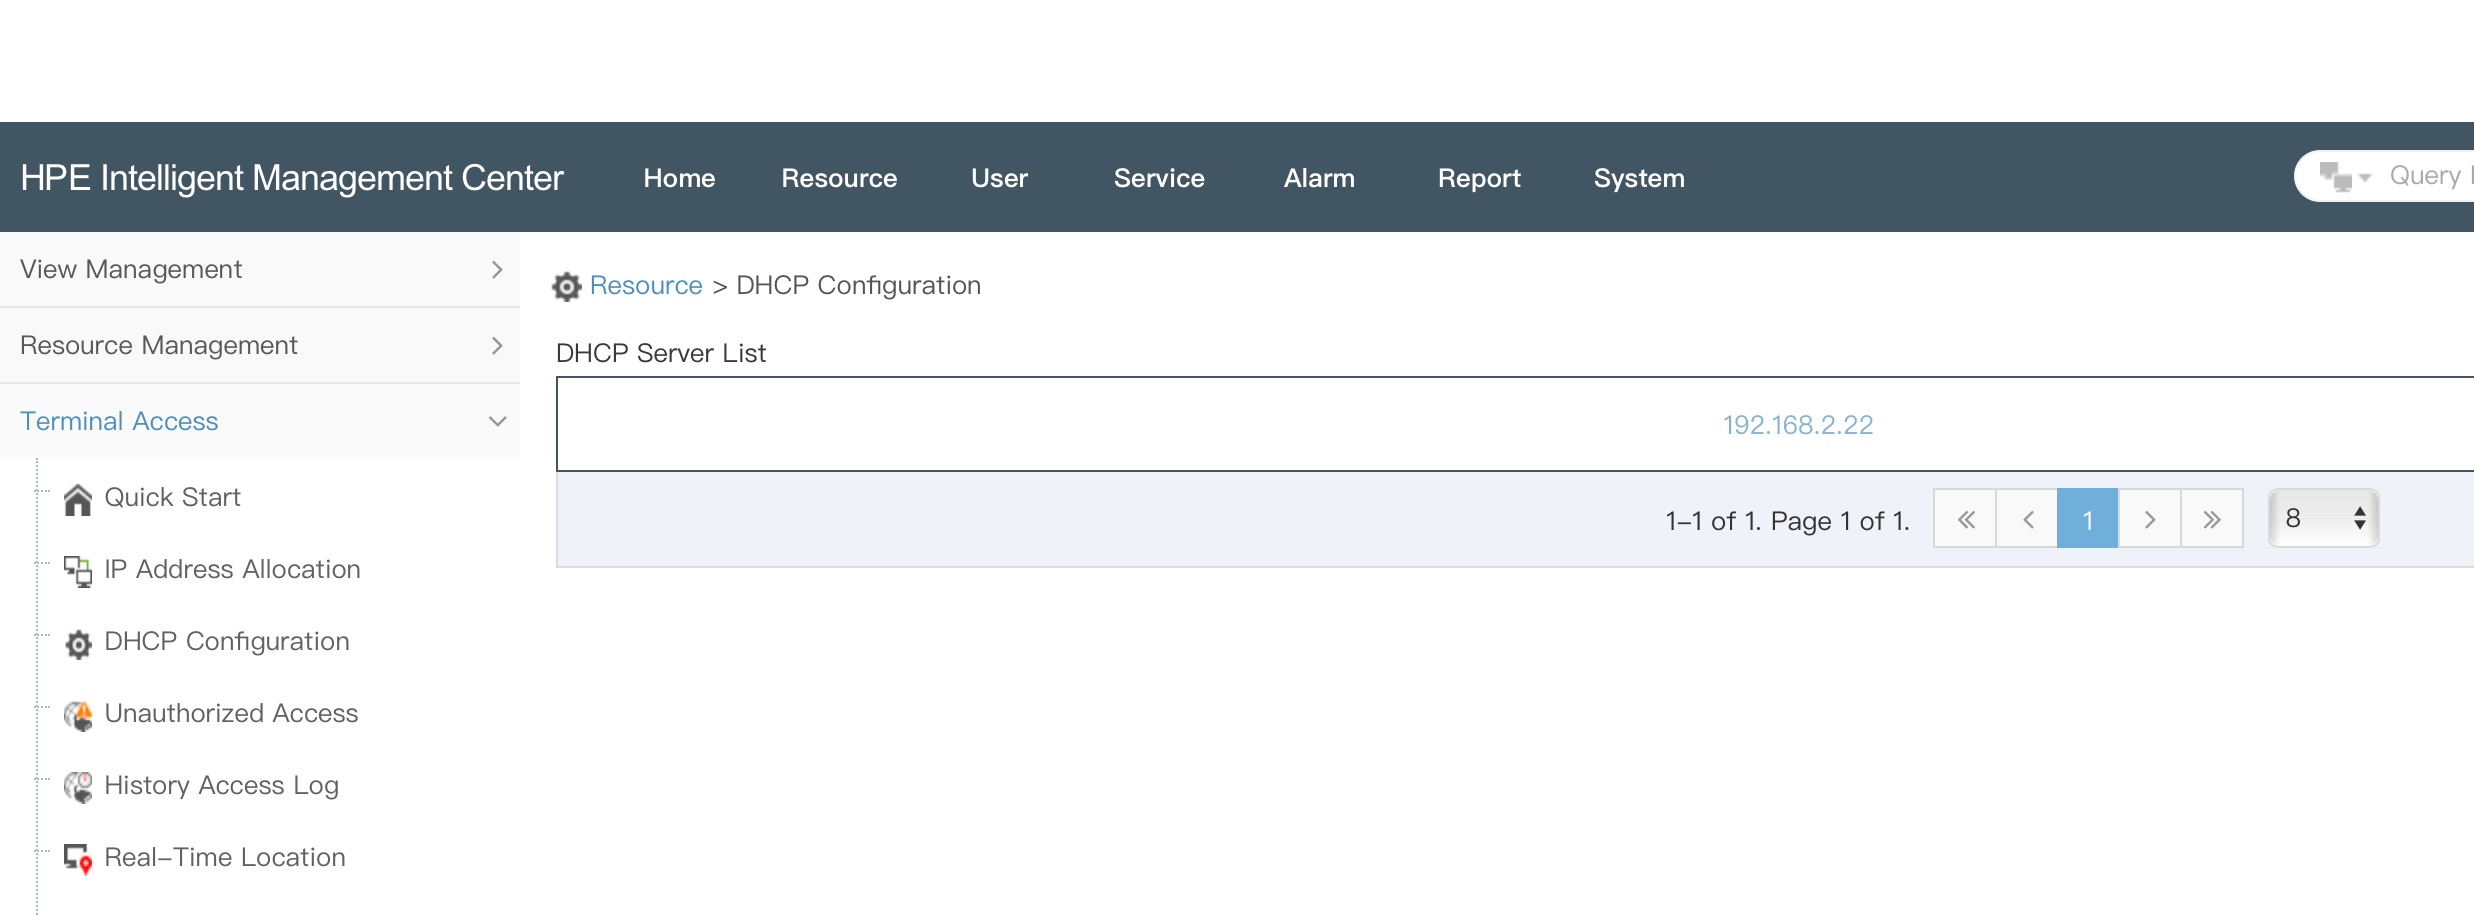
The DHCP server is in the “DHCP Server List”. You can click the IP of the server to get more information. Those include the different subnets, allocated IP’s and reserved IP’s. The main benefit of this, if you use the “History Access Log” in combination with the “Real-Time-Location” feature, you get the hostname from DHCP instead of only the IP and MAC address. This could save you important time during troubleshooting.
Feel free to send me your feedback or questions for this article with the help of the comment function below.
Hello,
thank you for the information
question do you try the new version in IMC 7.3 E706P06 it name IP Planning Management under User Tab
Hi Mohammad,
No actually not. Is there anything you would like to know about this feature/new name?
BR
Florian