This time, I write about the scenario, using Aruba Instant with external captive portal. With external portal, I did not mean ClearPass. It can be a simple web server, with a simple web page, hosing the captive portal. I show, how to send back the information to Instant AP and get the user online.
How Aruba Instant with External Captive Portal Works
In addition to the internal captive portal, the Aruba Instant solution also offers the ability to use an external captive portal for user authentication. As with the internal captive portal, every new user, gets redirected to the external captive portal. From that stage, the next steps depends on the defined process. Let’s assume, an easy username password login. The user insert username and password. Afterwards, the external captive portal sends those information back to the Instant AP. The Instant AP authenticates the user, either with the internal or external radius server. Depending on the answer, the client gets access or is redirected to the external captive portal page, again.
Another scenario could be, that the page shows the terms and conditions and the user checks the accept check mark to get access.
It is also possible to create a full self subscription architecture with an external radius server. The user gets the redirect to the external captive portal and subscribes to a guest service. The captive portal creates the user in the radius server and send the credentials to the client. With those credentials, the user can sign in to the external captive portal. The Instant AP authenticates the user, using the previously mentioned radius server.
In this post, I cover the first two scenarios. One page to login with the internal radius server and a page with only the terms and conditions. I share my created HTML code here, to make it even easier to reproduce.
How to Configure the External Captive Portal
The external captive portal on Aruba Instant is a separate profile. You can have multiple profiles and assign them to SSID’s or user roles.
To create an external captive portal profile connect to the Instant AP. Open the Security options and select External Captive Portal:

You see a list of available external portal profiles. You can edit existing profiles or create a new one. To create a new one, click the “New” button:
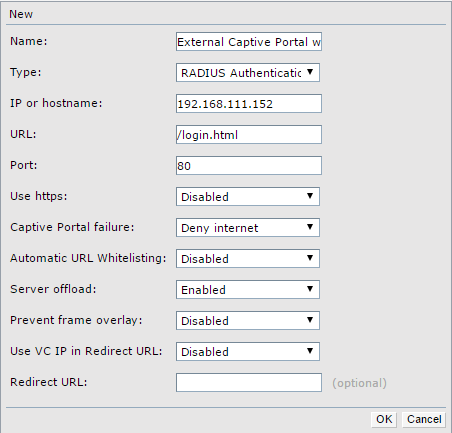
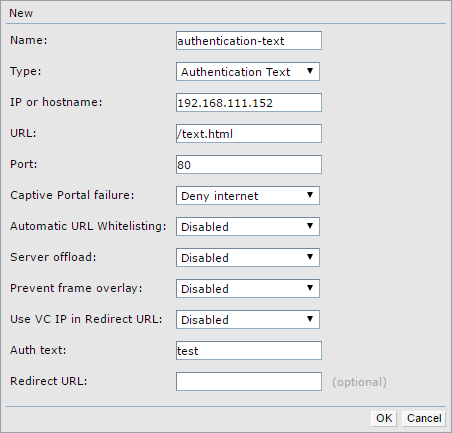
You get a list of options. I will not explain all of them as you can find here a complete description. The following options are the most important ones, to start:
- Name: This field is mandatory and have to be unique. Don’t make the name to long.
- Type: You have two options here
- Radius Authentication: The external captive portal sends the username and the password back to the Instant AP. With the username password combination the Instant AP sends the authentication request to a radius server.
- Authentication Text: The external captive portal authenticates the user without the Instant AP. To tell the Instant AP about the outcome of the authentication, the external captive portal includes the Authentication Text into the page, which is send to the user.
- Server offload: This option redirects only web traffic to the portal. App traffic is not redirected. This can save resources on the external captive portal.
Finally save the new profile with the click on the “OK” button.
Bind the External Captive Portal Profile to a SSID
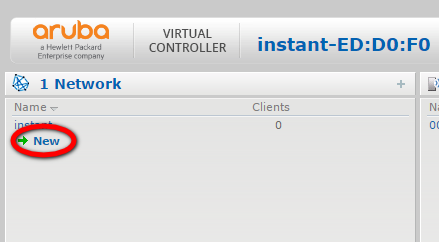
The next step is to create a new SSID and configure the external captive portal for that SSID. First, click on “New” in the network section:
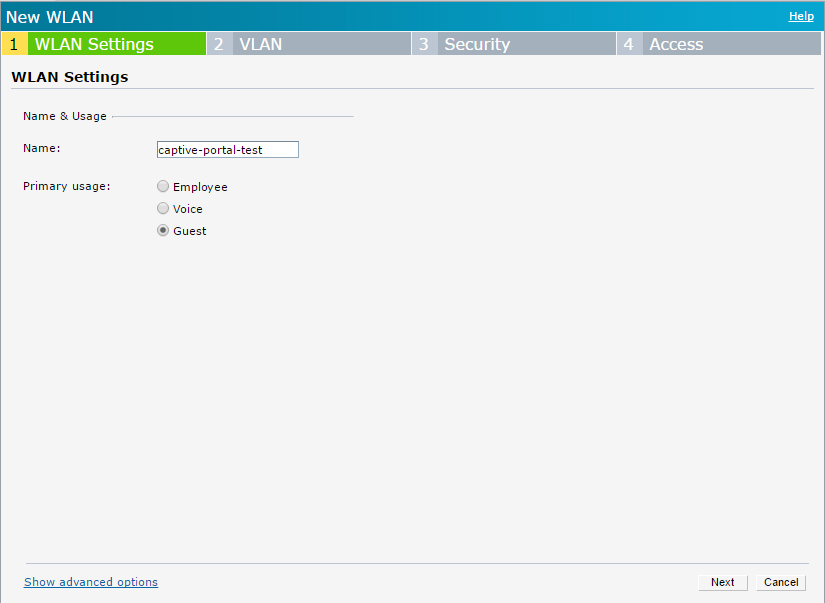
This opens the SSID wizard. On the first page, assign a name to the SSID and click “Next”:
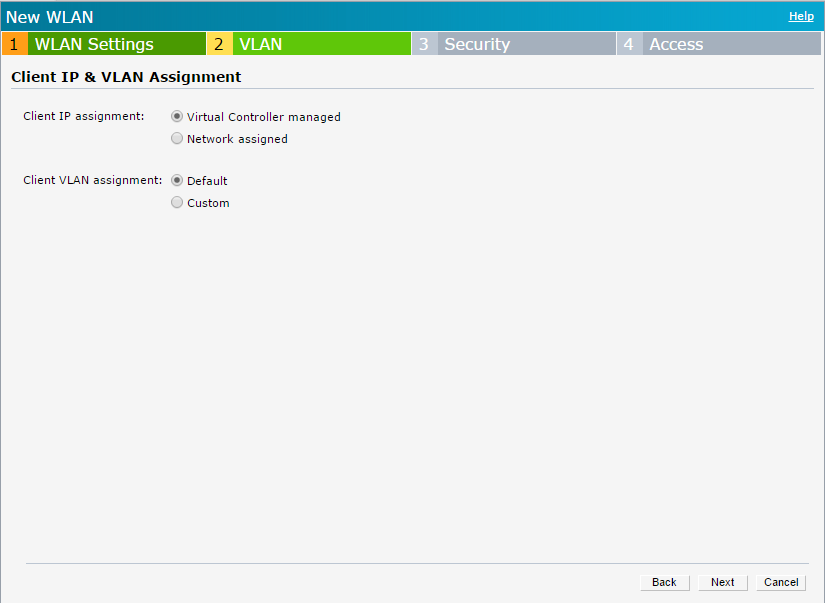
On the next page, you configure the VLAN. To make it simple in the first place, leave the default settings:
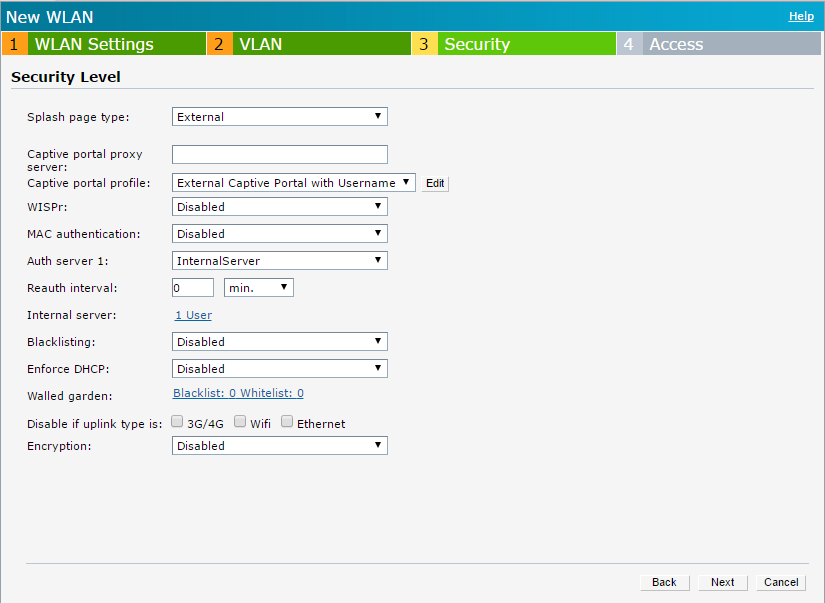
Now, we are getting to the interesting stuff. The following page includes the portal stuff. Select “external” for the “Splash page type” and also select the created external captive portal profile for “Captive portal profile”. The rest can stay with defaults:
Click next to get to the last page in the wizard. This page includes the access policies. For this example, leave it as it is. You can further enhance security by modifying those parameters:
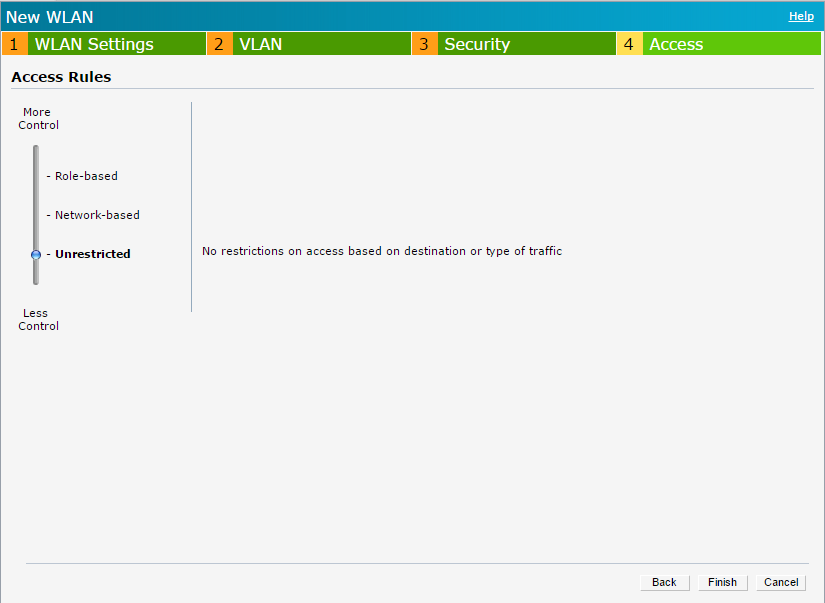
After you click “Finish” the SSID is ready to use. The AP starts to broadcast the SSID and any new user will be redirected to the external captive portal page.
Create the Captive Portal Page for Username Password
In the previous part, the Instant AP was configured to redirect new clients to an external captive portal. The next step is to create the captive portal page.
For my setup, I use a small Linux VM running Apache web server to host the page. When the user is redirected to the page, the Instant AP attached additional information to the URL. That information can help to select the best portal page for that user. For my example, the information sent from the Instant AP are those:
/login.html?
cmd=login&
mac=60:f4:45:0b:28:66&
essid=captive-portal-test&
ip=172.31.98.53&
apname=00%3A0b%3A86%3Aed%3Ad0%3Af0&
apmac=00%3A0b%3A86%3Aed%3Ad0%3Af0&
vcname=instant-ED%3AD0%3AF0&
switchip=securelogin.arubanetworks.com&
url=http%3A%2F%2Fcaptive.apple.com%2Fhotspot-detect.html
You can use the ESSID information to create a unique login page for every SSID, without the need to change something on the Instant AP and to simplify the configuration, by using only one external captive portal profile. Or the APNAME can indicate the branch office or location and the login page can include local information.
For my simple example, I will not use that information.
I will build a simple form with the username and password field and send that information back to AP. The whole HTML page looks like this:
<!doctype html>
<html lang="de">
 <head>
 <meta charset="utf-8">
 <meta name="viewport" content="width=device-width, initial-scale=1.0">
 <title>External Captive Portal with Username</title>
 </head>
 <body>
 <form method="POST" action="https://securelogin.arubanetworks.com/swarm.cgi">
 <input type="hidden" name="cmd" value="authenticate" />
 User Name: <br/> <input type="text" name="user" id="user"/>
 <br/>
 Password: <br/> <input type="password" name="password" id="password"/>
 <br/>
 <input type="submit" value="Login"/>
 </form>
 </body>
</html>
I have a simple form for username and password. It is sent to the Instant AP via this URL “https://securelogin.arubanetworks.com/swarm.cgi”.
If you changed the default certificate on the Instant AP, you need to adopt the URL, to match your certificate.
In the example above, I use only three fields:
- cmd: need to have the value “authenticate”
- user: this is the field for the username
- password: this is the field for the password
There are more fields available. The most useful one is “
Captive Portal Page for Authentication Text
I show also the second option, authentication text. First, create a new captive portal profile for authentication text:
Save the profile and assign the profile to a SSID. The steps are the same as with the radius authentication.
Second, you have to create a new login page. The new page could look like this:
<!doctype html>
<html lang="de">
 <head>
 <meta charset="utf-8">
 <meta name="viewport" content="width=device-width, initial-scale=1.0">
 <meta HTTP-EQUIV="refresh" CONTENT="5">
 <title>External Captive Portal with Authentication Text</title>
 </head>
 <body>
 This is a test page.
 </form>
 </body>
</html>
I have the authentication text “test”. If this string is somewhere in the HTML page, the user is authenticated. For my example, I simply put the string in the page and refresh the page automatically after 5 seconds.
This makes it very easy to automatically sign in users. It is also possible to create a welcome page, which includes the terms and conditions and an accept button which will bring up a new page, containing the authentication string.
You can get the same, with the radius based solution, by creating a hidden form and send a static
<!doctype html>
<html lang="de">
 <head>
 <meta charset="utf-8">
 <meta name="viewport" content="width=device-width, initial-scale=1.0">
 <title>External Captive Portal with Username</title>
 </head>
 <body>
 <form method="POST" action="https://securelogin.arubanetworks.com/swarm.cgi">
 <input type="hidden" name="cmd" value="authenticate" />
 <input type="hidden" name="user" id="user" value="test" />
 <input type="hidden" name="password" id="password" value="test" />
 <input type="hidden" name="url" id="url" value="https://www.flomain.de" />
 <input type="submit" value="Login"/>
 </form>
 </body>
</html>
The user gets only the “Login” button and after clicking on the button, the user gets redirected to my page.
That’s the simple default setup and work for most situations. In the next post, I will cover different deployment scenarios.
If you have any questions please use the comment function below. If you would like to provide feedback please contact me or use the comment function as well.
Hello blogger, I would like you to provide this article. I configured according to your method and found that the guest network is unreachable to “https://securelogin.arubanetworks.com/swarm.cgi”. What could be the reason for this? Thank you.
Hi txisfine,
To answer your question I need more information.
How is the IP assignment managed in your guest network? Did you change the captive portal certificate of the IAP?
BR
Florian
Hi Florian I came across your informative article whilst searching for an answer to difficulties I’m encountering trying to get Auth text to work with IAP-205 in the same way your write up states it can be done.
“It is also possible to create a welcome page, which includes the terms and conditions and an accept button which will bring up a new page, containing the authentication string”
I have not been able to get auth text to work if the authentication string used is on the second page. Can you provide more details??
We had a working solution like the one you have described above, however it stopped working around a month ago.
If we login on with an e.g. iphone we now get errors like :
404 Captive Portal
Not find ECP config
I suspect it has something to do with either:
Firmware upgrade of the AP’s, I think the certificate looks different than on other new units.
Do you have any ideas?
Hi Esben,
To be honest, this is not enough information to get a clue what might be wrong. I assume the error occurs during the redirect of the client? Did you use https? Are the certificates up to date and valid? On Both the external server and the IAP.
BR
Florian
The automatic refresh after 5 seconds finally fixed the Authentication Text for me, after months of trying to figure out why my text was not recognised.
Hi Victorwitkamp,
glad to read that I could help.
BR
Florian