In this post, I would like to show how to install Proxmox on
Check Requirements
Before you can start the installation, you should check if your host is able to install Proxmox. You should have the latest version of Debian Wheezy, Debian Jessie is currently not supported by P
You should also
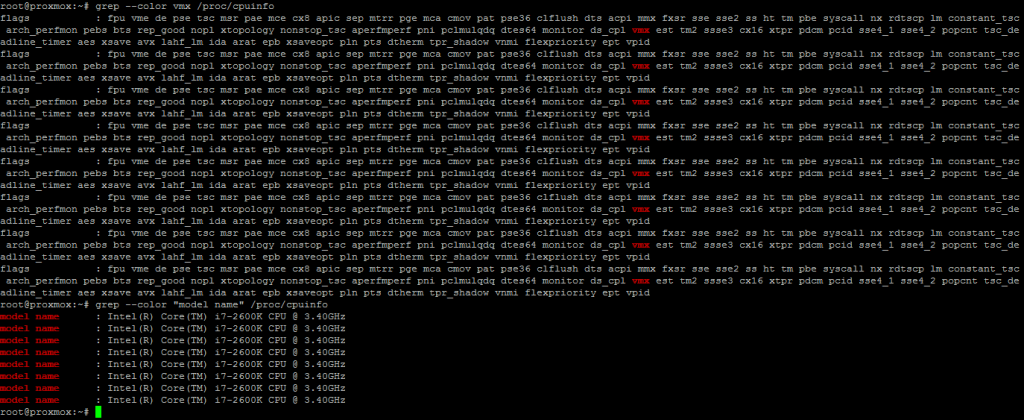
grep --color vmx /proc/cpuinfoor
grep --color svm /proc/cpuinfoFor an intel CPU it could look like this:

I do not have any AMD based system to get a sample output, but it should look similar.
You should also make sure, that you have the correct settings in your
127.0.0.1 localhost
192.168.2.10 proxmox.hpn.local proxmox

# The following lines are desirable for IPv6 capable hosts
::1 localhost ip6-localhost ip6-loopback
ff02::1 ip6-allnodes
ff02::2 ip6-allrouters
If you can make a check mark on the above requirements, head over to the next step.
Install Proxmox
To install proxmox on your system, you have to add the repository to your source list:
vi /etc/apt/sources.listAdd the following line:
# PVE repository provided by proxmox.com, only for installation (this repo will stay on 3.1)
deb http://download.proxmox.com/debian wheezy pve
Before you can use this repository, you ave to import the repository key:
wget -O- "http://download.proxmox.com/debian/key.asc" | apt-key add -Update your system:
apt-get update && apt-get dist-upgradeThis will fetch the information from the added repository and install the proxmox kernel.
If not automatically done with the update above, install the Proxmox kernel:
apt-get install pve-firmware pve-kernel-2.6.32-26-pveNow, the tricky part starts. If you have no physical access to the server, you need to be very careful with the next step. It could happen that you machine will not boot correctly.
You have to configure grub that way, that the Proxmox kernel is loaded automatically. During the installation of the Proxmox kernel, you will see those lines:
Generating grub.cfg ...
Found linux image: /boot/vmlinuz-3.2.0-4-amd64
Found initrd image: /boot/initrd.img-3.2.0-4-amd64
Found linux image: /boot/vmlinuz-2.6.32-26-pve
Found initrd image: /boot/initrd.img-2.6.32-26-pve
done
This will tell, which options are available at the boot screen. The default value for grub is “0”. This means, that the first line is option “0”. You should boot line number “3”, which means we need to tell grub to use option “2” for default. To change the default option open this file:
vi /etc/default/grubLook for this entry:
GRUB_DEFAULT=0I have to change it to “2”:
GRUB_DEFAULT=2Save the file and update grub with the new configuration:
# update-grub
Generating grub.cfg ...
Found linux image: /boot/vmlinuz-3.2.0-4-amd64
Found initrd image: /boot/initrd.img-3.2.0-4-amd64
Found linux image: /boot/vmlinuz-2.6.32-26-pve
Found initrd image: /boot/initrd.img-2.6.32-26-pve
done
Using this command will also bring up all boot options, if you missed it in the first place.
You can now reboot your system.
If you system is back online, you can check if the correct kernel was booted by:
uname -a
Linux 2.6.32-26-pve #1 SMP Mon Oct 14 08:22:20 CEST 2013 x86_64 GNU/Linux
The important part is “-pve”.
You can now remove the debian default kernel by:
apt-get remove linux-image-amd64 linux-image-3.2.0-4-amd64 linux-baseIf you do so, you have to change the grub configuration again.
Generating grub.cfg ...
Found linux image: /boot/vmlinuz-2.6.32-26-pve
Found initrd image: /boot/initrd.img-2.6.32-26-pve
done
For me, it is now “0” again.
The last step, is to install the rest of the Proxmox files:
apt-get install proxmox-ve-2.6.32 ntp ssh lvm2 postfix ksm-control-daemon vzprocps open-iscsi bootlogdThis will install a lot of packages.
You can now remove the Proxmox repository from your source list again. If you do not have a commercial support contract you have to remove the commercial repository from your system. Therefore open this file:
# vi /etc/apt/sources.list.d/pve-enterprise.listand remove those lines:
deb https://enterprise.proxmox.com/debian wheezy pve-enterpriseand add those lines:
# PVE pve-no-subscription repository provided by proxmox.com, NOT recommended for production use
deb http://download.proxmox.com/debian wheezy pve-no-subscription
Update the system to the latest Proxmox version:
# apt-get update && apt-get dist-upgradeAs this will install a newer kernel version, reboot the last time.
You can now access the GUI of Proxmox by using this url:
You can use your root credentials, to login to the system.
The next step would be to create networking for the VM’s. I will write a post about the network configuration next time.
If you have any questions, regarding this post or if you would like provide feedback, please use the comment function below.