In this post I will explain the new UAM page push policy in iMC, which was introduced with
The UAM page push policy will replace the portal selection in the “Access Policy”, which means, you cannot select any portal anymore in the “Access Policy”. You have to create an UAM page push policy on order to present a non-default portal to your user. If no policy is created, the default portal will be presented to the user.
Create an UAM Page Push Policy
You can create two types of the UAM page push policy, which are different in the type of authentication. There is a mac-based authentication method, which is used for the BYOD authentication and the portal-based authentication method for normal portal authentication. I will show how to create a new UAM page push policy for portal authentication, but the same rules also apply to the mac-based authentication for BYOD.
To change or create a new UAM page push policy go to “User–>User Access Policy–>Page Push Policy”. This will bring up the following page:
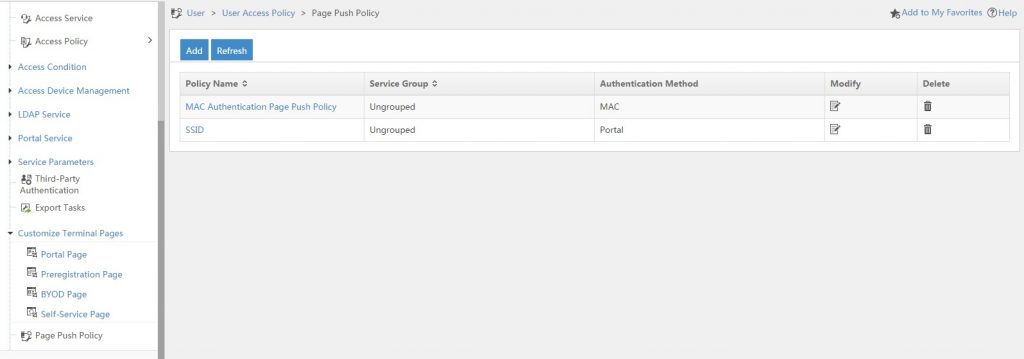
For a new iMC installation, this page should be empty, for those who upgraded from an earlier version of iMC, the page should have some default created policies. Those policies will be automatically created by the update process when access policies
To create a new UAM page push policy simply click on the “Add” button:
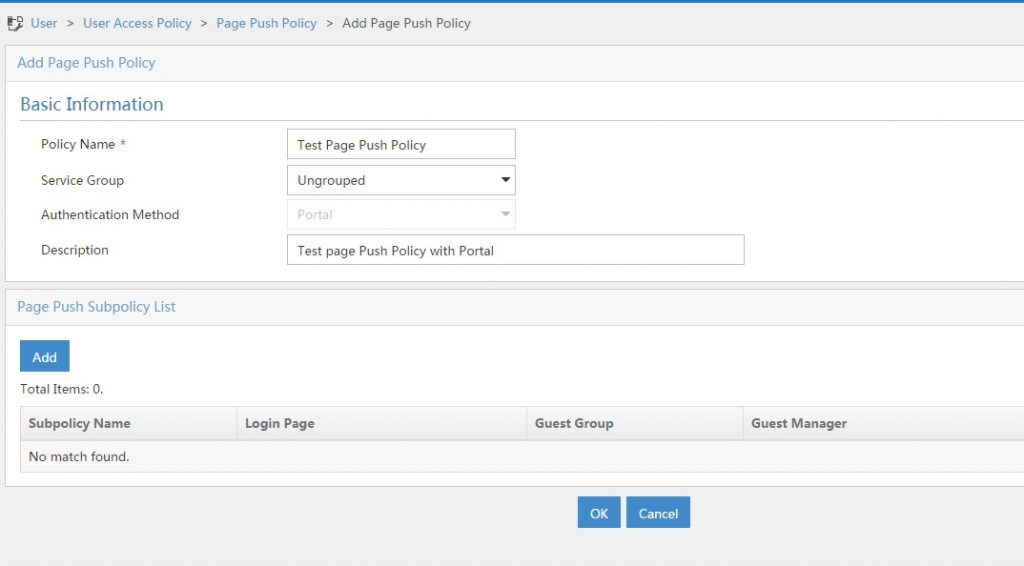
You should find a name for the policy and create a description. As I already have a mac-based policy, I cannot create another one. But if this is the first policy you create, you are able to select “Portal” or “MAC” for the authentication method. To select the portal, which should be presented to the user, you have to add subpolicies by clicking the “Add” button:
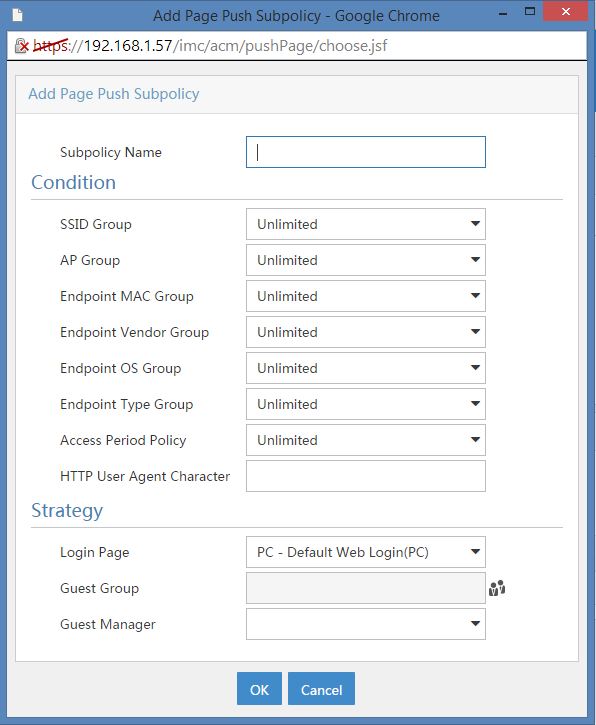
With the help of this dialog you can create a lot of scenarios, like the access scenarios in the access service. After choosing a name for the subpolicy, you can select different conditions. As you can see, they are the same as the “Access Conditions”. Before you can select them in this dialog, you need to create those “Access Conditions” under “User–>User Access Policy–>Access Conditions”. You can also specify a “HTTP User Agent Character”. The last step, is to select the “Login Page” and the “Guest Manager”. Choosing the “Guest Manager” is a great way to assign guests to the correct guest manager. For example, you have different locations with different guest managers. You can now create a subpolicy for every location with the corresponding guest manager.
If you only need to push the same page to every user connecting to a SSID, you only create a SSID group and select this group in the dialog above. To save the subpolicy click “OK”.
Afterwards, you can add another subpolicy or save the UAM page push policy.
As you can see, it is very easy and flexible to push terminal pages to your guests and the UAM page push policy is a very great enhancement.
If you have any further questions, leave me a comment.