This post will describe the process of installing your own iMC webserver certificate for the iMC webserver. We will create a certificate template for Windows Server 2008R2 and use this template for the certificate. This certificate is than exported and used as the iMC webserver certificate. Most of the information comes from the HP documentation on this site:
HP iMC – How to install User Certificates on the iMC Server
I use the latest iMC version for this post, which is iMC 7.1. The certificate in iMC is stored in a Java keystore. The file is located at “[iMC installation dir]iMCclientsecurity” and the file name is “newks”. We need to create a new keystore file with the new certificate information. The good news is, that iMC has all the needed tools included. Before we start with iMC, we need to create the certificate. I will use windows server 2008R2 as a certificate server.
Create a certificate with Windows Server 2008R2
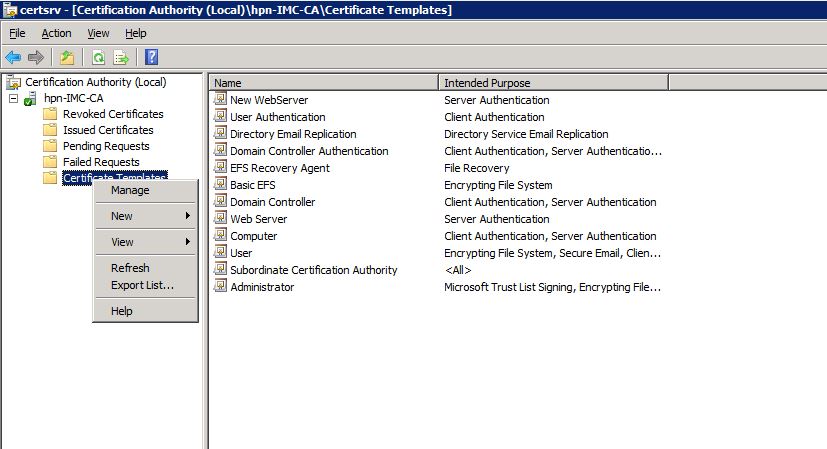
I assume that windows server is installed with the certificate authority role.I will use a modified version of the web server template as the iMC webserver certificate. Simply open the “Certificate Authority” management console, right-click on “Certificate Templates” and select “Manage”:
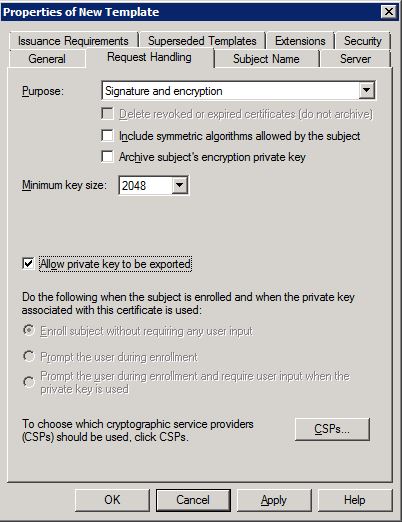
You will see a list with all available certificate templates. Look for the “Web Server” template and duplicate this certificate by using a right-click on the certificate and click “Duplicate Template”. Select Windows Server 2003 Enterprise and click “OK”. The properties window will appear. Click on “Request Handling” and check the check box for exporting the private key:
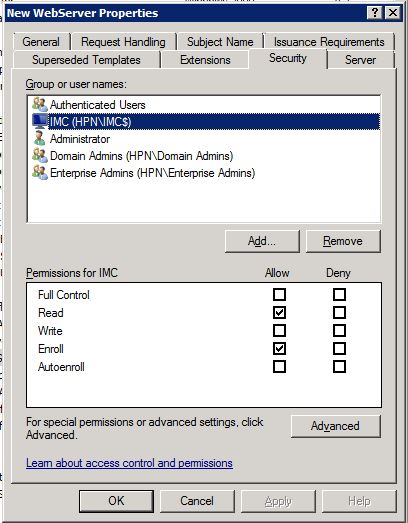
Go to the “Security” tab and add the iMC server to the list of objects who can get access to the certificate:
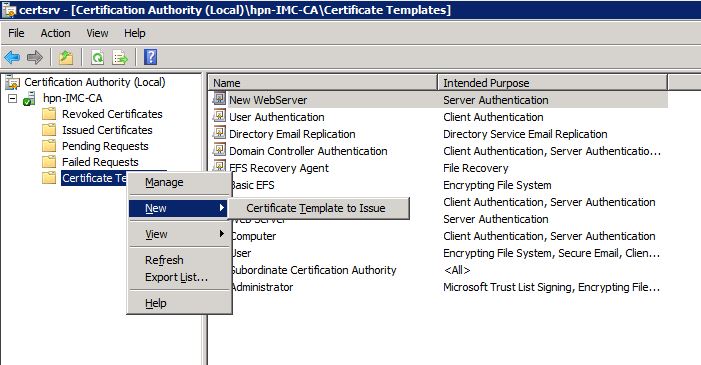
Don’t forget to assign a name to the template and click “OK”. This will save the template. Close the “Certificate Template Console” and do a right-click on “Certificate Templates” and navigate to “New–>Certificate Template to Issue”:
Select the created certificate template and click on “OK”. The created certificate will now be in the list of available certificate templates.
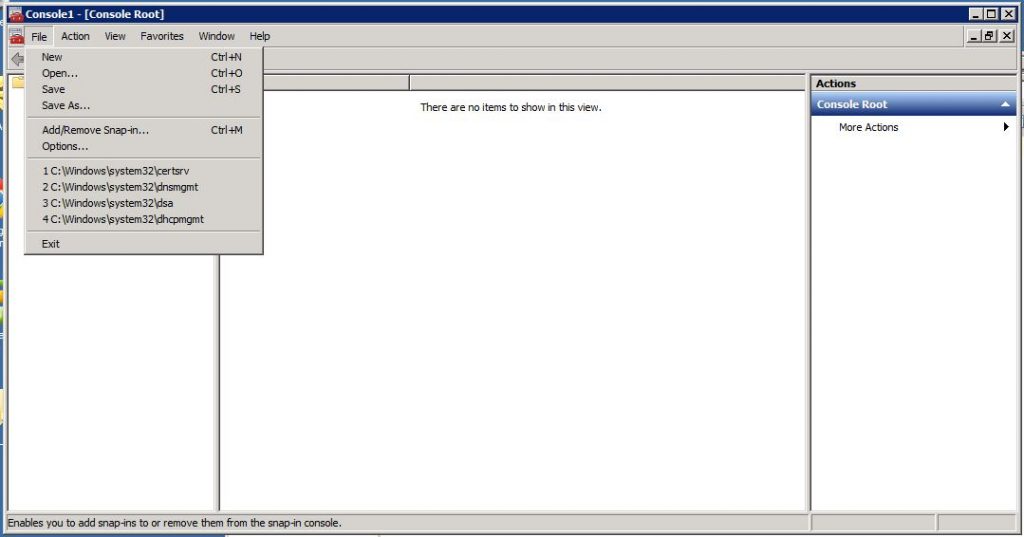
The next step is to request this certificate from the CA with the iMC server. Head over to the iMC server and open the certificate MMC by open the “Microsoft Management Console”. Click on “File–>Add/Remove Snap-in” to add the “Certificates” Snap-in:
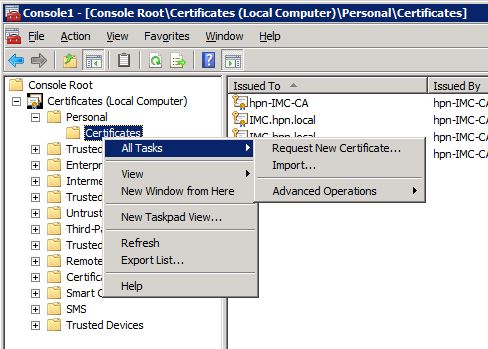
When asked, select “Computer account” and click “Next” and select the “Local Computer”. Click “OK” to add the console. Navigate to the “Personal” certificates and right-click on “Certificates” to select “All Tasks–>Request New Certificate”:
Click “Next” and select the “Active Directory Enrollment Policy” and click again “Next”. On this page check the checkbox for the template, we created earlier. Click on the yellow warning triangle to insert additional information for the certificate:
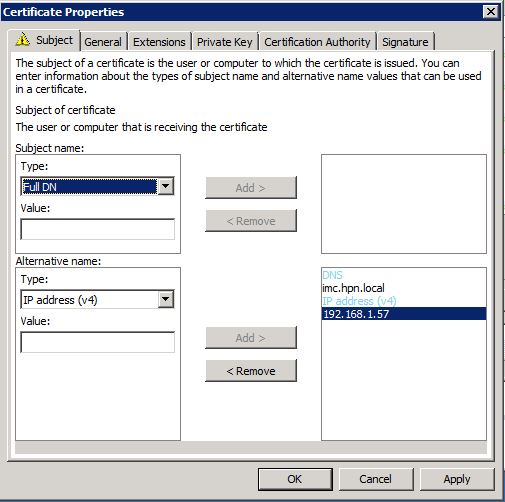
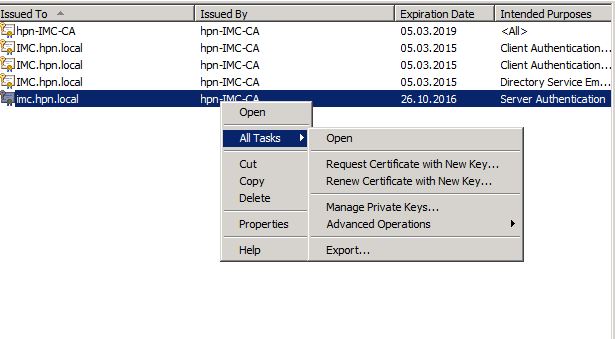
I only use “Alternate Name” for DNS and IP. Click “OK” to save the settings. Click “Enroll” and you will find the certificate in your certificate store. You can now export the certificate using the certificate snap-in. Just right-click on the enrolled certificate and navigate to “All Tasks–>Export”:
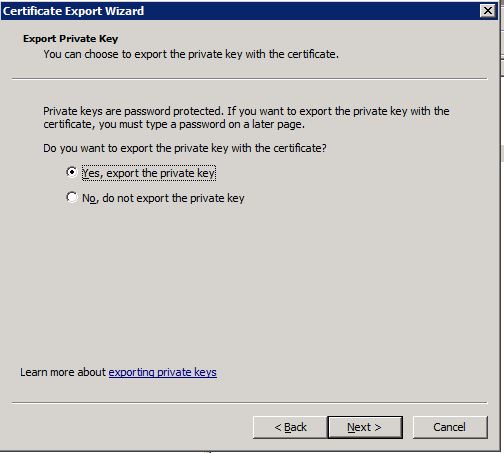
The wizard will guide you through the process of export. Just make sure, you select to export the private key:
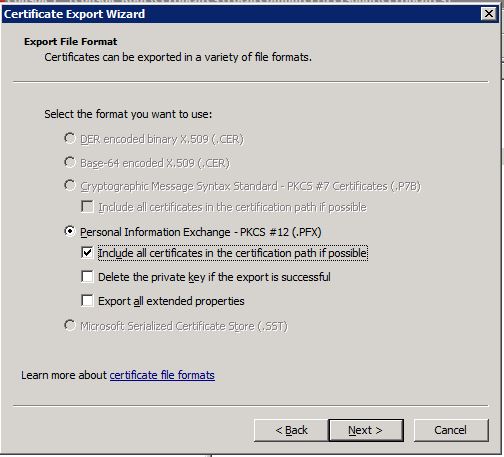
On the next page select to include the whole certificate chain:
The rest of the wizard is obvious and self-explaining. After you have finished the export of the certificate you can start to import this certificate into iMC and use it as the new iMC web server certificate.
Import the iMC Webserver Certificate
To start the import of the iMC webserver certificate you need to use the tools provided by iMC. Open a command line and navigate to “[iMC installation directory]\deploy\jdk\bin”. The first step is to convert the certificate to a
C:\Program FilesiMC\deploy\jdk\bin:keytool.exe -importkeystore -srckeystore c:\Users\Administrator\Desktop\imc.pfx -destkeystore c:\Users\Administrator\Desktop\newks_imc -srcstoretype pkcs12 -deststoretype JKS -storepass iMCV500R001 -v
Geben Sie das Passwort f³r den Quell-Keystore ein:
Eintrag f³r Alias le-newwebserver-72c54659-887d-47e5-b845-b7f56dd3b9ea erfolgrei
ch importiert.
Importbefehl abgeschlossen:  1 Eintrõge erfolgreich importiert, Fehler oder Abbr
uch bei 0 Eintrõgen
[c:\Users\Administrator\Desktop\newks_imc wird gesichert.]
********UPDATE August 21st 2017********
Since version 7.3 E0506 you do not need to use the password from above. You can use your own password.
*****************************************
The password is needed, as the iMC server is expecting a password for the
le-newwebserver-72c54659-887d-47e5-b845-b7f56dd3b9eaWe need this alias for the next steps.
Now, we need to change the alias to the one, iMC is expecting. Run this command on the created
C:\Program Files\iMC\deploy\jdk\bin:keytool.exe -keyclone -keystore c:\Users\Administrator\Desktop\newks_imc -alias le-newwebserver-72c54659-887d-47e5-b845-b7f56dd3b9ea -dest imc
Geben Sie das Keystore-Passwort ein:
Geben Sie das Passwort f³r  ein.
Geben Sie das Passwort f³r  ein.
        (EINGABETASTE, wenn selber Name wie f³r )
For the guys with no
********UPDATE August 21st 2017********
Since version 7.3 E0506 you do not need to use the password from above. You can use your own password but it should be the same, which was used for the keystore file itself.
*****************************************
Now, we need to remove the original alias from the keystore:
C:\Program Files\iMC\deploy\jdk\bin:keytool.exe -delete -keystore c:\Users\Administrator\Desktop\newks_imc -alias le-newwebserver-72c54659-887d-47e5-b845-b7f56dd3b9ea
Geben Sie das Keystore-Passwort ein:
You need to provide the password for the
C:\Program Files\iMC\deploy\jdk\bin:keytool.exe -list -v -keystore "c:\Users\Administrator\Desktop\newks_imc"********UPDATE August 21st 2017********
Since version 7.3 E0506 you do not need to copy the key store file manually into a folder in the iMC directory. You can use the iMC GUI to import the file. Log into iMC and go to “System–>System Configuration–>HTTPS Access Settings”:
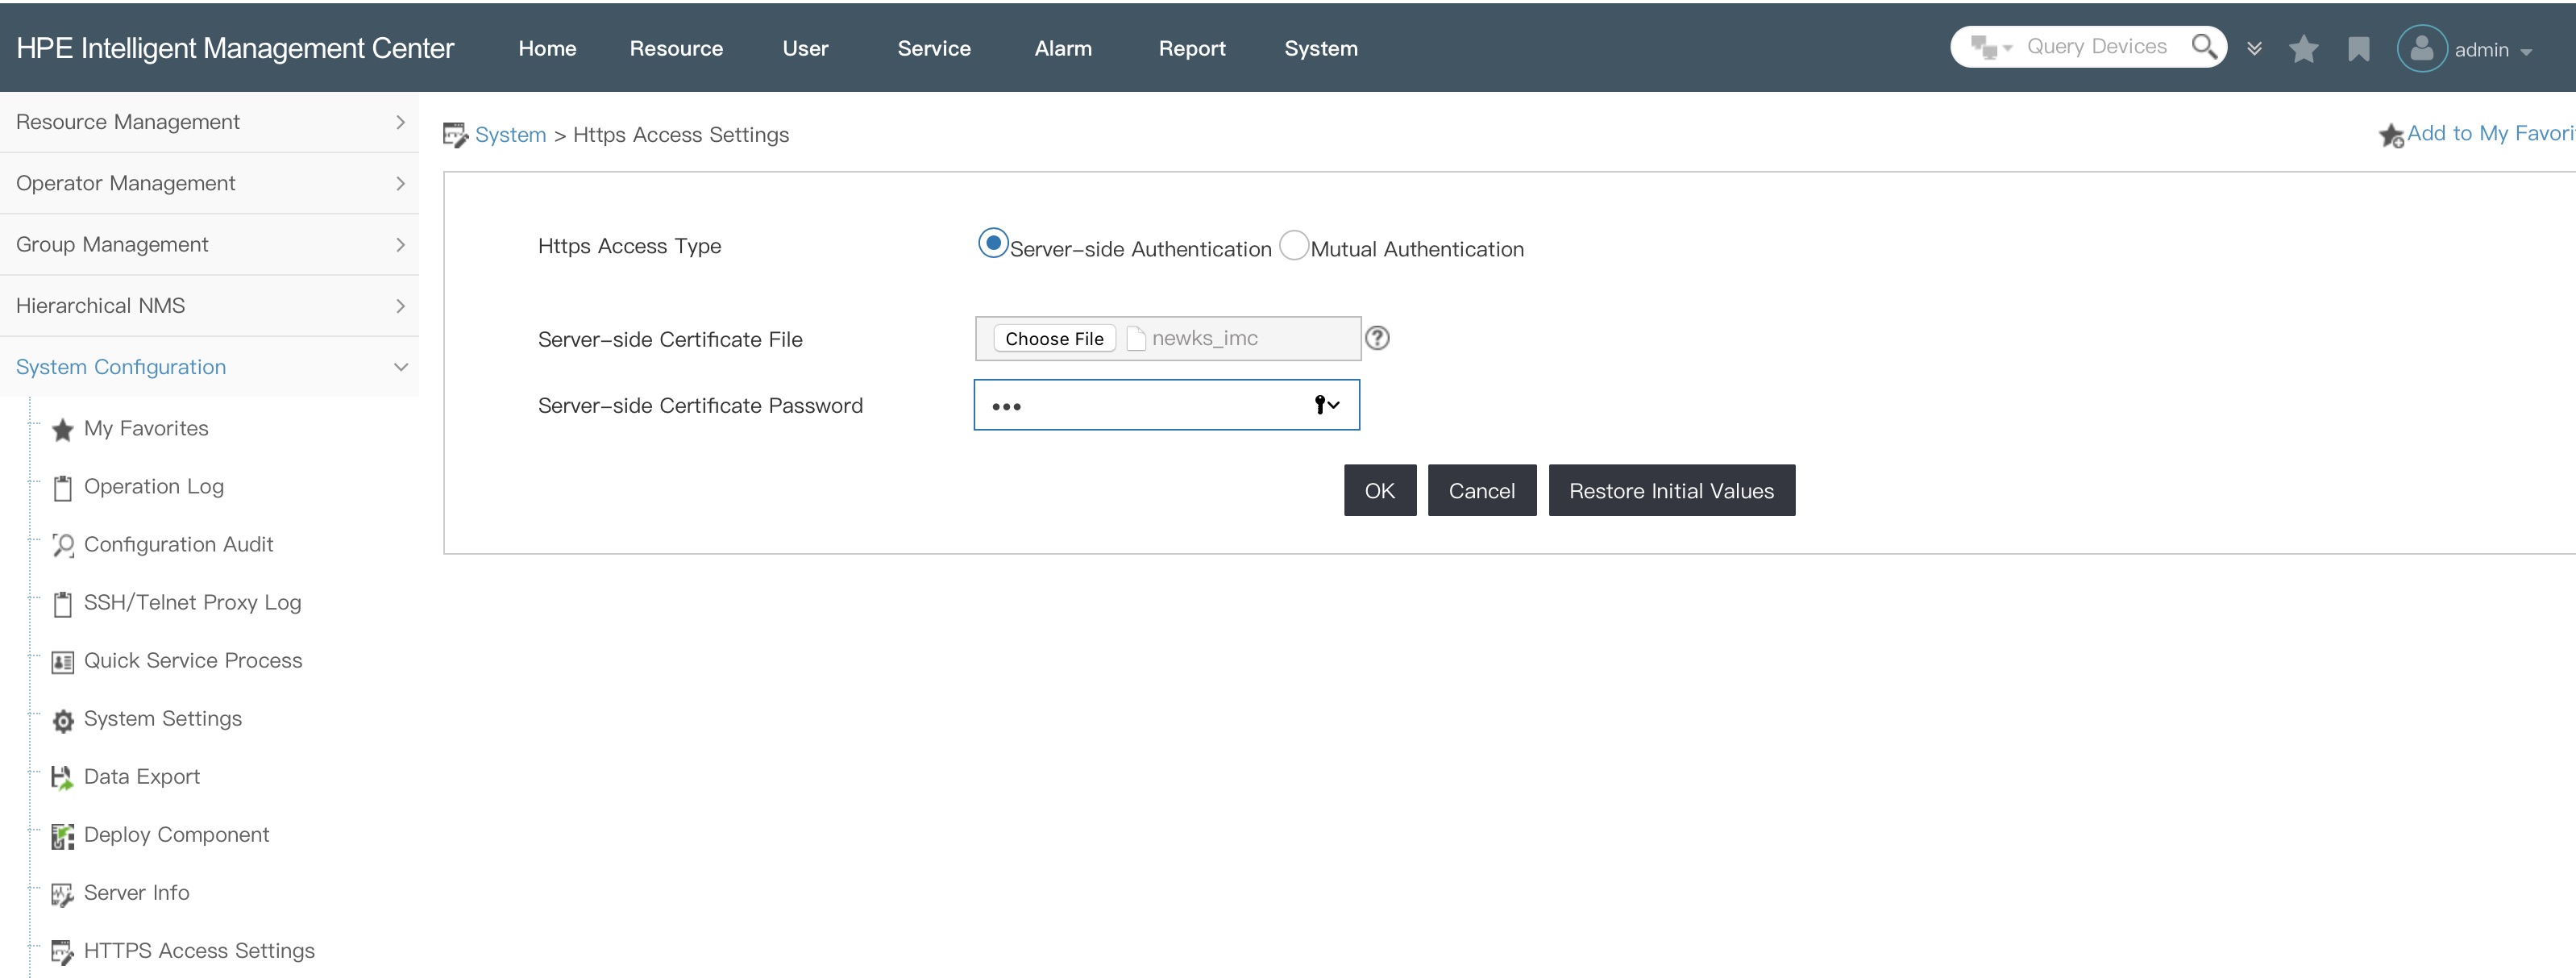
On this page, you can select the key store file from above and you need to enter the password for the file itself and for the key itself. Afterwards, you have to restart iMC and the new key file with the new certificate is used.
*****************************************
The last step is to copy the new
As mentioned above, the iMC webserver certificate is stored in the “[iMC installation dir]\iMC\client\security” directory in the “newks” file. I recommend to backup the original iMC weberver certificate by rename the “newks” file to “newks.backup”. Now, copy the new iMC webserver certificate by copying the create keystore file into the directory.
Afterwards, restart iMC and check with a browser of choice if the new iMC webserver certificate is used.
For this post I also used the information from those two blogs:
Importing a Digital Certificate to HP’s Intelligent Management Center (iMC)
Installing HP iMC – Intelligent Management Center
*** Update 25.11.2014***
It looks like iMC will override the “newks” file when doing an update. At least, the upgrade from 7.1 E0302 to 7.1 E0303 changed my certificate back to the default one. Simply copying the created “newks” file into the “security” directory solved the issue. Looks like this has to be one step in my upgrade path.
*** End of Update***
For any questions or feedback, please us the comment function.