Have you ever heard of someone asking for wired guest access? Why should you use wired guest access, when WLAN is available? For those, who need this kind of guest access, the following post is very interesting.
I can think of the following scenarios, where you could need wired guest access:
- You have a WLAN installation which does not support captive portal, or you would like to use ClearPass for the captive portal, but your infrastructure does not support captive portal with ClearPass.
- You have switches which do not support a captive portal or which do not support captive portal with ClearPass.
Bot scenarios assume, that you put your clients into a guest VLAN and you terminate this guest VLAN on an Aruba IAP. You can also use an Aruba Controller. But for this post, I use an Aruba Instant Access Point (IAP). The only requirement is, that the IAP has at least 2 ethernet ports. I use the IAP225 for this setup.
Wired Guest Access – Topology
The topology for the wired guest access setup is very simple. I have a switch with two VLAN’s, 202 and 203. I use VLAN 202 for the management and VLAN 203 for my wired guest users. Below, is a schema of the physical and logical connection between the IAP and the switch. I highlight only the important information:
 _____               _____
|  S  |             |  A  |
|  W  5---VLAN203---2  P  |
|  I  |             |  2  |
|  T  7---VLAN202---1  2  |
|  C  |             |__5__|
|__H__|
I have a DHCP server in VLAN 202, so the IAP can get an IP address. For VLAN 203, I configure the IAP to serve clients with IP addresses. I use NAT to translate the private addresses in VLAN 203 to the IAP address in VLAN 202. With NAT, you do not have to work with routing. If you prefer routing, you should consider a controller, instead of an IAP.
If you enable LLDP on the IAP and the switch, you might get a warning because of different PVID’s. This is because the IAP use the Magic VLAN 3333 internally. To avoid the warning, configure VLAN 3333 for the guest users.
Wired Guest Access – IAP Configuration
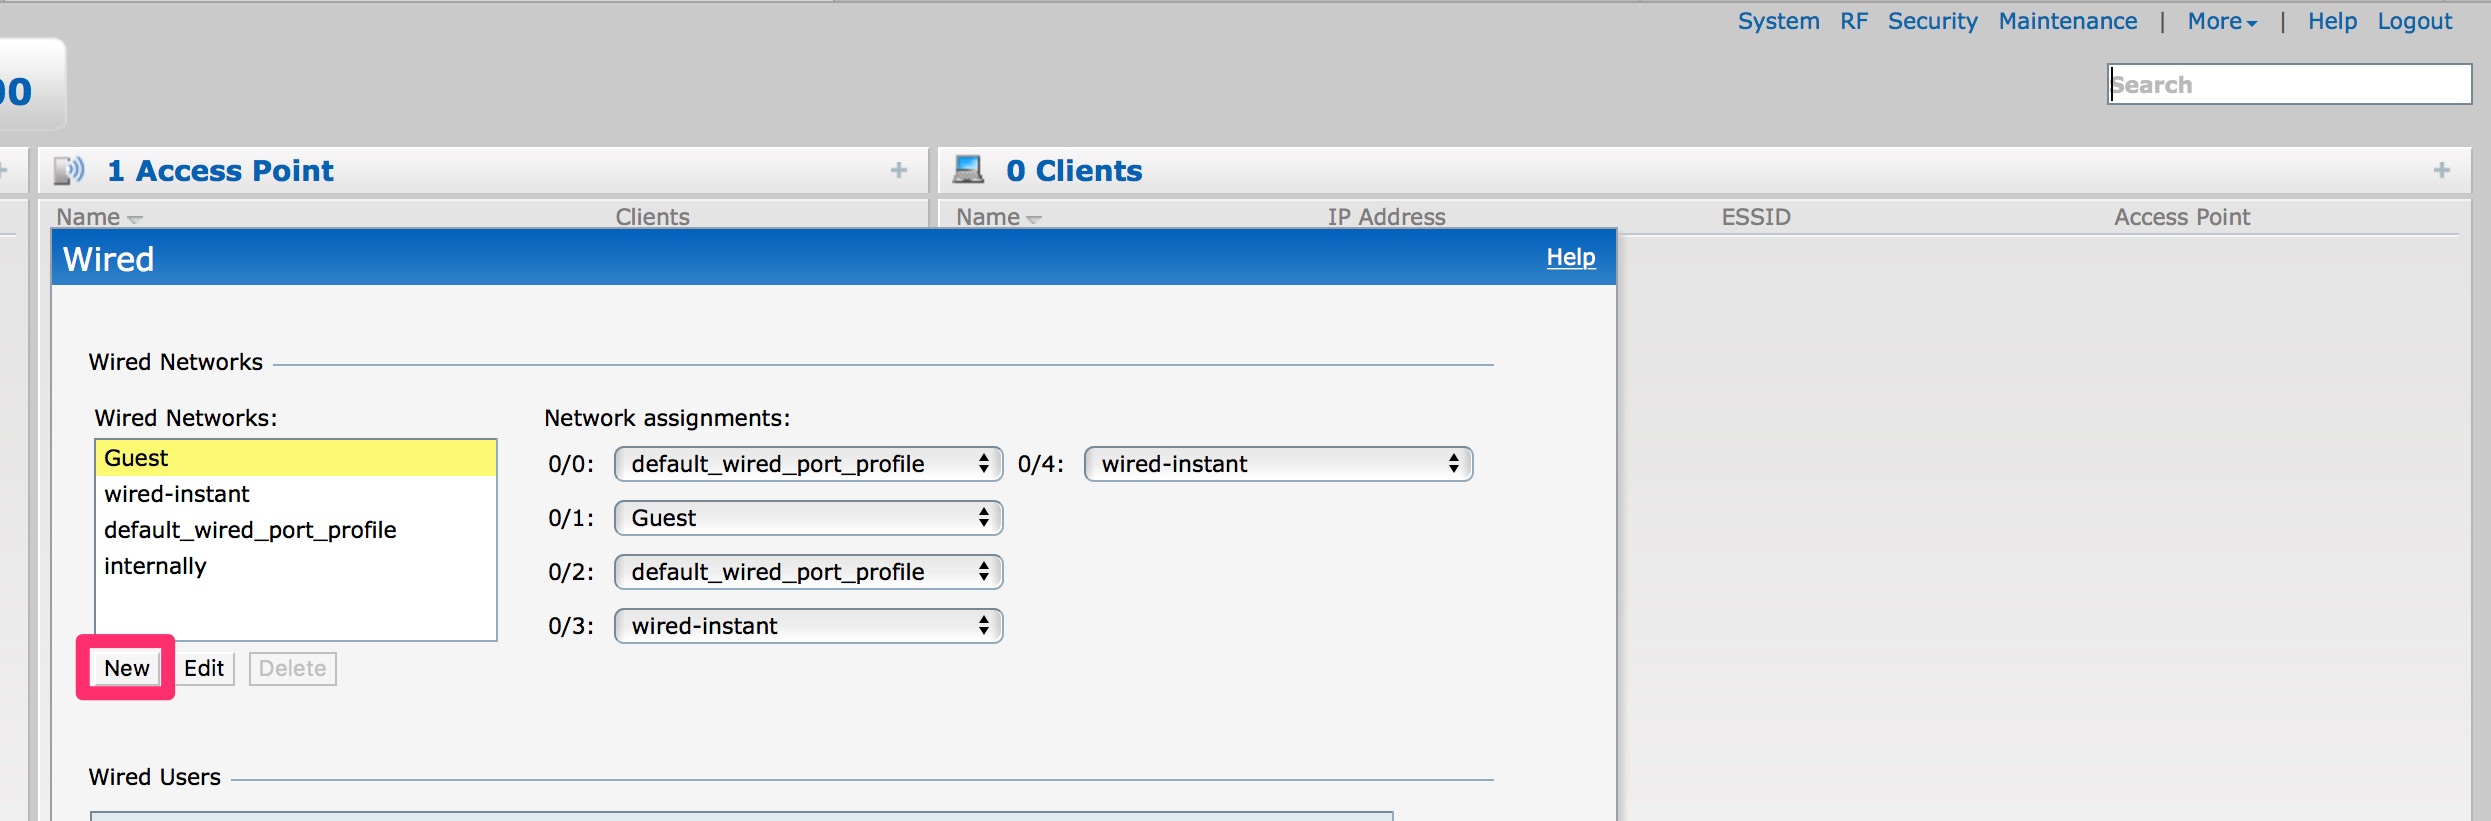
You find the wired configuration in the IAP GUI. Go to “More–>Wired”. Here you find 5 ethernet ports. In my case, Port 0/0 is the uplink port. I use this port for management. As of the time, I write this post, it is not possible to have the management port and a guest VLAN with a captive portal on the same port. This means you need at least two ports in your IAP. So, do not touch port 0/0 or the profile for port 0/0, unless you know what you are doing. For wired guest access, you do not need to change port 0/0.
For IAP’s with two ethernet ports, use port 0/1. First, you have to create a new wired port profile. Select the “New” button in the wired configuration from above:
Now, you see the “New Wired Network” wizard. It is like the “New SSID” wizard.
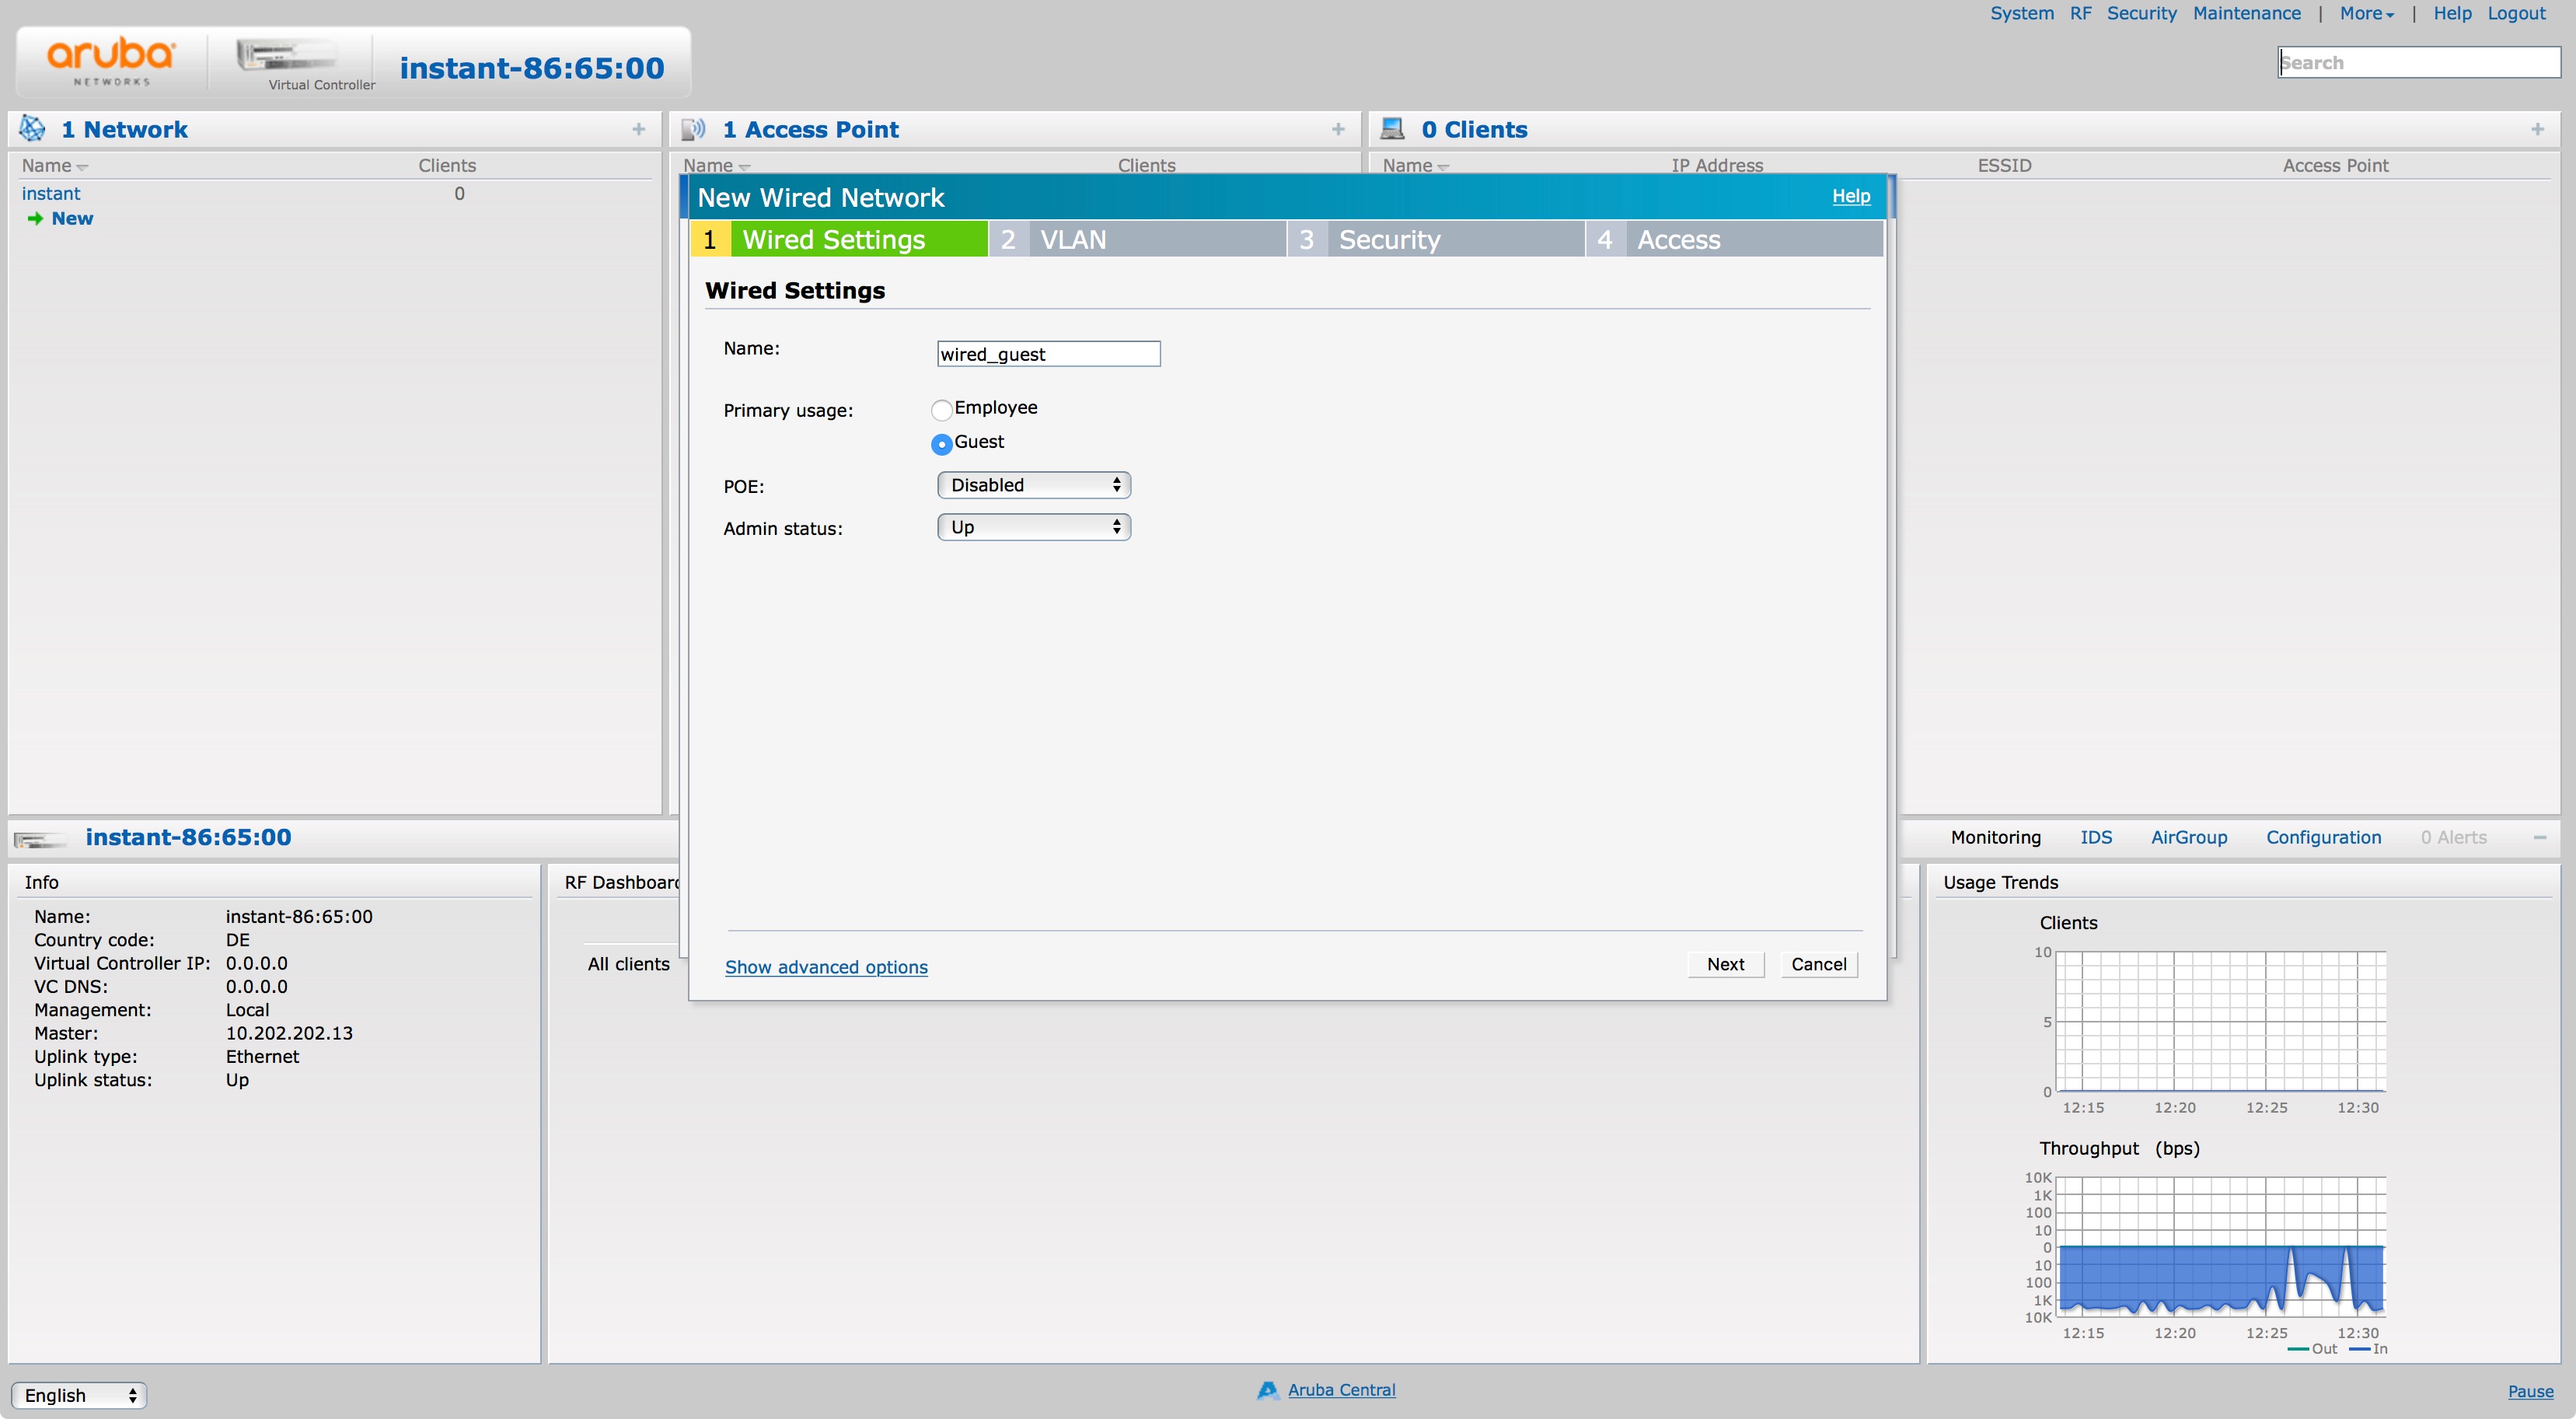
First, you need to enter a unique “Name” and select “Guest” for the type. You can go to “Next”:
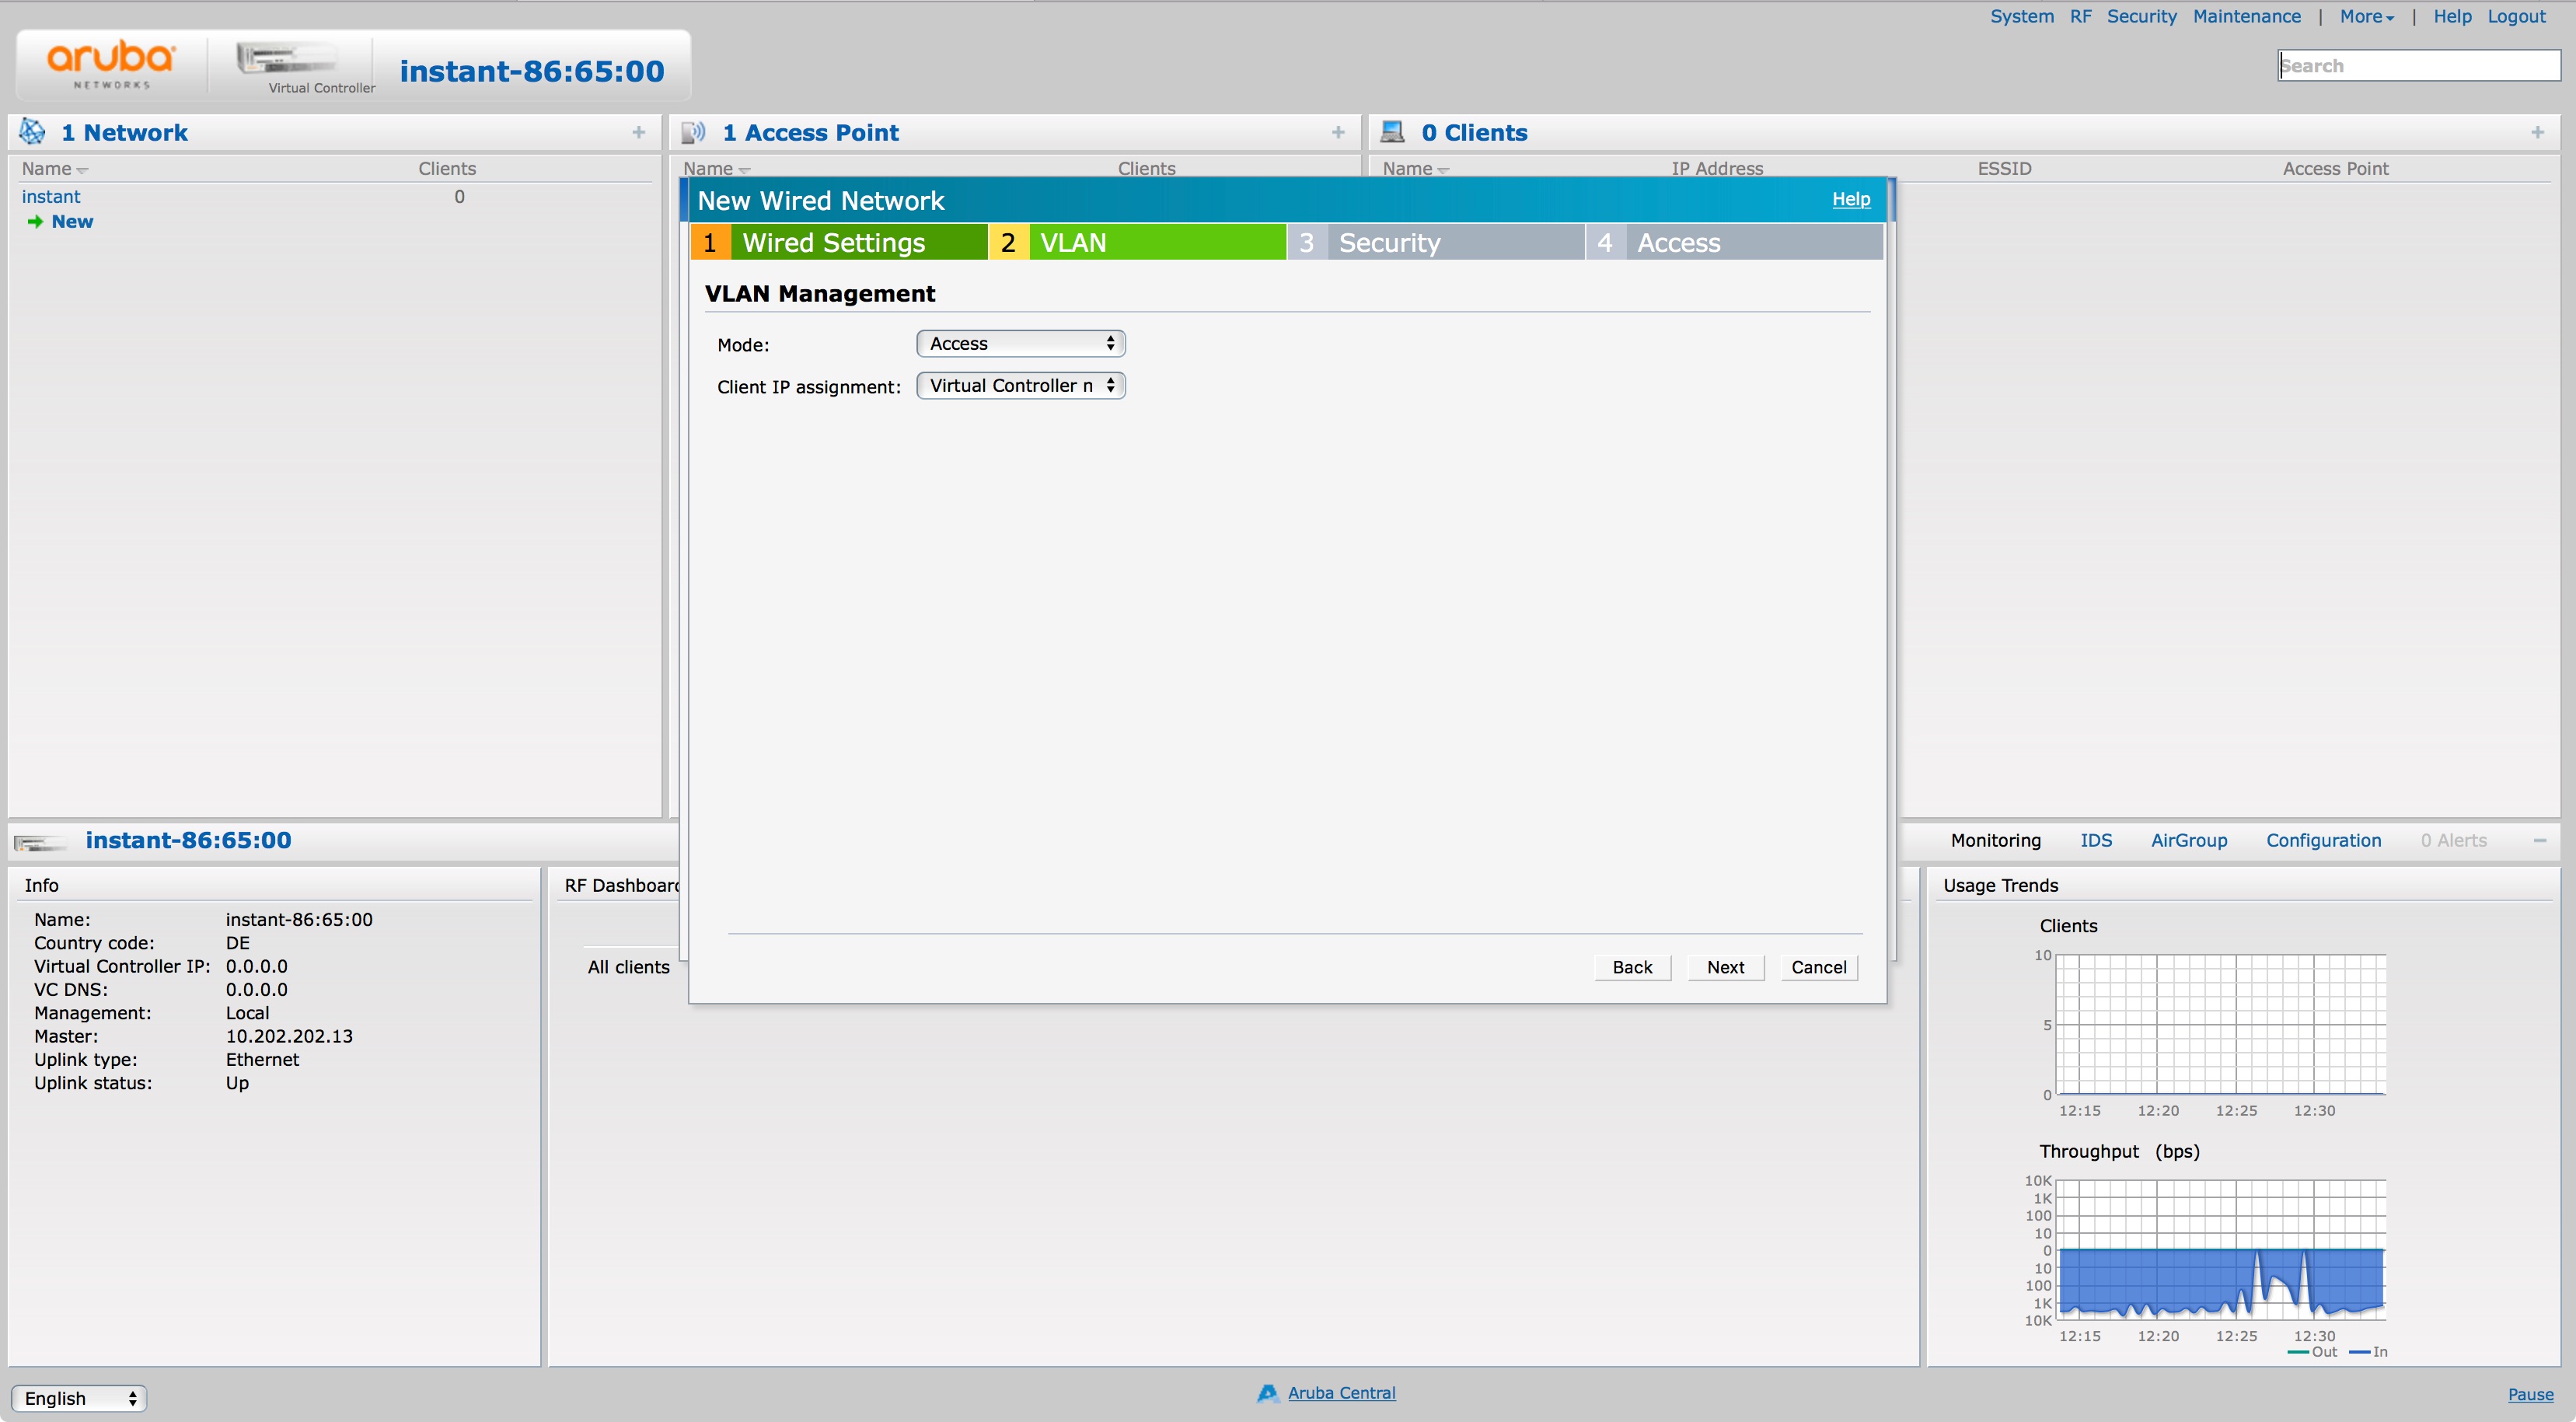
On the “VLAN” page, select “Access” as the “Mode” and “Virtual Controller managed” for “Client IP assignment”. This ensures, that the IAP use an internal VLAN (3333) for the clients.
The last two tabs are totally your choice. For my setup, I use the internal acknowledge page and no restrictions. You should use what suits your needs. You have the same options as with WLAN based guest networks.
The last step is to assign the profile to the port 0/1. Simply use the drop-down menu and select the profile from above:
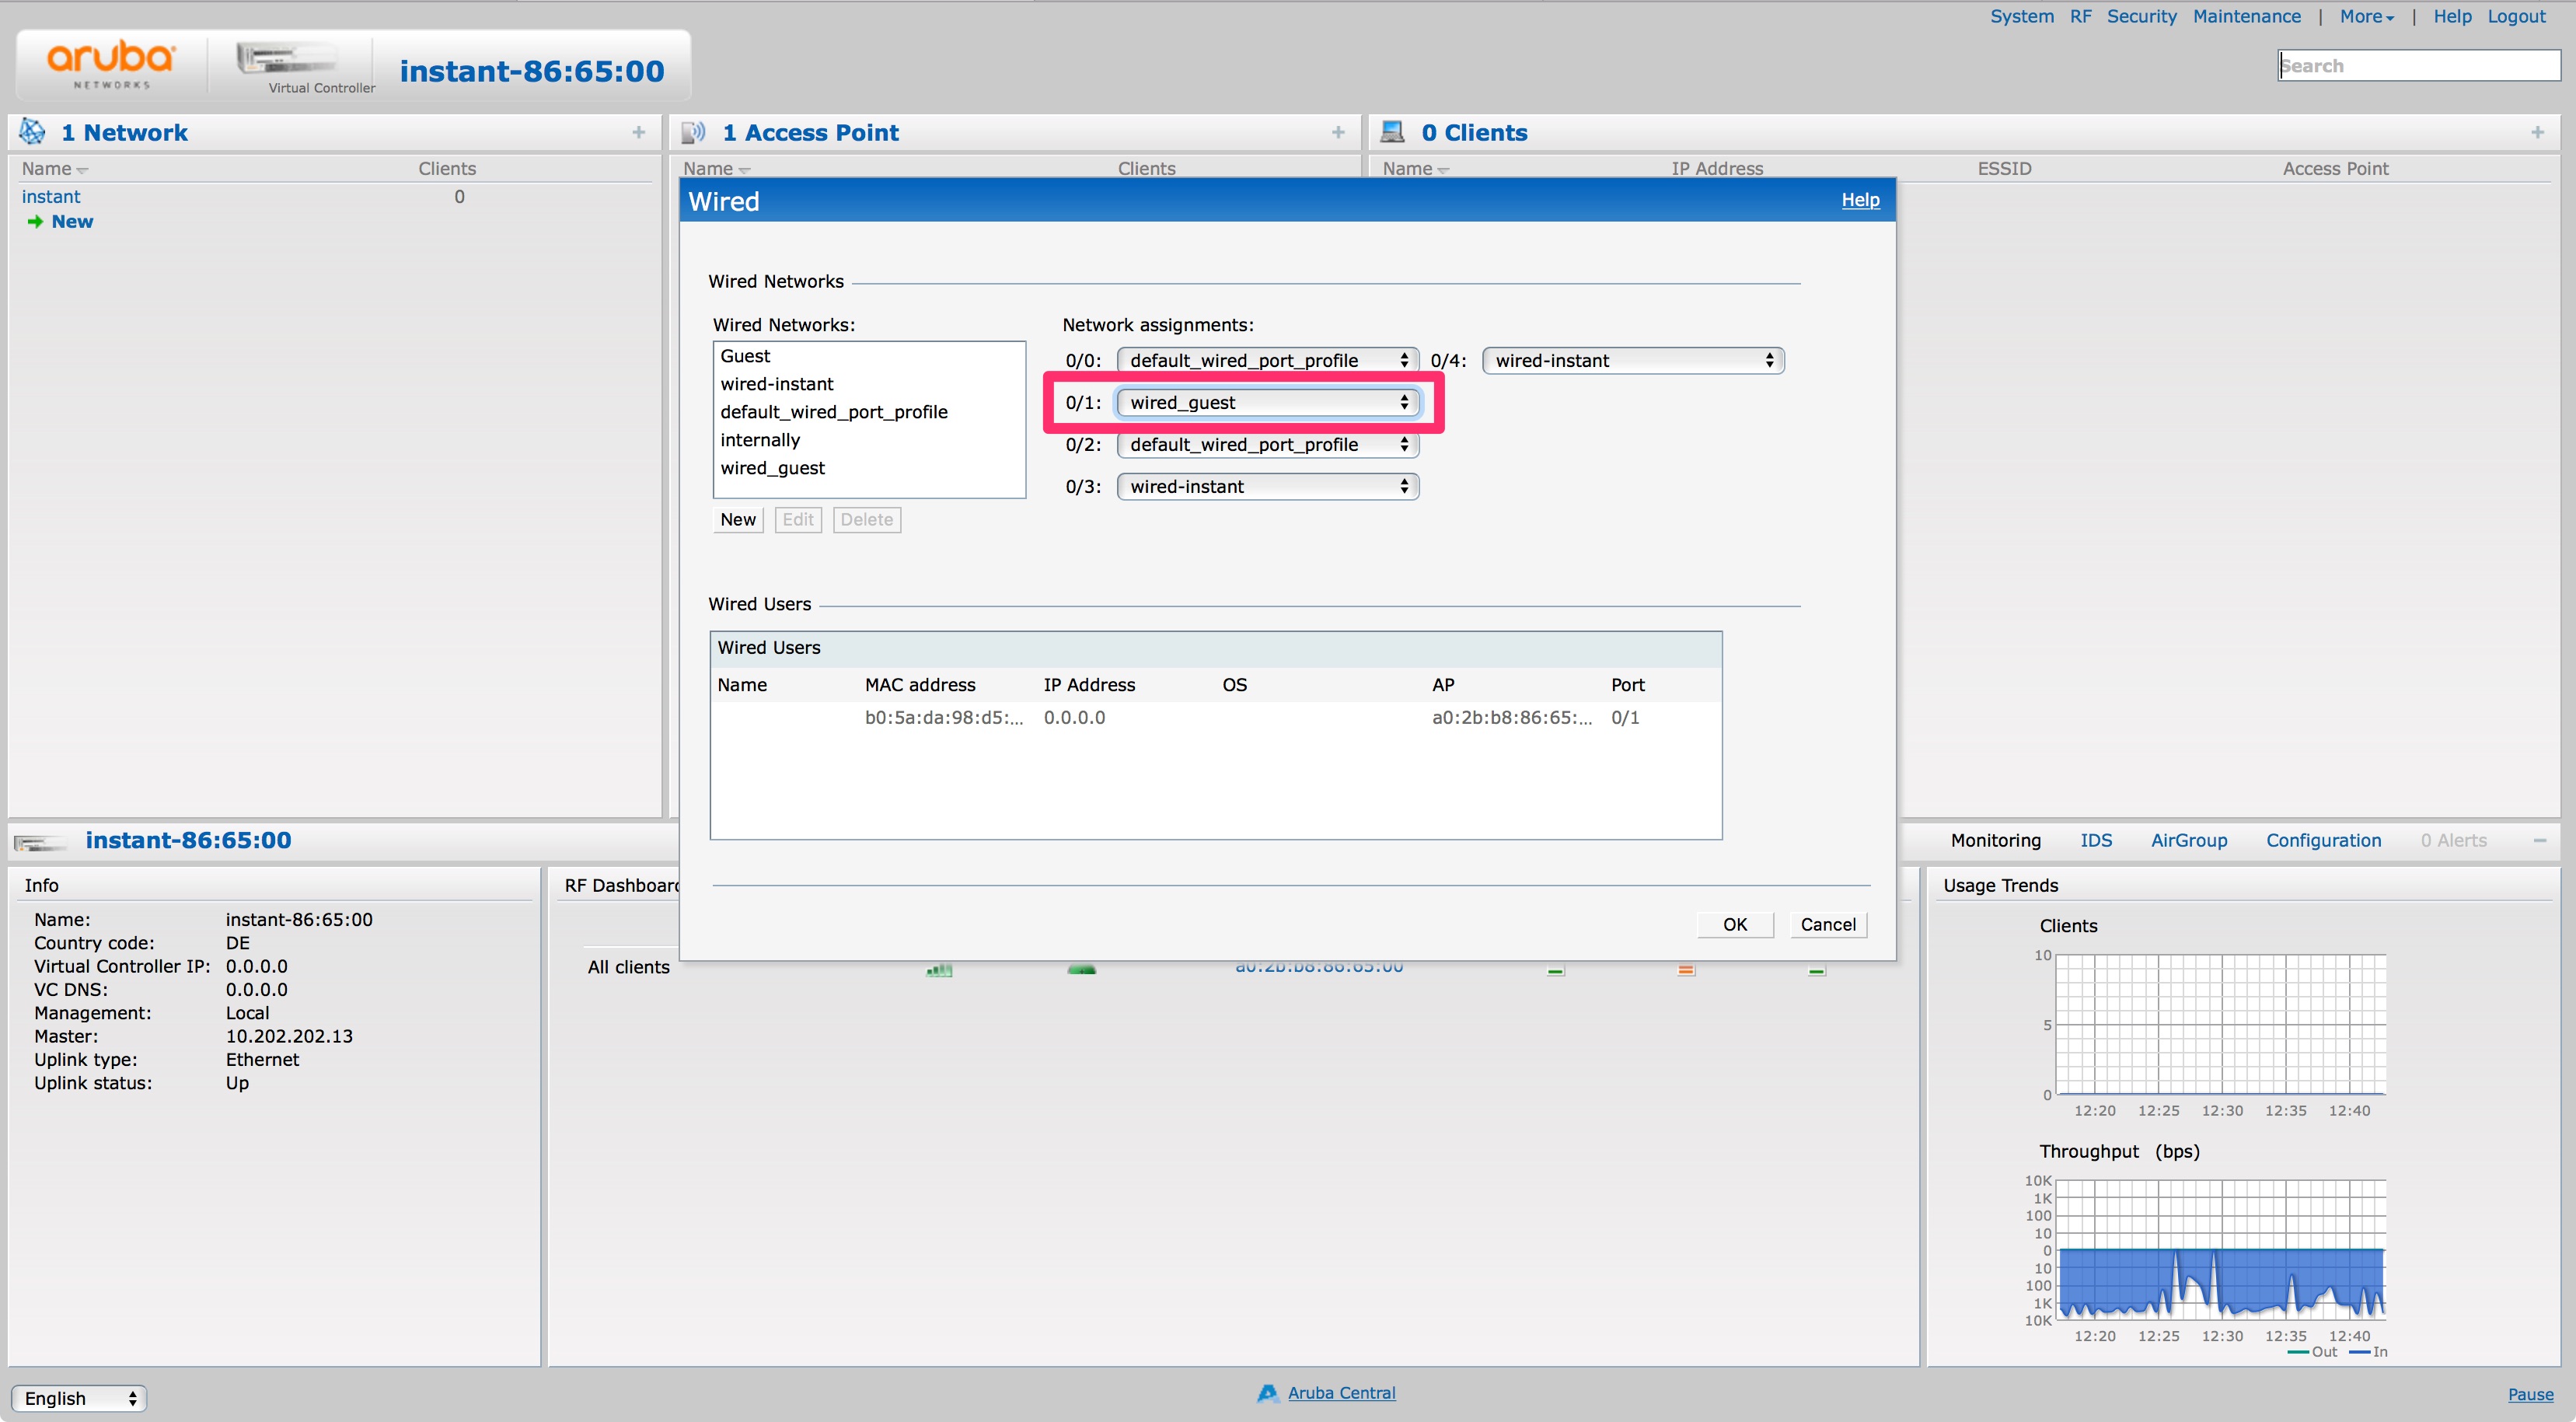
Done!
You can now connect clients to the network and put them into your guest VLAN (203 in my case). They get an IP from the IAP. In my case, they need to accept the T&C’s to get access.
Wired Guest Access – Change Guest VLAN
The method above let you use the magic VLAN 3333 and if you are ok with that, you do not need to continue. But if you like to change the VLAN and the IP addresses, the part below is very interesting.
The first step is to create a local DHCP scope on the IAP. Go to “More–>DHCP Server” and create a new local DHCP scope:
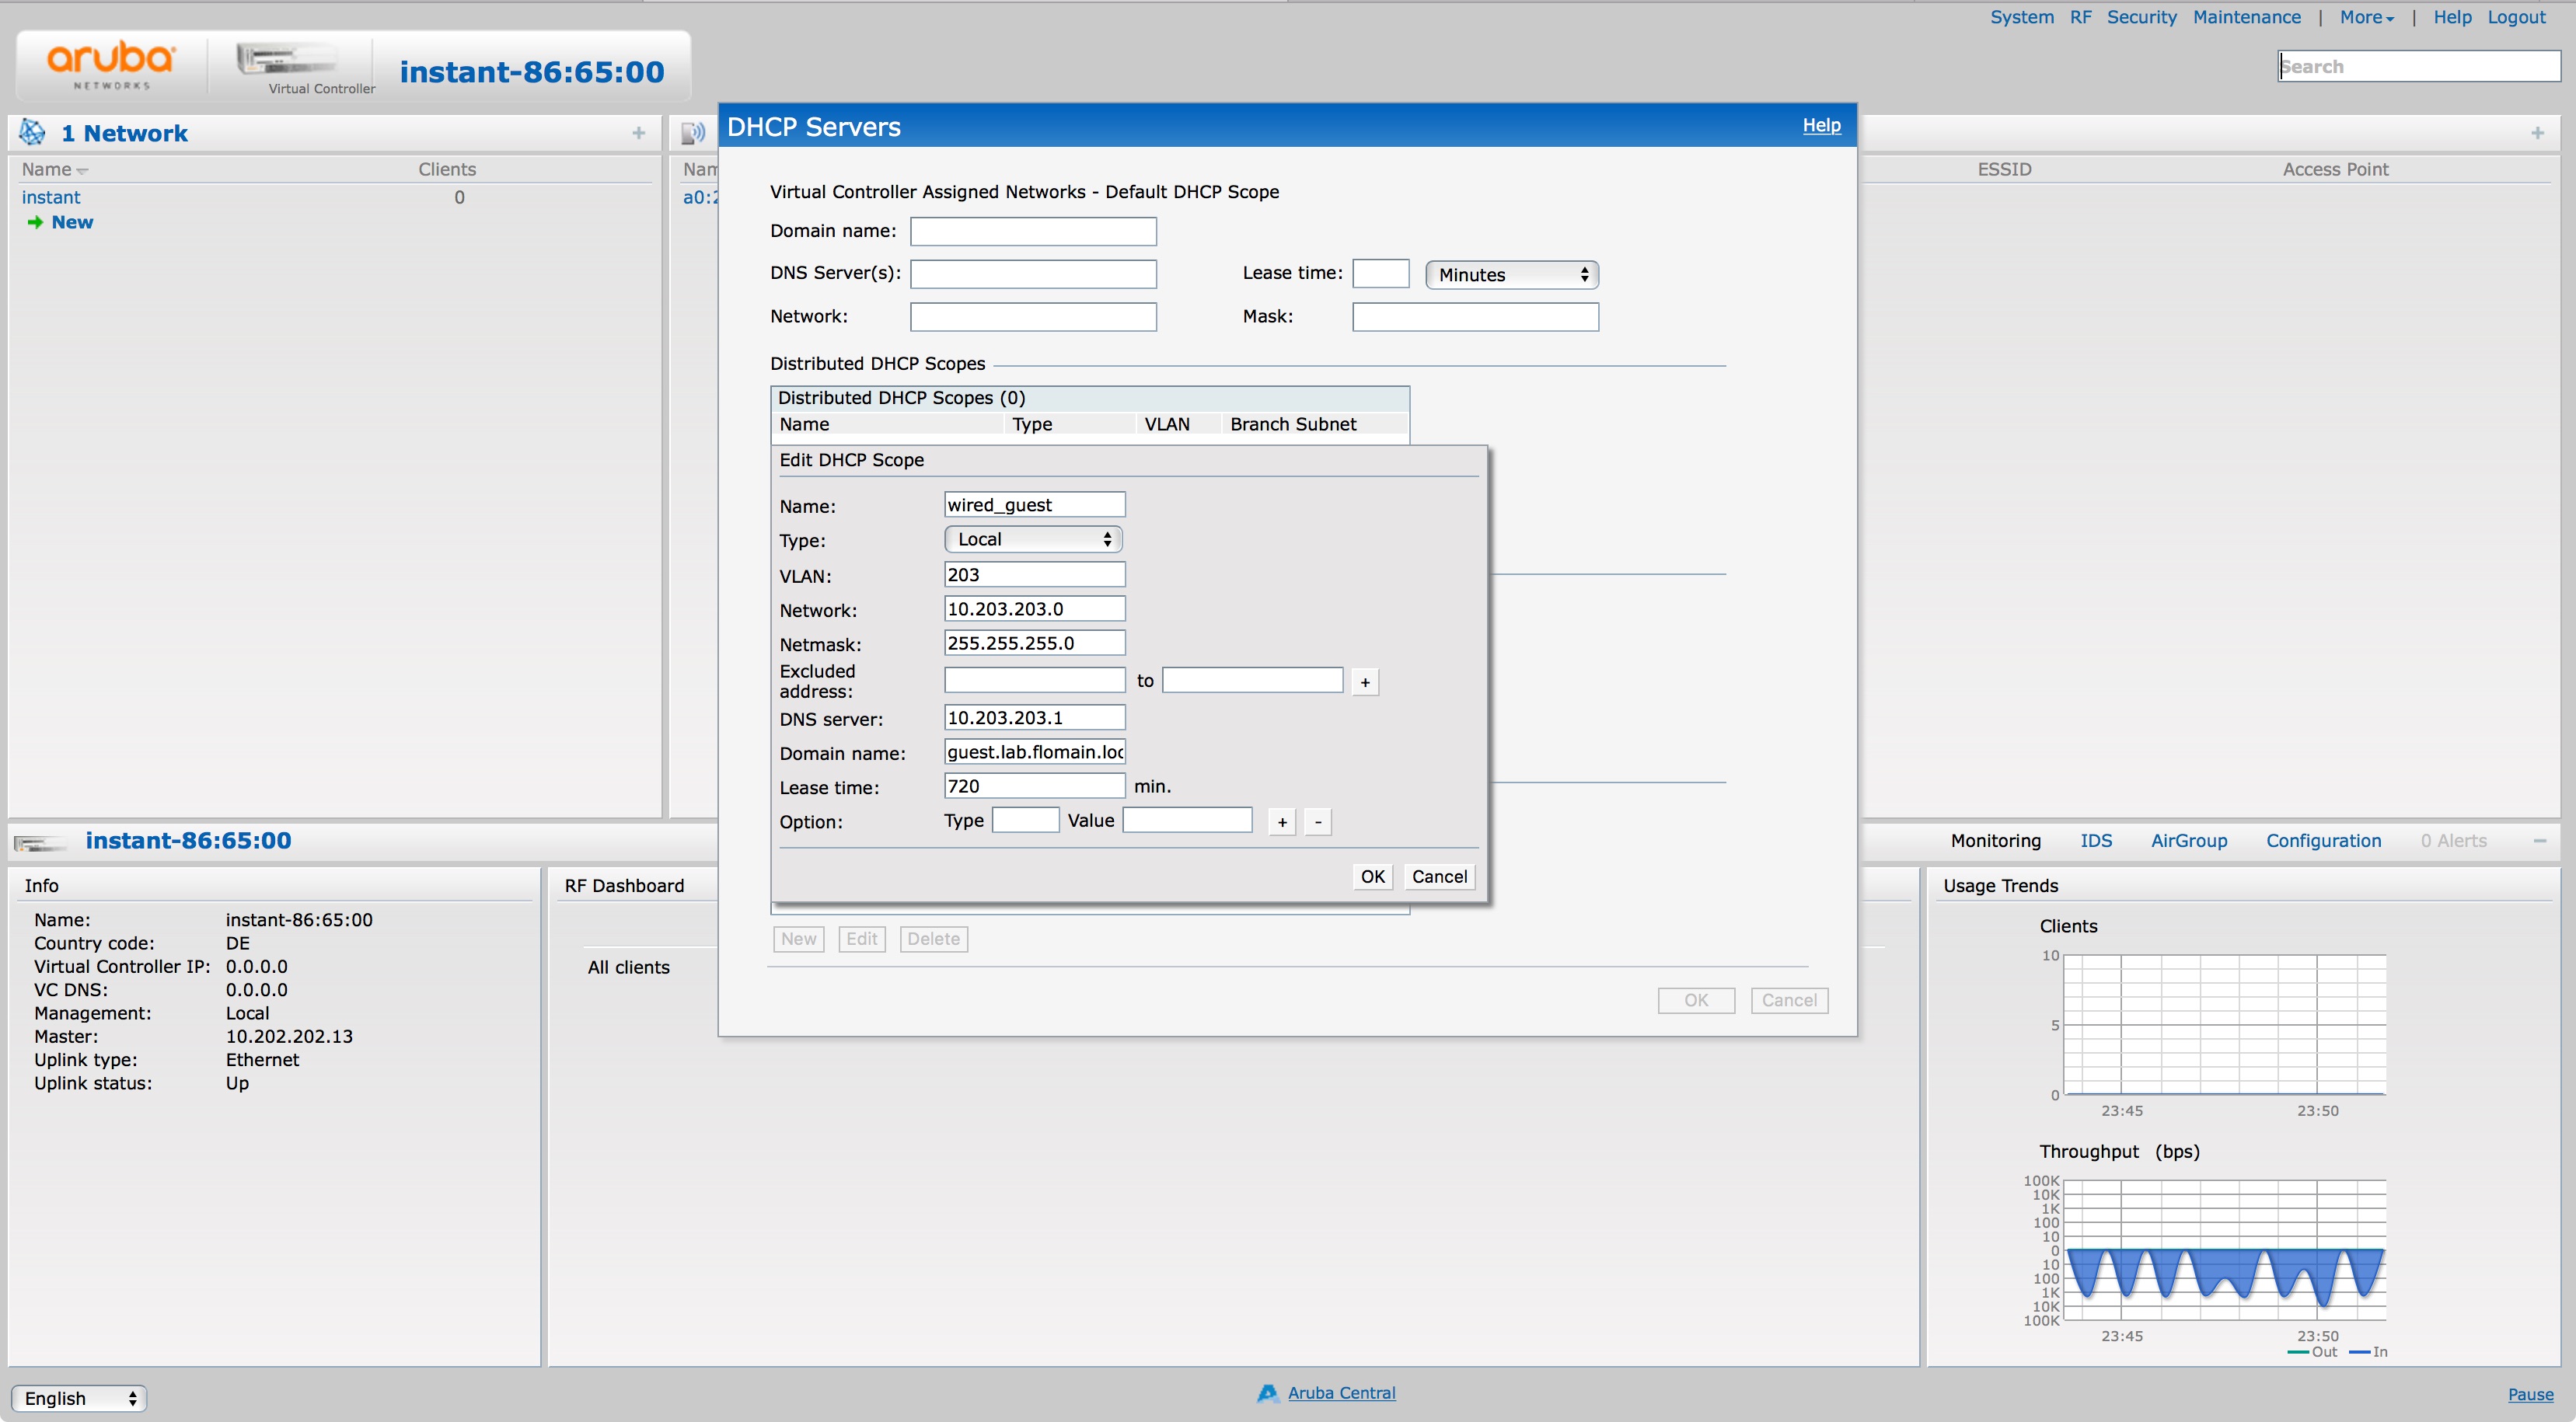
The important part is the VLAN. Use the VLAN id you choose for your guest VLAN. In my case, it is 203. Save the configuration and head back to the wired configuration. You can now change the profile from above. The only change is the VLAN configuration:
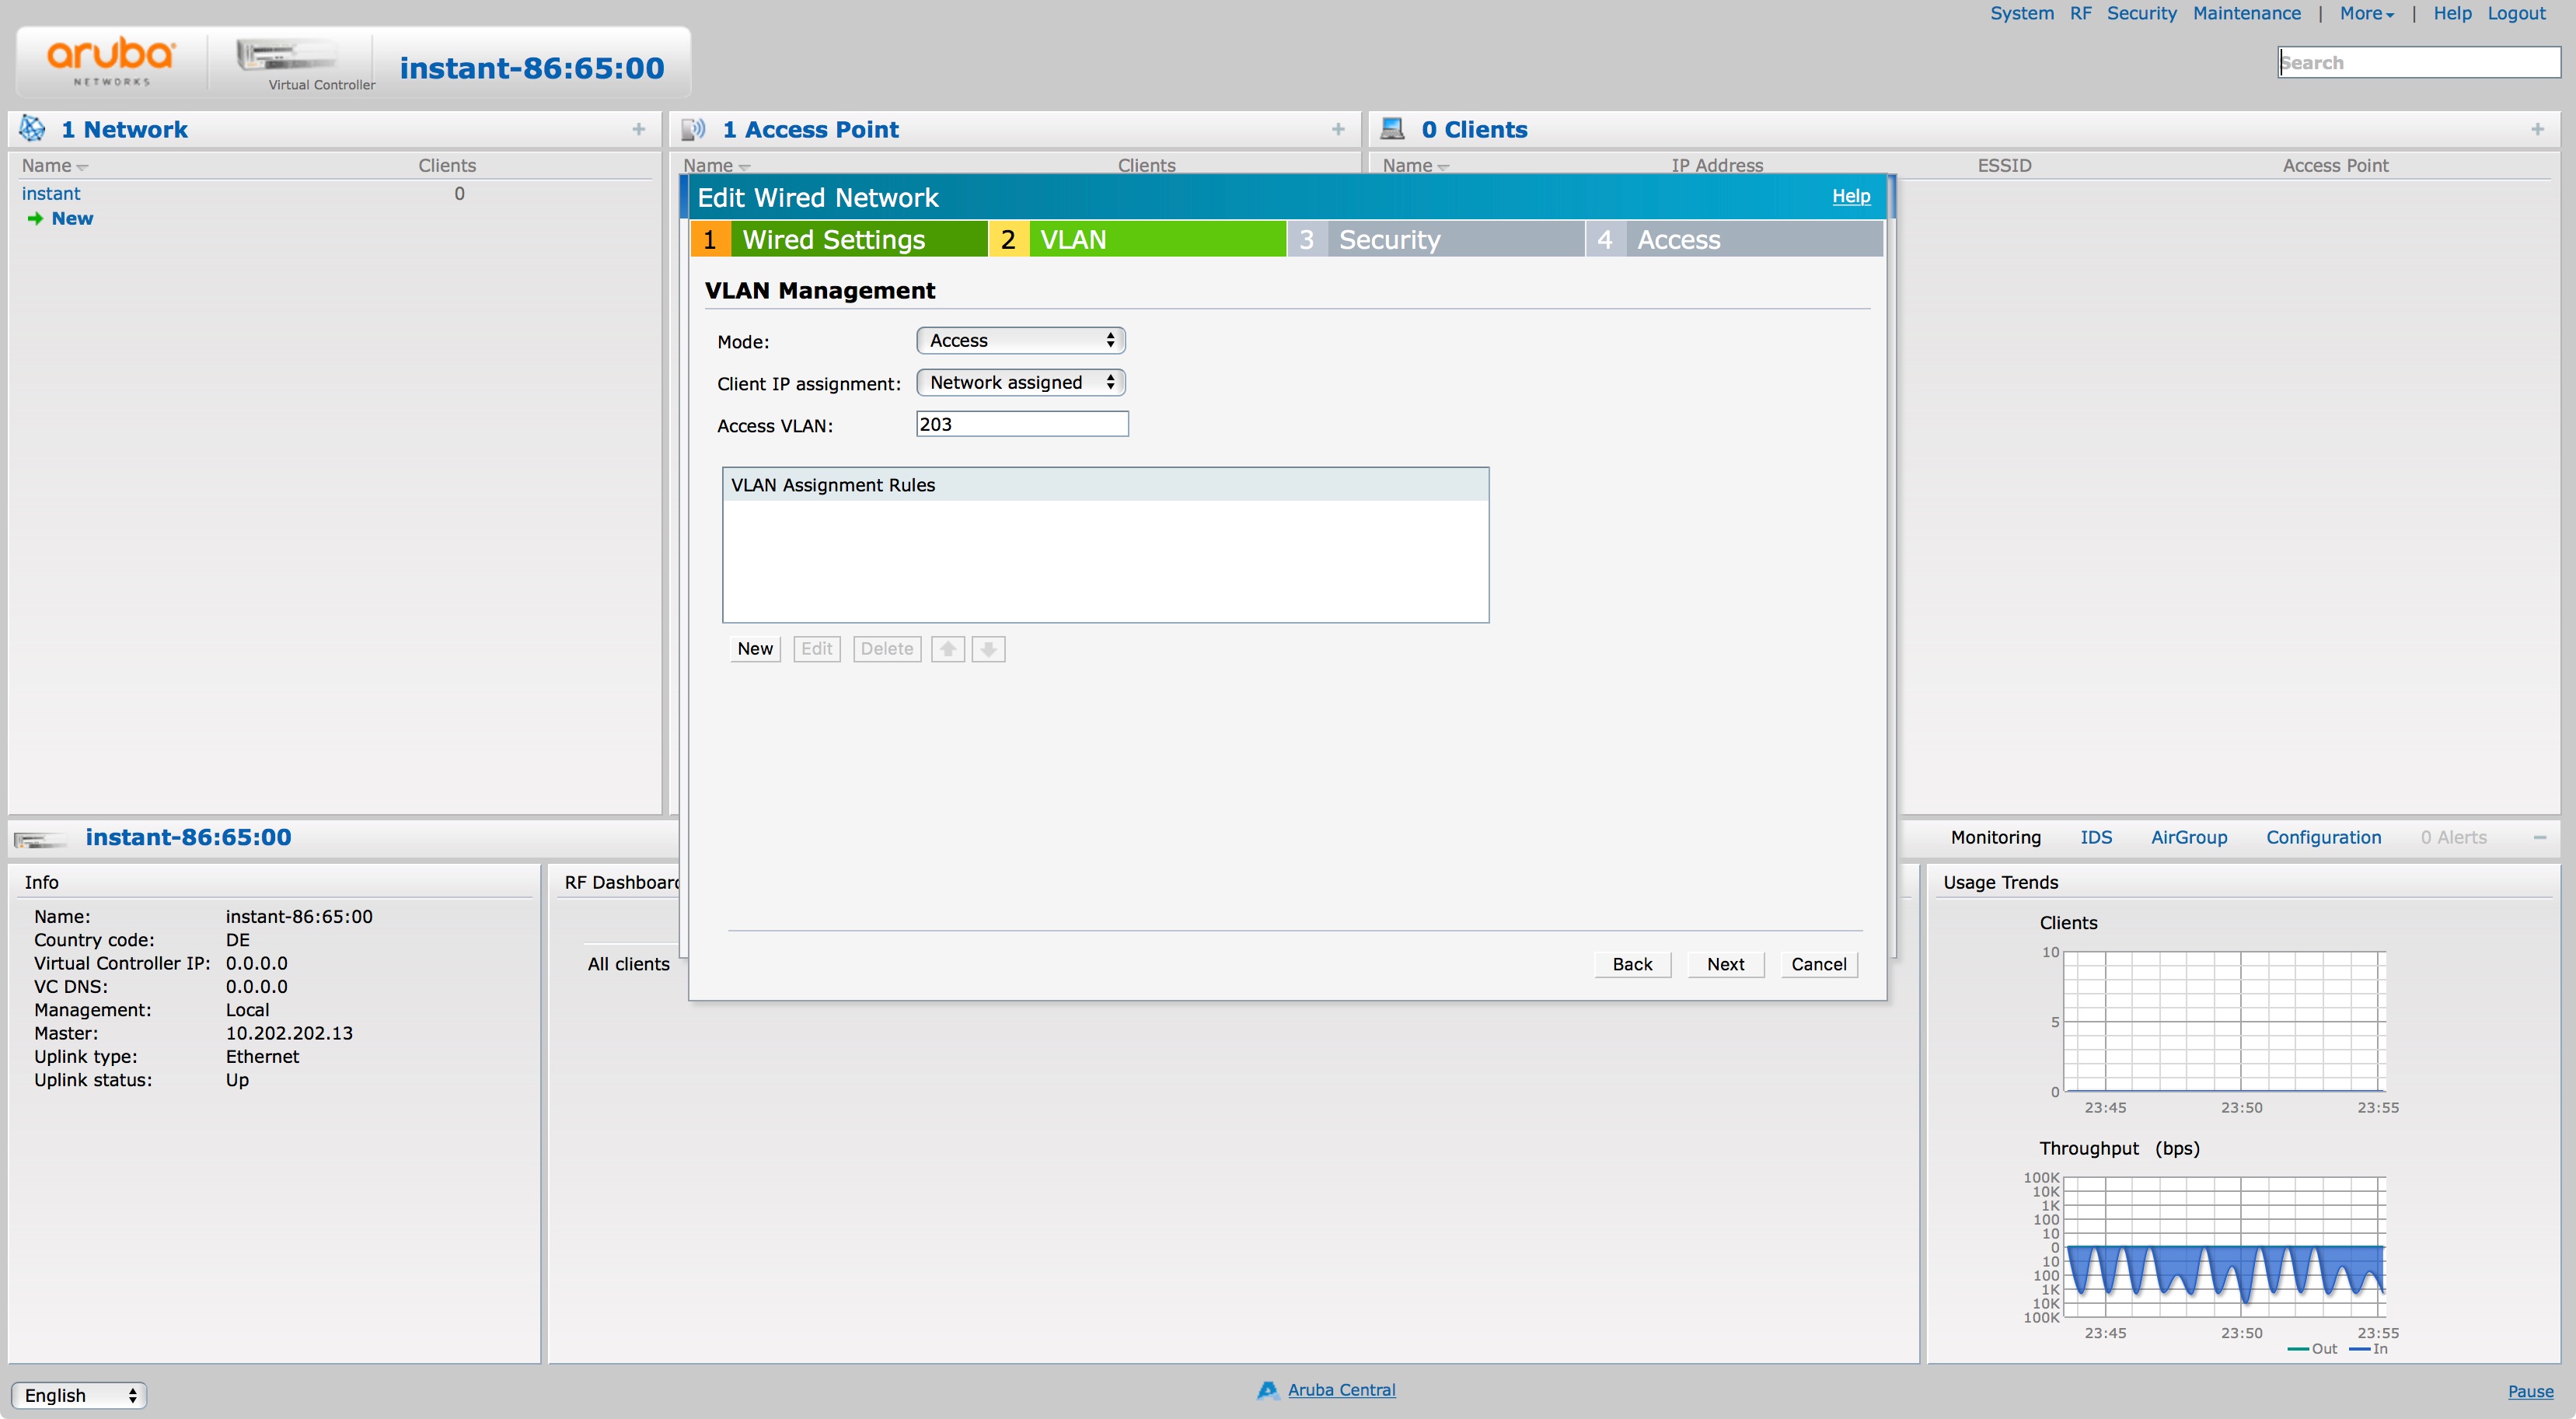
Change the “Client IP Assignment” to “Network Assigned” and the “Access VLAN” to the VLAN from the local DHCP scope. Save the configuration. If you connect your client, it will get an IP from the local DHCP scope from above.
To make it even easier, you can also configure it that way:
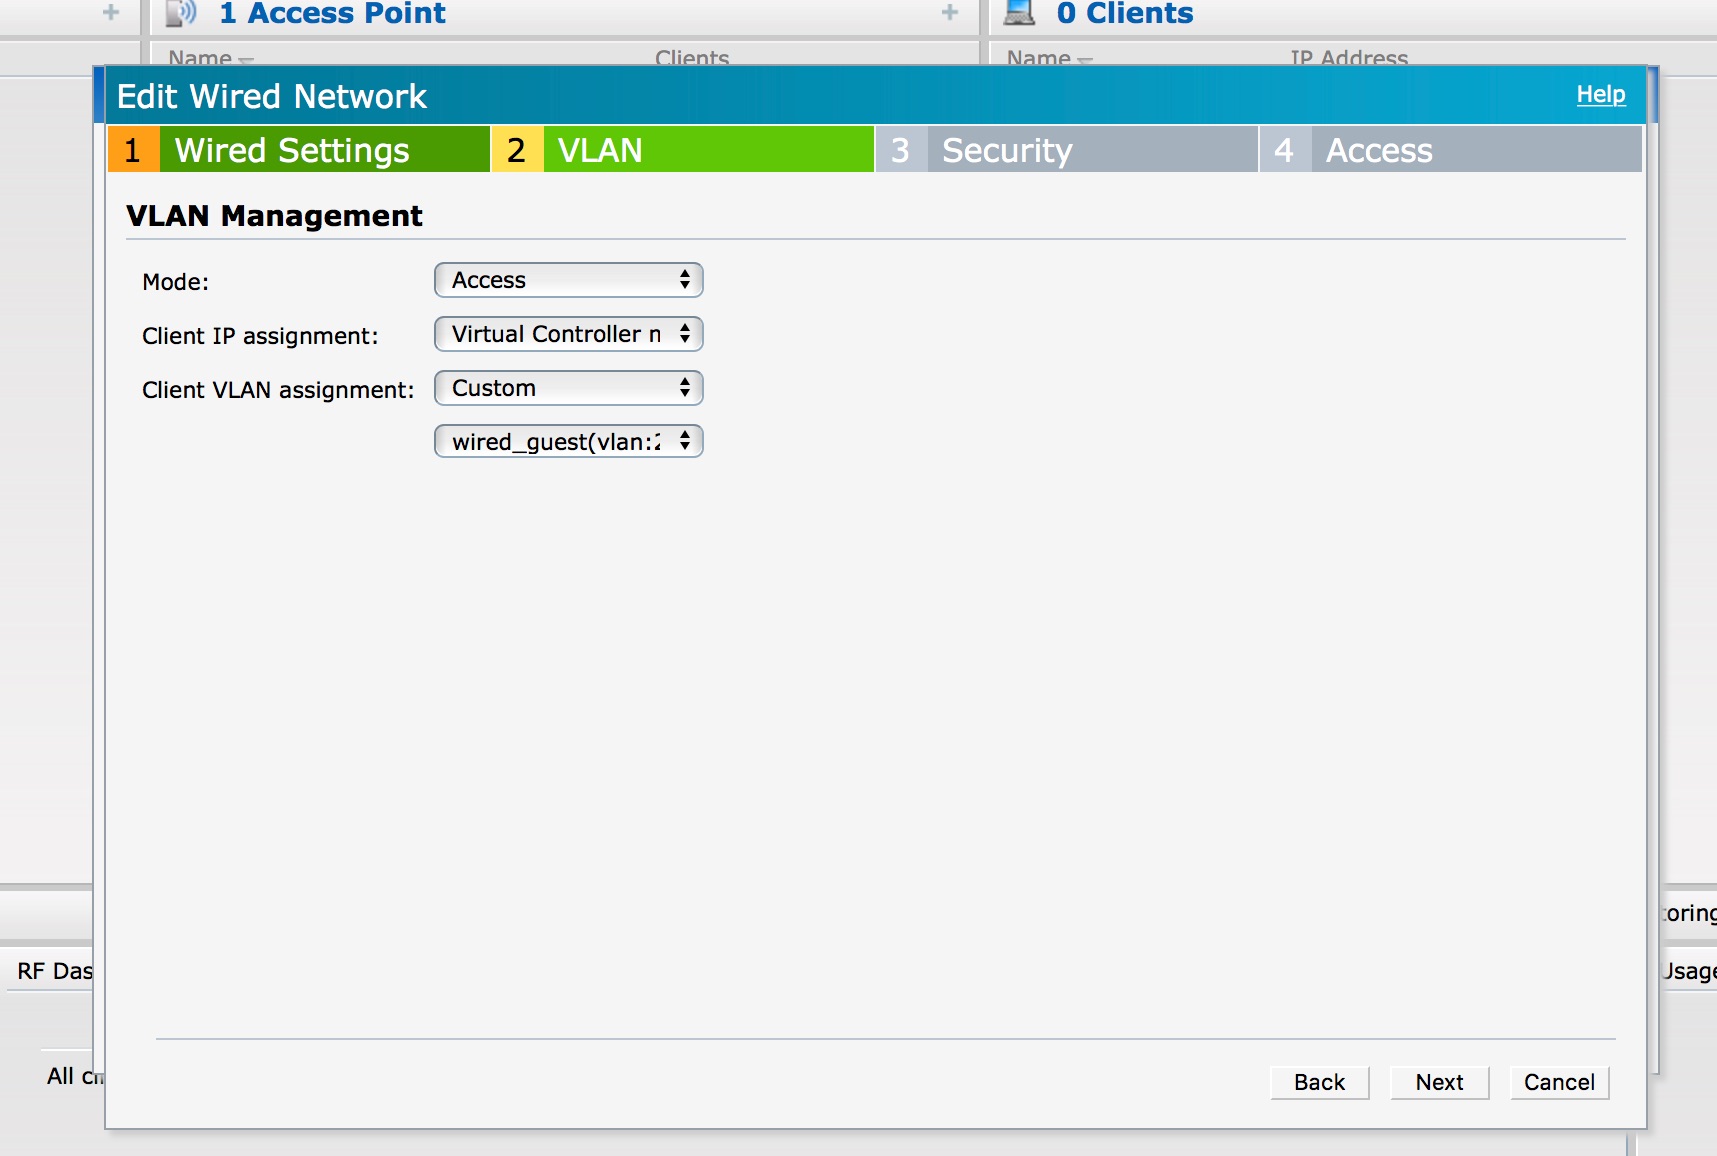
Change the “Client VLAN assignment” to “Custom” and then select the VLAN from the local DHCP server in the new drop-down list. The result is the same as above.
And if you use a custom VLAN and enable LLDP on the IAP and the Switch, there is no warning anymore.
If you find this post interesting, leave me a comment and share it with your friends. If you don’t like the post, leave me a comment and share it with your enemy. But whatever you do, leave me a comment, now.
Do you have a how to for wired captive portal with aruba controller?
Hi Jesko,
Unfortunately not, but this is a good idea for a new Blog Post. I will put it on the list 🙂
BR
Florian